As a seasoned brewer, one of the most crucial elements in my brewing process is the yeast starter. The yeast starter is integral in ensuring a smooth and robust fermentation process, which ultimately impacts the final quality of your brew.
So, how do you make a yeast starter?
To make a yeast starter, you need to create a mini-fermentation with water, DME (Dry Malt Extract), yeast, and a container. The process involves boiling water and DME together, cooling it, adding yeast, and letting it ferment for a few days.
This process is essential in yielding a larger quantity of yeast cells, which are vital in kick-starting your fermentation process.
How do you make a yeast starter for mash?
To make a yeast starter for mash, you’ll need the following ingredients and equipment:
Ingredients:
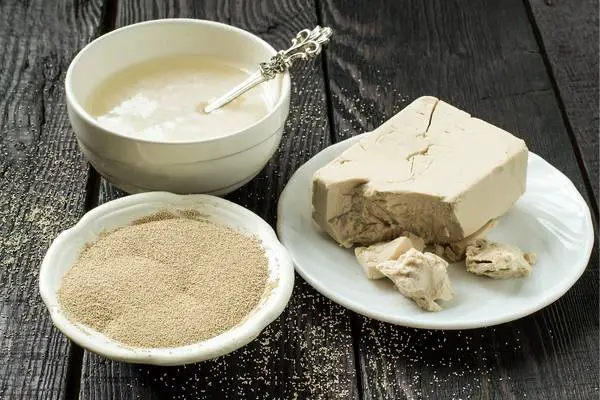
1. Yeast: Choose a yeast strain suitable for fermentation, such as ale yeast or distillers yeast.
2. Malt extract: Use a light or extra light malt extract to provide the necessary nutrients for yeast growth.
3. Water: Use distilled or filtered water to avoid any contaminants that could harm the yeast.
Equipment:
1. A clean, sterilized glass jar or flask with an airlock or a clean, sterilized plastic container with a loose-fitting lid.
2. A stir plate (optional but recommended) or a sanitized spoon for stirring.
Procedure:
1. Sanitize all equipment, including the jar or flask, airlock, and spoon, to prevent any unwanted contamination.
2. In a small saucepan, bring some water to a boil and dissolve the malt extract according to the manufacturer’s instructions. This will create a malt extract solution.
3. Pour the malt extract solution into the sterilized jar or flask, leaving some headspace for the yeast to grow.
4. Allow the solution to cool to room temperature.
5. Pitch the yeast into the cooled malt extract solution. The amount of yeast will depend on the desired fermentation strength, but generally, 1-2 tablespoons of yeast is sufficient for a small starter.
6. If using a stir plate, place the flask on the plate and turn it on. This will provide continuous agitation, promoting yeast growth. If not using a stir plate, gently stir the mixture with a sanitized spoon.
7. Cover the jar or flask with an airlock or a loose-fitting lid to allow gas to escape while preventing contaminants from entering.
8. Store the yeast starter in a warm, dark place, ideally around 70-80°F (21-27°C). Maintain this temperature throughout the fermentation process.
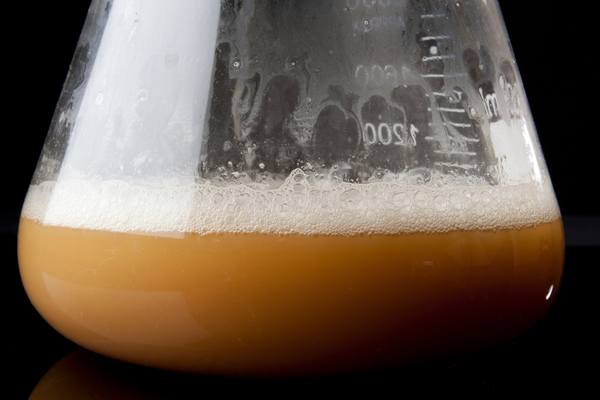
9. Allow the yeast starter to ferment for 24-48 hours, or until it reaches its peak activity. You’ll notice signs of fermentation, such as bubbling or a foamy layer on top.
10. Once the yeast starter is ready, it can be added to your mash or used to inoculate a larger fermentation vessel.
Remember to handle all equipment and ingredients with proper sanitation to ensure a healthy yeast starter.
Importance of a Yeast Starter
As a brewer, I cannot stress enough the importance of a yeast starter. It’s not just about increasing the quantity of your yeast cells, it’s about improving the health and vitality of your yeast.
A healthy yeast population leads to a more efficient fermentation, reducing the risk of off-flavors in your brew. It also shortens the lag phase between pitching your yeast and the start of fermentation, reducing the chances of bacterial infections.
Materials Needed
To make a yeast starter, you don’t need a plethora of equipment. Here’s what you’ll need:
- A container: I prefer a flask for easy swirling.
- DME (Dry Malt Extract): This is the yeast’s food.
- Yeast: A single pack of liquid yeast is enough.
- Water: You’ll need about a liter.
- A stove or heat source: For boiling your DME and water.
- A thermometer: To check the temperature of your mixture.
The Process of Making a Yeast Starter
The process of creating a yeast starter is straightforward. Start by boiling 1 Liter of water, then add 100g of DME. Boil this mixture for about 10 minutes to sterilize it. After it cools to room temperature, add your yeast.
It’s important to note that the temperature of your mixture should not exceed 30°C (86°F) when adding your yeast, as high temperatures can harm the yeast cells.
After adding the yeast, cover your container with a sanitized piece of aluminum foil and let it sit for a couple of days. You should see signs of fermentation – this means your yeast is ready!
Troubleshooting Problems
Occasionally, you might run into issues while making your yeast starter. If you don’t see any signs of fermentation after a few days, your yeast might be unhealthy or dead. In such cases, it’s best to discard this batch and start over with fresh yeast.
Remember, patience is key when brewing. It’s better to take the time to make a new yeast starter than to risk ruining your entire batch of beer.
The Role of Yeast in Brewing
Yeast is a crucial component in brewing. It not only converts sugars into alcohol, but it also contributes significantly to the flavor and aroma profile of your beer. Different yeast strains can produce vastly different flavors, so choosing the right yeast for your brew is essential.
Conclusion
So there you have it, the process of making a yeast starter is not as daunting as it may seem. By taking the time to prepare a healthy yeast starter, you’re setting the stage for a successful brew.
10 Quick Facts About Yeast Starters
1. Yeast starters increase the quantity and health of your yeast.
2. They reduce the risk of off-flavors in your beer.
3. A yeast starter shortens the lag phase of fermentation.
4. All you need to make a yeast starter is a container, DME, yeast, water, and a heat source.
5. You boil your DME and water together to sterilize them.
6. It’s important to cool your mixture to room temperature before adding your yeast.
7. Signs of fermentation in your yeast starter indicate it’s ready to use.
8. If you don’t see signs of fermentation, your yeast may be unhealthy or dead.
9. Yeast plays a crucial role in the flavor and aroma of your beer.
10. Making a yeast starter is a crucial step in ensuring a successful brew.
FAQs
How to make a two-step yeast starter?
To make a stepped yeast starter, you will need to follow a few simple steps. First, sterilize all the equipment you will be using, including a container to hold the starter. Next, add a small amount of yeast to the container, typically around 10% of the total desired starter volume. Then, add a suitable nutrient-rich solution, such as a mixture of water and malt extract or a commercial yeast starter solution.
Place an airlock or loosely fitted lid on the container to allow gas to escape. Allow the starter to ferment at an optimal temperature, usually between 70-80°F (21-27°C), for a specific period, typically 24-48 hours. After this initial fermentation, transfer a portion of the starter to a larger container with fresh nutrient solution, increasing the volume. Repeat this process multiple times, gradually increasing the volume of the starter each time, until you reach the desired quantity. This step-by-step approach helps build up a healthy yeast population, ensuring a successful fermentation when pitching the yeast into your main batch of beer, wine, or other fermented beverages.
How much sugar do you put in a yeast starter?
The amount of sugar to put in a yeast starter depends on the recipe and desired outcome. Generally, it is recommended to use about 1-2 tablespoons of sugar per cup of water. However, some recipes may call for more or less sugar depending on the specific yeast strain and fermentation goals. It’s important to follow the recipe instructions for the best results.
How to make a yeast starter with sugar?
To make a yeast starter with sugar, you’ll need the following ingredients: water, sugar, and yeast. Start by sterilizing a glass jar or container. Dissolve sugar in warm water, ensuring it’s not too hot to kill the yeast. Add yeast, stirring gently until it dissolves. Cover the jar with a clean cloth or plastic wrap, securing it with a rubber band. Place the jar in a warm area, ideally between 70-80°F (21-27°C). Allow the mixture to ferment for 24-48 hours, stirring occasionally. Once it becomes frothy and smells yeasty, your yeast starter is ready to be used in bread or other recipes.