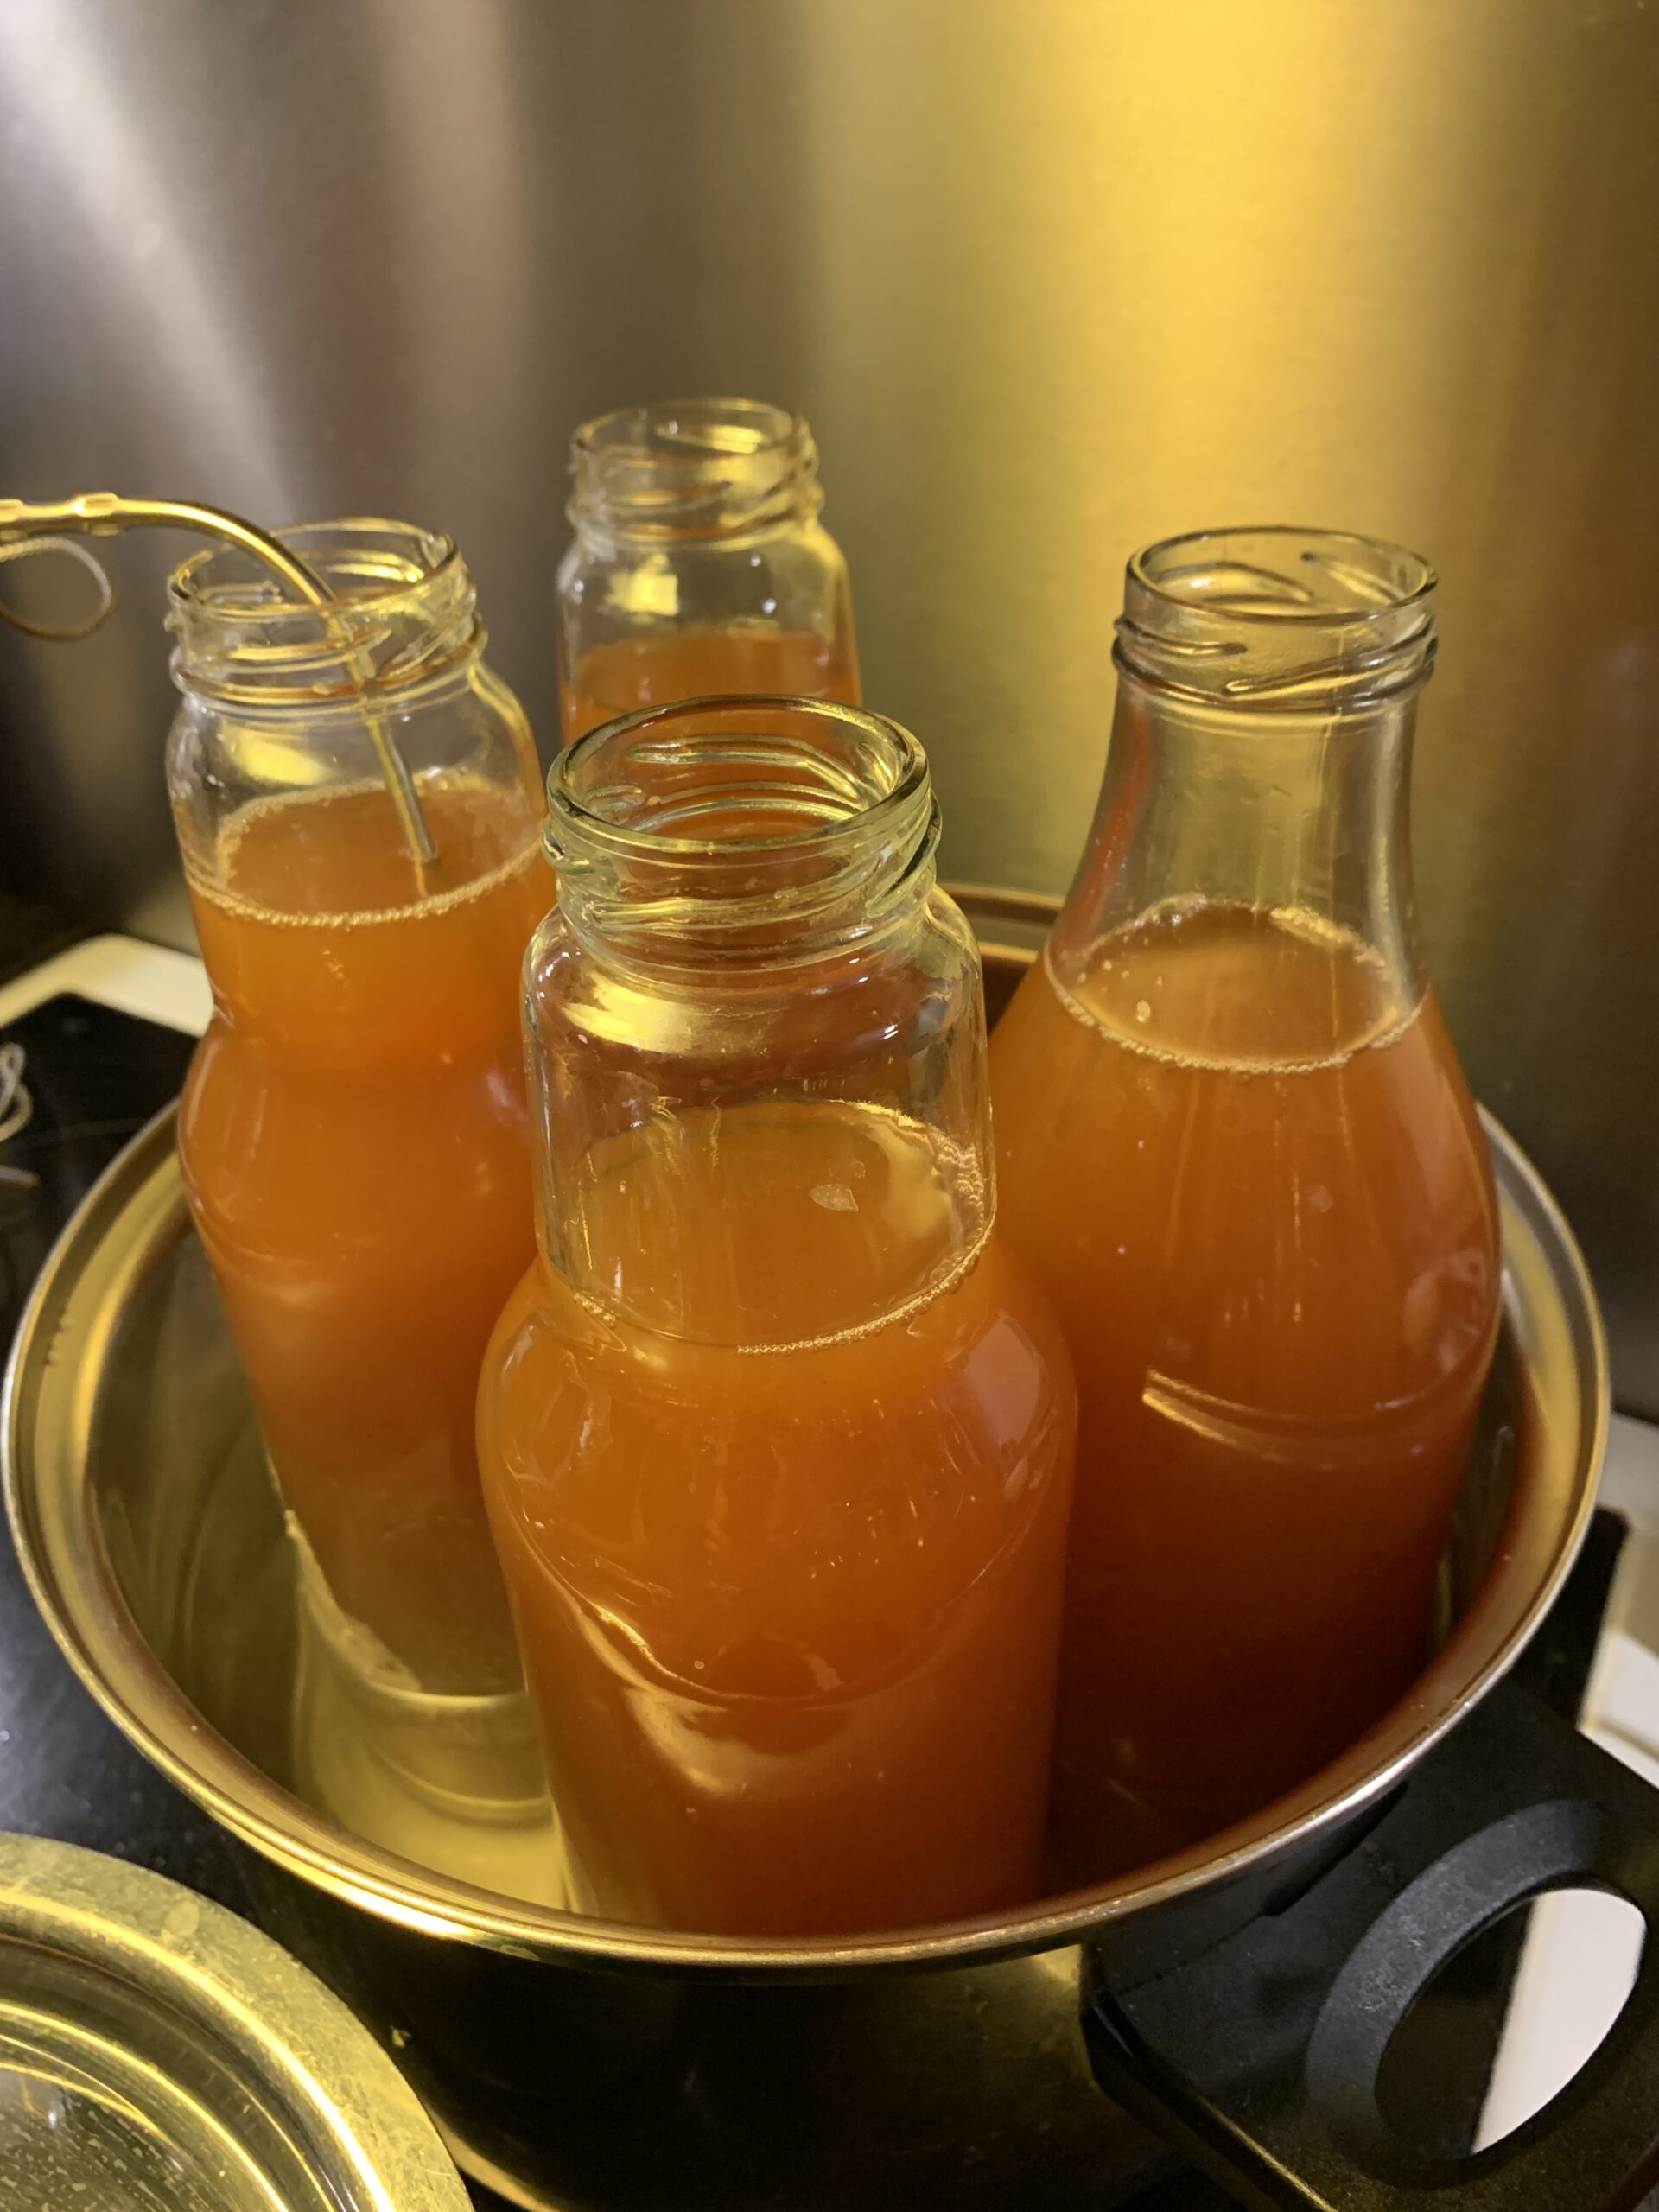
To rack your homemade cider, start by sanitizing all of your equipment. Then, fill your siphon with water and let it run until the water flows consistently. Next, insert the racking cane into the cider, being careful not to disturb the sediment. Finally, siphon the clear cider into a clean, sanitized carboy, leaving the sediment behind.
- ✅ Racking is the process of siphoning off the clear cider from the sediment that has settled at the bottom of the fermenter.
- ✅ Racking can improve the taste and clarity of your cider and prevent off-flavors from developing.
- ✅ You can rack your cider multiple times, but each time increases the risk of oxygen exposure and contamination.
- ✅ The best temperature to rack your cider is between 50-60°F (10-15°C).
- ✅ When racking, it is important to keep everything sanitized and to avoid splashing your cider to prevent oxidation.
Intimidated by racking when making cider at home? Don’t be! It’s simpler than you think! So, how do you start? This guide has you covered! We’ll show you step-by-step how to rack cider. Get ready to savor your homemade drink in no time!
Introduction to Racking Hard Cider
Racking hard cider is the process of separating the fermented liquid from sediment to clarify the drink before bottling. It is an essential step in homebrewing to ensure the quality and taste of the final product.
- To start racking hard cider, first, transfer the fermented cider from primary fermentation to a secondary fermentation vessel, leaving the sediments behind.
- Next, attach an auto-siphon or racking cane to a tube and transfer the cider into the new vessel, being careful not to disturb the sediments.
It is essential to understand that timing is critical during racking as it can affect the taste and quality of the cider. Rack the cider when primary fermentation ends and use a sanitized carboy cap to minimize air exposure during the transfer.
Ensure that all equipment is sanitized before use and consider using a no-rinse sanitizing solution for convenience.
Using a funnel and bottle filler may also help minimize oxidation and spills while transferring the cider. Once the transfer is complete, consider priming the cider using sugar or another sweetener to provide a natural carbonation effect.
Allow the cider to sit for a few days before checking the gravity for the desired sweetness and carbonation levels. Finally, bottle the cider under positive pressure with a no-rinse sanitizing solution and place it in a dark and cool place to age.
Equipment and Sanitation
Equipment and Sanitizing for Homemade Cider
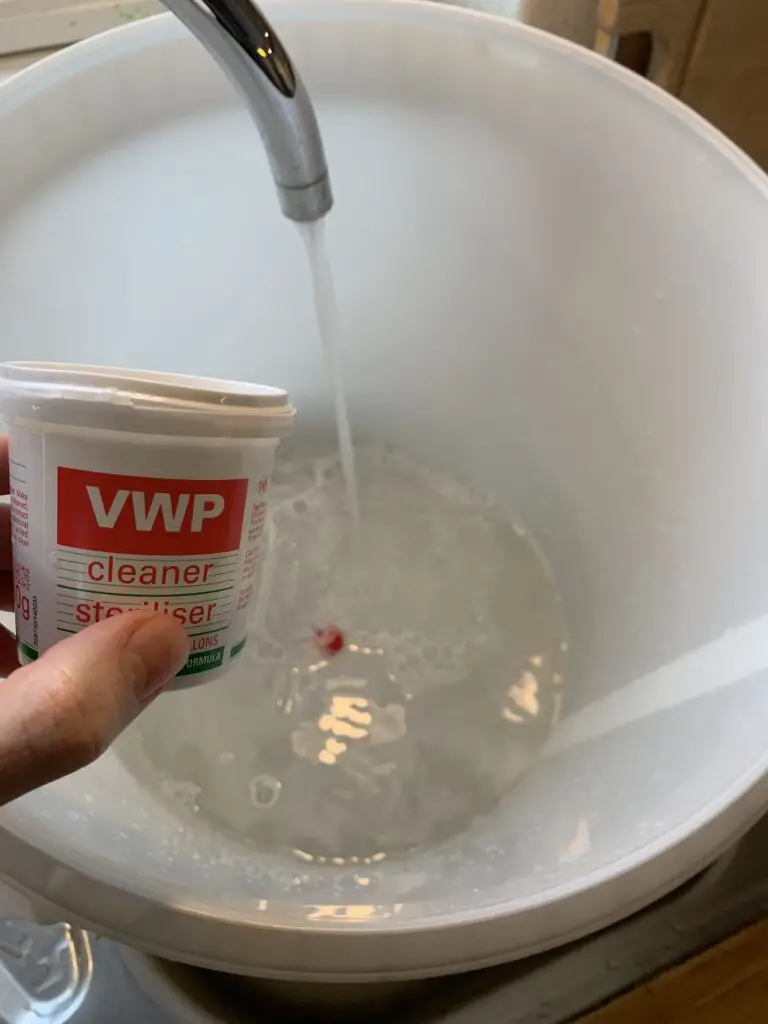
When preparing to make homemade cider, it is crucial to have the right equipment and to keep everything sanitized to avoid contamination. Here are four key equipment and sanitation points to consider:
- Use glass bottles or plastic containers designed for to store the finished cider.
- Sanitize all equipment and surfaces that come into contact with the cider, including the fermentation vessel, airlock, tubing, and bottling equipment.
- Use a siphon to transfer the cider from the fermentation vessel to the storage bottles to avoid oxidation.
- If using plastic tubing, avoid pouring the cider by hand through it, as this can introduce unwanted bacteria.
It is also important to note that the fermentation vessel should have airtight seals to prevent oxygen from entering during the fermentation process.
One homebrewer shared a lesson learned the hard way, realizing after a few batches that even small residue left on a fermenting vessel can lead to an infection in the cider.
They now make sure to thoroughly clean and sanitize all equipment and surfaces before starting each batch.
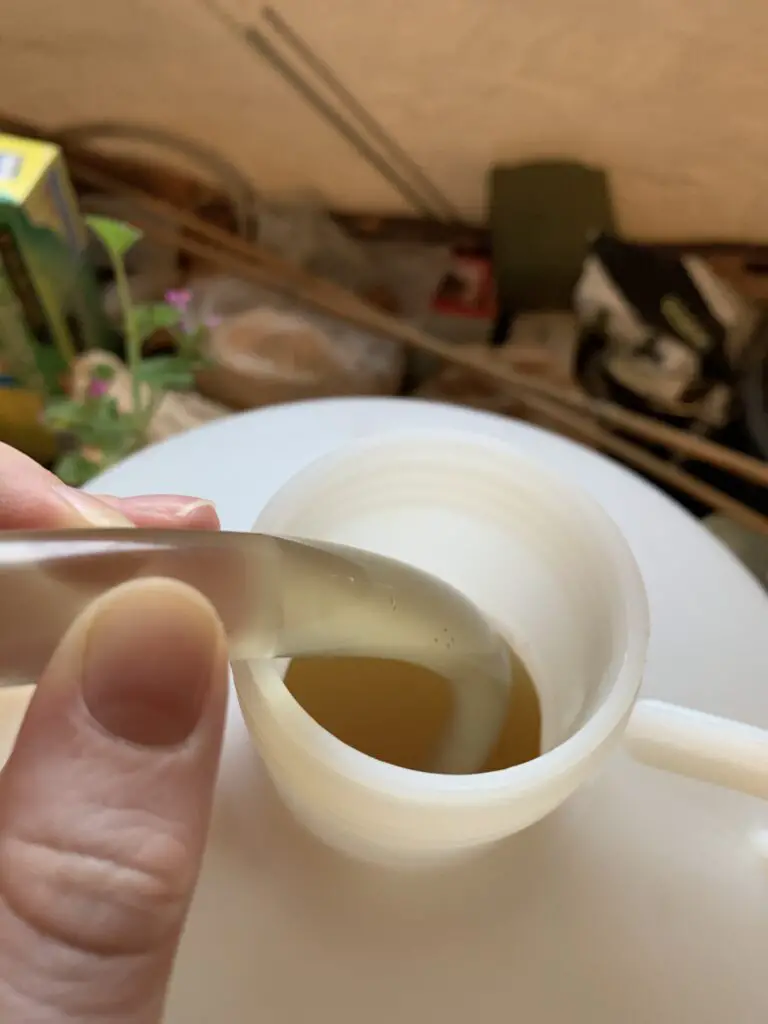
A funnel can be useful
This equipment plays an essential role in transferring homemade cider from one container to another. It is a conical-shaped tool with a narrow neck, which allows for easy pouring without making a mess. The funnel ensures that cider is moved to different vessels with ease and precision.

When racking homemade cider, the funnel is placed on top of the receiving vessel, and the fermented liquid is poured through it into the container. The funnels are available in different sizes and materials like plastic, steel, or glass. Choosing one made of food-grade material will prevent contamination.
It’s recommended to sanitize the funnel before use to avoid contaminating the cider. Boiling it in water for 10 minutes is ideal, but using Star San sanitizer or another suitable sanitizer would also work.
Using this equipment eases work when pouring by hand and helps make home brewing more fulfilling. Whether you are dealing with small batches or larger ones, having a set of funnels would be beneficial.
Funnel size should match that of the spigot or siphon used to draw off liquid during racking for better results. Sanitizing funnels after every use ensures a healthy drink for consumption.
Pouring by Hand with a Funnel
Efficiently pouring homemade cider using a funnel can prevent spills and keep your workspace clean. To do so, follow these four simple steps:
- Position the Funnel: Hold the funnel straight over the cider container and keep it steady.
- Slowly Pour the Cider: Pour the cider slowly to avoid overflow or spilling.
- Monitor the Flow: Keep an eye on the flow and make sure that the funnel does not get clogged.
- Remove the Funnel: Once the cider is poured, remove the funnel and clean it before the next use.
Additionally, it is essential to use a funnel that is appropriate for the size of the container and has a wide enough opening to prevent clogs.
Pro Tip: While pouring, tilt the container slightly to ensure thorough filling. Happy cider-making!
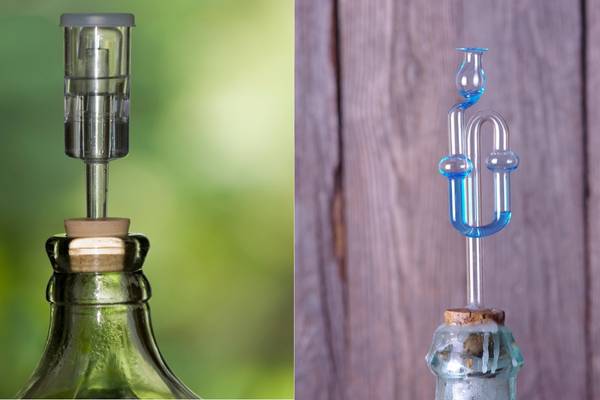
Racking Cane
Racking cane is a necessary equipment used for transferring homemade cider from one vessel to another. It has a specific design that allows the user to siphon the liquid without disturbing any sediment at the bottom of the vessel, ensuring clear and clean cider.
Here’s a simple 5-step guide to using a racking cane:
- Sanitize Racking Cane – Before use, sanitize racking cane by filling it with sanitizer and letting it sit for some time.
- Positioning Racking Cane – Position your cider into a secondary fermenter and place your sanitized racking cane on top of your brew.
- Siphoning Liquid – Submerge the end of the racking cane into your cider until it hits just above the sediment layer. Start siphoning the liquid by suctioning on top of the hose connected to your cane.
- Maintaining Airflow – The air inside your brew needs somewhere to escape while picking up flow, so ensure there is no hose blockage or restrictions while siphoning.
- Bottling Time – Once you have transferred all desired quantity of juice, turn off flow by removing suction from hose, and plug with an airlock or cork. You can then continue with bottling if ready.
It is essential to note that if you need precision control over how much liquid you eject, you could use an adjustable clamp or valve between tubing and output.
Pro Tip: Ensure cleanliness and sanitization before handling equipment but never sanitize wine bottles as sanitizers might harm them.
Auto Siphon
When it comes to the process of siphoning homemade cider, an essential tool to have is an ‘automatic racking cane’. This device makes the process of transferring your cider from one fermenter to another much easier and less time-consuming.

Click the check price at Amazon.
Here is a 5-step guide for using this valuable tool:
- Sanitize all equipment before use.
- Attach the tubing onto the racking cane by pushing it onto the top nozzle.
- Submerge the racking cane into your fermented cider, making sure not to touch the bottom to avoid sediments.
- Pump or pump with mouth pressure until all air bubbles are removed and see gravity carry out cider.
- Move the cane steadily towards the bottom and move it slightly when all liquid has been drained. Then remove the tubing and cap or bottle your cider as desired.
It’s important to note that automatic racking canes come in different sizes depending on the volume of your cider. Therefore, be cautious when selecting one that fits both your fermenter and tubing.
Don’t miss out on minimizing contamination risks posed by manually siphoning your cider during transfer. An auto-siphon ensures smooth transfer and equilibrium through consistent water supply. It is more hygienic and reduces chances of unwanted flavors affecting home-brewed ciders.
Food-grade Tubing
The Flexible Tubes Suitable for Edible Liquids
For homemade cider enthusiasts, food-grade tubing is a must-have tool for transferring liquids during the brewing process. This flexible and non-toxic tubing comes in various sizes, making it perfect for transferring cider batches of different volumes.
When selecting food-grade tubing, it is important to ensure that it meets regulations for use with edible liquids, such as apple juice. The tubing should also be easy to clean and resistant to kinking or collapsing during use.
Proper sanitation of the tubing can help prevent contamination of the cider batch. Rinse the tubes regularly with warm water and sanitize before each use using a solution of potassium metabisulfite or other sanitizing agents recommended for use with food equipment.
Pro Tip: Always sterilize the tubes before using them to sterilize your bottles.
Carboy Cap
Sealing your cider properly after racking with an airlock device is crucial to prevent contamination. The cap of the fermenting container, known as the “secondary” or “carboy,” serves as a critical barrier against oxygen and bacteria infiltration that can ruin your brew’s flavor.
To ensure a safe and successful fermentation process, it is essential to use a tight-fitting carboy cap, preferably made of silicone or rubber material with holes for the airlock device. Make sure to sterilize the cap before use to avoid any unwanted microbial activity.
It’s worth noting that some brewers prefer using sanitized aluminum foil over a carboy cap during primary fermentation due to potential CO2 buildup. However, this method might not be suitable for all ciders and should be used with caution.
Intricacies surrounding appropriate sealing are often overlooked yet critical to achieving perfect homemade cider. Don’t miss out on enjoying deliciously fermented cider; double-check your carboy cap seal before starting the fermentation process!
Importance of Sanitation
Maintaining a Clean Environment for Cider Fermentation
Fermenting cider requires a pristine working station, as bacteria can ruin the batch. Microbes in cider production carry unique flavors, but it is essential to control the types and quantity that goes into fermentation. The sanitation process includes cleaning containers with reliable methods, treating surfaces with food-grade sanitizer solutions, and use of sterile utensils for every task.
Cider making involves exposure of raw apple juice to yeast and room temperature. To guarantee success, you need strict sanitation to ensure harmful microbes do not contaminate the product before adding selected non-intrusive yeasts bought from a reliable source. Sanitization also helps prevent potential allergens from cross-contaminating your blend.
It is crucial to pay keen attention to sterilization throughout the entire cider-making process. Regular cleaning of work surfaces, equipment and handling raw apple juices while keeping them free from bacteria or other contaminants will give you into high-quality apple cider hygienically fermented.
Fun Fact: A San Francisco-based business named ‘The Artisanal Kitchen Supply’ provides the basic kitchen gear such as fermentation jars having small airlocks – appropriate for creating industrious bubbly beverages like Kombucha or vinegar or wine at home!
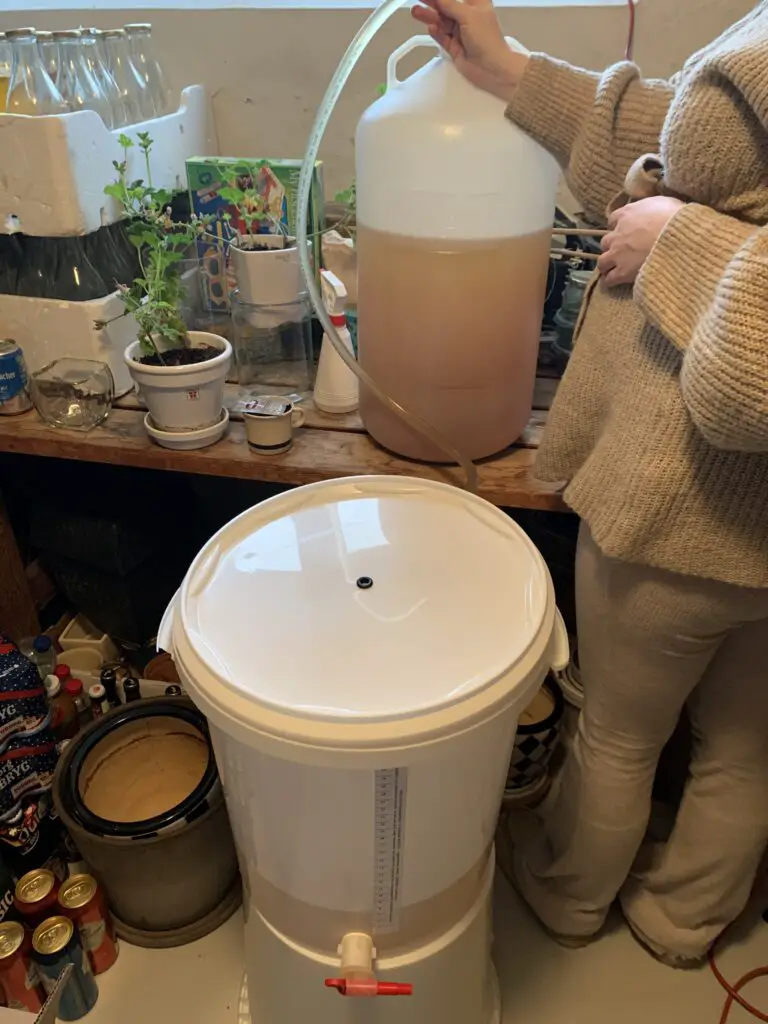
Using a Siphon
How to Operate a Siphon for Racking Homemade Cider
Using a siphon is essential in the process of racking homemade cider.
6-Step Guide to Operate a Siphon
- Sanitize all equipment, including the siphon.
- Place the filled fermenter onto a raised surface, ensuring the bottom of the siphon does not touch the sediment.
- Submerge the siphon into the cider until the bottom reaches just above the sediment.
- Fill the tubing with water, plug the end with your finger, and place the other end into the receiving container.
- Remove your finger and allow the water to flow, pulling the cider through the tube.
- Once the transferring process is complete, discard the sediment remaining in the fermenter.
Additional Tips for a Smooth and Effective Siphoning Process
To avoid any contamination while siphoning, be sure to carefully sanitize all equipment and avoid introducing bacteria into the cider. Also, be careful not to agitate the fermenter during the process, as it can disrupt the sediment and release unwanted particles.
A True Story Relating to Siphoning Cider
A cider maker once shared a story about failing to secure the tubing correctly. As they siphoned the cider, it leaked all over their garage floor. They quickly learned the importance of taking the time to double-check each step of the process to avoid any potential mishaps.
Using a homemade siphon
When utilizing a homemade siphon for racking cider, it is essential to comprehend the mechanics behind it.
A syphon works by using gravity to move liquid from a higher point to a lower one.
- Fill up the source container
- Put one end of the tube in the supply container and the other end in your desired destination.
- Make sure that the starting end is submerged in liquid.
- Suck on the other end of the tubing until you get a flow, then lower it into your destination container
It’s essential to keep your mouth off of the hose when sucking, even though it can be a challenge. I usually hold my hand (using gloves) around the opening of the tube and suck through my hand to avoid direct contact with the tube (ans subsequently the cider!).
A unique aspect of using a siphon is that you can continue using it as long as liquor stays above its lowest entrance level while transferring cider into different containers.
In ancient Egypt, there was evidence that they used siphons to transport water from one location to another. The structure and principles have remained unchanged through history and continue to be used today in various industries, including home brewing.
Priming a Siphon
To ensure a smooth flow of cider during the siphoning process, you can try to prime the siphon. This step creates a vacuum that allows cider to flow from the source container to the receiving vessel without sucking the cider into it first!
Sound impossible? Its not!
Heres is how:
- Fill a sanitised holding vessel with a bit of your cider, apple juice or water and attach one end of the tube tightly onto it.
- Submerge the other end of the tube into the container of cider, making sure it gets as close to the bottom as possible but without disturbing any sediment.
- Cover both ends with your fingers creating an airtight seal.
- Lift up the end of the tube attached to the holding vessel and submerge the one end into your fermentation vessel.
- Bring the other end down into the receiving container.
- Allow water suction to begin from the container of cider until you feel it moving along your finger.
- Release your fingers from both ends once you notice that cider will begin flowing smoothly without any suction!
While priming, make sure you use clean hands or gloves.
Once this step is complete, continue with racking by gently transferring clear cider into another sanitised vessel while preventing any sediment or yeast from being transferred.
The Old Fashioned Way – Use Your Mouth
Using Your Oral Force to Kickstart the Siphoning Process
A traditional method of siphoning homemade cider involves the use of your mouth to create a vacuum in the hose. It is essential to start by sanitizing all the equipment, including the racking cane and hose. Next, place the fermenter containing your cider on an elevated surface, preferably a countertop or table.
Insert one end of the racking cane into the fermenter while ensuring that it doesn’t touch sediment at the bottom. Submerge the other end of the hose into a bucket of sterilized water. Place your thumb over the free end of the hose in the bucket to prevent air from entering.
Now comes the moment where you have to use your oral force and suck on the end of the hose attached to your racking cane carefully. Keep doing it until ciders start flowing out into your bucket or container via gravity.
It’s essential not to let this cider siphon too vigorously as it may introduce oxygen, which could lead to spoilage or bacterial contamination. Maintain a steady flow while ensuring that you don’t run out of liquid in either container.
It’s worth noting that this technique is less favorable than using an auto-siphon pump as it can cause bacterial contamination if not done correctly. Studies reveal that using an auto-siphon reduces contamination rates when transferring liquids between containers.
Submerge the Tube in Sanitizing Solution
To ensure the cleanliness of the tube and prevent infection, it is essential to properly sanitize it before use. This process can be referred to as ‘Immersing the Tube in a Disinfectant Solution‘.
Step-by-Step Guide:
- First, prepare a sanitizing solution by mixing water and a commercial sanitizer of your choice.
- Fill a bucket or container with this sanitizing solution.
- Submerge the tube completely into the solution.
- Leave the tube in the solution for about 5 minutes to ensure it has been fully sanitized.
- Carefully remove the tube from the sanitizing solution.
- Rinse the tube thoroughly with clean water to remove any residual disinfectant and allow it to air-dry.
In addition, make sure that the container, lid, or any other equipment that will come into contact with your cider is also properly sanitized using this same process.
During my first attempt at making homemade cider, I forgot to properly sanitize my equipment and ended up with spoiled cider. Since then I have always made sure to carefully and thoroughly sanitize everything before starting my brewing process.
Use the Pumping Action of an Auto-siphon
For a professional and effective way of transferring homemade cider without any risk of contaminating it, one can make use of the auto-siphon. With its efficient pumping action, the auto-siphon is commonly used for home brewing processes and ensures that no unwanted particles or bacteria are transferred during siphoning.
To efficiently use the auto-siphon in transferring homemade cider, follow these three simple steps:
- Place the container holding your homemade cider above the container you wish to transfer it to.
- Prime the siphon pump by pumping it until water or cider begins to flow through it.
- After ensuring that liquid flows steadily through the siphon tube, connect it to the receiving vessel, and allow it to flow until emptied completely.
Additionally, when using this technique, ensure that all equipment used has been adequately sanitized before beginning your process.
It’s important to note that when racking homemade cider using an auto-siphon, all movement should be done as gently as possible to avoid disturbing any sediment at the bottom of the brew. This step maintains optimal quality and clarity while removing residue from your delicious drink.
Historically speaking, the foundation of modern brewing techniques rests on many such essential tools such as auto-siphons which streamline quality control processes while increasing efficacy. Trusting its usage will lead towards more exceptional quality ciders every time in a consistent fashion.
Use Positive Pressure
Creating Favorable Pressure for Cider Fermentation
Creating a favorable pressure environment is crucial to the successful fermentation of your homemade cider. This process, known as positive pressure, helps prevent oxygen from penetrating the cider during fermentation.
To achieve positive pressure, consider using an airlock or waterlock on your fermenting vessel. Fermenting in a sealed container is another viable option to ward off unwanted oxygen exposure. These strategies help create a carbon dioxide-rich environment that displaces any oxygen present in the fermentation vessel.
It is worth noting that negative pressure (vacuum) may also develop during certain stages of the process, which can lead to unwanted bacteria and mold growth. Regular monitoring and maintaining favorable pressure levels prevent these undesirables from occurring.
Maintaining optimal pressure provides your cider with an ideal and consistent environment for efficient fermentation. Be sure to follow recommended protocols at each stage of production as you prepare flavorful batches of healthy homemade cider!
Don’t miss out on perfecting your craft of creating delicious batches of homemade cider. Take small steps towards success with careful attention to maintaining optimum conditions for quality fermentation!
Key Takeaways:
- Proper equipment and sanitation are key to successful racking of hard cider. The essential equipment includes a funnel, racking cane, auto-siphon, food-grade tubing, carboy cap, and sometimes a bottle filler. It is also important to maintain proper sanitation to prevent contamination and spoilage of the cider.
- Pouring by hand with a funnel is also a simple and effective method of racking hard cider. However, it is essential to work in a clean environment and avoid introducing any foreign matter or contaminants into the cider.
- Understanding and using a siphon is another popular method of racking hard cider. Siphoning can be primed using different methods such as positive pressure, submerging the tube in sanitizing solution, using the pumping action of an auto-siphon, or even using your mouth. Understanding how a siphon works and selecting the right priming method can contribute to a successful racking of hard cider.
3. Tips for Successful Racking of Hard Cider
Racking Hard Cider: Expert Tips for Success
For successful racking of hard cider, follow these 3 easy steps:
- First, sanitize all equipment with iodine or a no-rinse sanitizer.
- Second, use a siphon to transfer the cider into your sanitized containers, while avoiding sediment.
- Finally, add sulfites to prevent spoilage and oxidation.
It’s important to note that racking cider can vary by recipe and preference, and understanding the unique qualities of your cider can improve the process.
Consider factors such as alcohol content, sweetness and acidity levels, and adjust your racking method accordingly.
According to the American Homebrewers Association, hard cider is the fastest-growing segment of the craft beverage industry in the United States.
FAQs
What does it mean to rack homemade cider?
Racking homemade cider refers to the process of siphoning the clear cider from the sediment that has settled at the bottom of the container. This is an important step in the cider-making process, as it helps improve the clarity and taste of the final product.
When should I rack my homemade cider?
You should rack your homemade cider after the initial fermentation has completed and the cider has cleared. This usually happens after one to two weeks. You can tell that it’s time to rack when the cider is no longer bubbling and the sediment has settled at the bottom of the container.
What equipment do I need to rack my homemade cider?
To rack your homemade cider, you’ll need a siphon, a carboy, and a sanitized racking cane. You may also want to use a sanitized funnel to help transfer the cider from one container to another.
Can I rack my homemade cider more than once?
Yes, you can rack your homemade cider more than once if you want to achieve a clearer, more refined product. However, each time you rack the cider, you risk oxidizing it and potentially affecting the taste and quality.
How long should I age my racked homemade cider?
How long you should age your racked homemade cider depends on several factors, including the specific recipe and personal preference. Generally, cider should age for at least a few weeks to a few months before being bottled or consumed. Over time, the flavors will mellow and develop, resulting in a smoother, more complex cider.