

As the holiday season approaches, imagine toasting with a crisp, spiced homebrew that captures the warmth of Christmas—crafted entirely in your kitchen. With festive gatherings on the horizon, timing your brew perfectly ensures a rewarding payoff, from gifting bottles to savoring them fireside. This guide walks you through selecting styles and schedules, sourcing ingredients like seasonal spices, prepping gear, mastering the brew and fermentation, and bottling for peak flavor. Ready to elevate your holidays?

Planning Your Homebrew for Christmas
To ensure a festive and high-quality batch of homebrew is prepared by December 25, it is essential to engage in strategic planning well in advance. This process typically requires a 4- to 6-week timeline, extending from the initial brew day to the point of serving.
Selecting the Right Beer Style
For the Christmas season, it is advisable to select warming beer styles such as spiced winter warmer ales (with alcohol by volume, or ABV, ranging from 6–8%) or robust porters, in accordance with the Beer Judge Certification Program (BJCP) category 21B.
Four appropriate styles are outlined below:
- Winter Seasonal Warmer (BJCP 21B): Characterized by malty and spiced profiles with a 6% ABV; ideally suited to cold weather conditions, though moderation is recommended to prevent overindulgence. A notable example is Great Lakes Christmas Ale, which features notes of cinnamon and honey.
- Old Ale (BJCP 19B): Exhibits fruity characteristics with dark fruit esters and a 7% ABV; offers complexity but may feel substantial in body. An exemplary option is Gale’s Prize Old Ale, combining flavors of raisin and toffee.
- Wee Heavy (BJCP 19C): A Scotch-style ale with caramel notes and an 8% ABV; provides rich warmth, albeit with potentially higher caloric content. Belhaven Scottish Ale serves as a representative example, incorporating biscuit-like malts.
- Spiced Beer (BJCP 21A): Incorporates custom additions such as ginger or nutmeg; highly versatile, yet achieving balance is essential to prevent any single element from dominating. Anchor Our Special Ale, infused with spruce tips, exemplifies this with its festive aroma.
Timing the Brewing Schedule
To commence brewing by mid-November, allow sufficient time for two weeks of primary fermentation, one week of secondary fermentation, and two weeks of bottle conditioning to achieve optimal carbonation by Christmas Eve.
Adhere to the following structured timeline for producing a holiday ale with a target original gravity of 1.060:
- Brew Day (early November, 4–5 hours): Sanitize all equipment thoroughly, mash grains at 152°F for 60 minutes, conduct the boil with hops, and cool the wort to 65°F.
- Primary Fermentation (Days 1–14 at 65–70°F): Pitch yeast (e.g. Safale US-05) into a 5-gallon carboy and monitor progress with a hydrometer.
- Secondary Fermentation (Days 15–21): Transfer the wort to a clean vessel and, if desired, incorporate spices such as cinnamon.
- Bottling (Day 22, ~2 hours): Prime with corn sugar (4 ounces for 5 gallons) and fill 12-ounce bottles.
- Conditioning (Days 22–36 at 70°F): Store the bottles in a dark and cool environment.
Construct a Gantt-style calendar in Google Sheets, incorporating columns for phases (e.g., Brew Day: November 5–5; Primary: November 6–19), rows for specific tasks, and colored bars to denote durations.
Common challenges include commencing after October, which may lead to incomplete fermentation as noted in American Homebrewers Association forums; therefore, initiate the process by November 1 to accommodate any unforeseen delays.
The total active time required for the entire process is 5–7 hours.
For a deeper understanding of why transferring the beer to a separate vessel improves clarity and flavor, see our guide on secondary fermentation in brewing.
Setting Realistic Goals and Batch Size
Target a 5-gallon batch, which yields approximately 48 12-ounce bottles. This volume is suitable for gifting to 10 to 15 family members during holiday gatherings, minimizing waste.
For novice homebrewers, it is advisable to begin with smaller 3-gallon batches, producing about 24 bottles. This approach is ideal for small families experimenting with recipes while avoiding excessive storage requirements. Intermediate brewers may scale up confidently to 5-gallon batches for social events, consistent with data from the Homebrewers Association indicating average yields of 40 to 50 bottles per batch, after accounting for typical losses.
To assess return on investment, consider that $50 in ingredients can produce 48 bottles of beer at approximately $1 per bottle, compared to a retail price of $4 per bottle, resulting in savings of around $140. For effective scaling, increase recipe quantities by 20% to compensate for evaporation. Employ a hydrometer to monitor fermentation progress and achieve consistently crisp results.
Gathering Ingredients
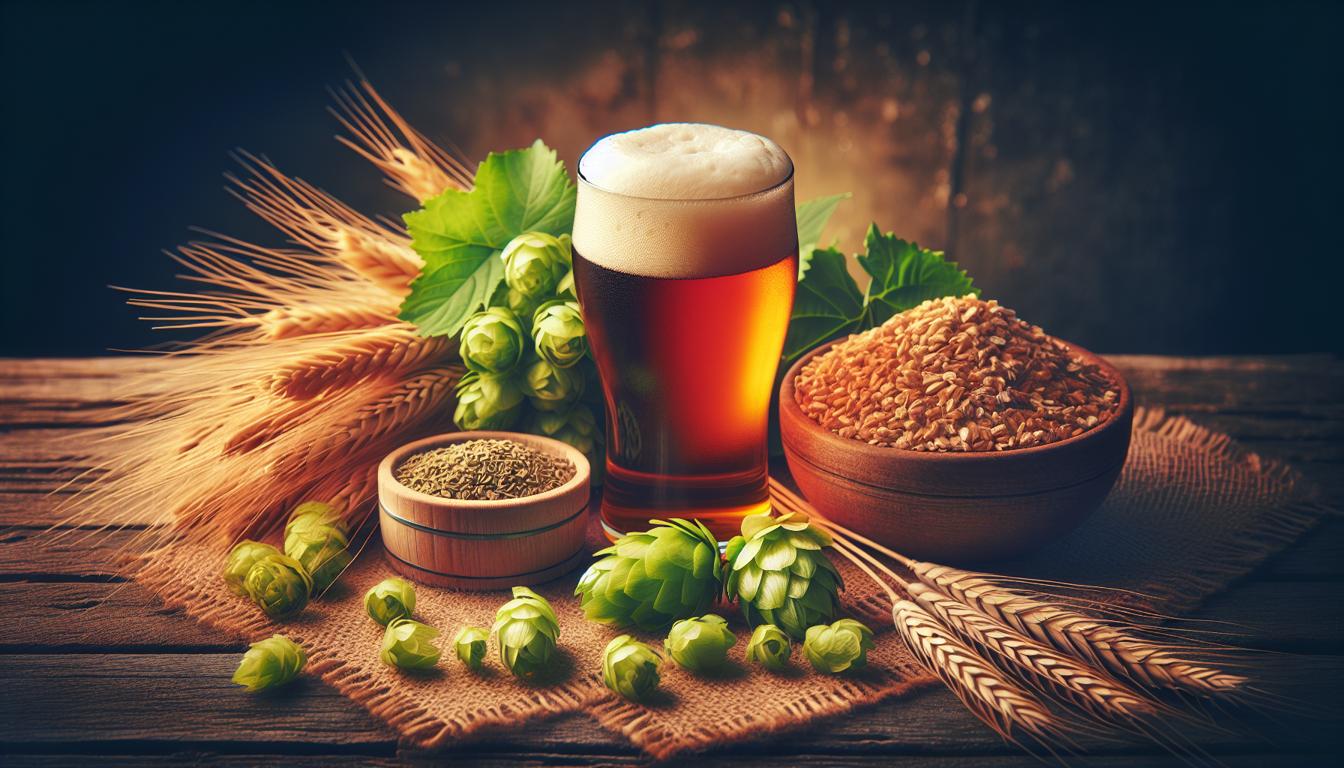
Procuring high-quality ingredients is essential for crafting a flavorful Christmas brew. Emphasis should be placed on fresh malts, aromatic hops, and seasonal spices to capture the essence of holiday warmth.
Sourcing Base Malts and Hops
For brewing a 5-gallon batch of Christmas ale, procure 8 pounds of Maris Otter base malt and 2 ounces of East Kent Goldings hops from reputable suppliers, with an estimated total cost of around $25.
To optimize efficiency and cost-effectiveness in sourcing, consider the following options:
- Online retailers: Many sites provide bulk quantities; on Amazon you can search for larger sacks of brewing malt and Saaz hops as alternatives.
- Local homebrew supply stores: Consult the American Homebrewers Association (AHA) directory to locate nearby outlets, which typically apply a small markup but offer immediate availability for pickup.
- Bulk purchasing: For those planning multiple brewing sessions, consider 50-pound sacks of malt such as generic base malt.
To maintain optimal freshness and quality, verify that the crush dates on the malt are no more than three months prior.
These specified quantities are essential for all-grain brewing methods; however, extract kits—requiring approximately 7 pounds of extract for $40—provide a more straightforward approach for novice brewers.
To incorporate seasonal elements, adapt John Palmer’s spiced ale recipe from How to Brew by incorporating cinnamon and nutmeg during the flameout stage.
Choosing Yeast Strains
For brewing a fruity Christmas warmer, select Safale S-04 English ale yeast, available at around $5 per packet. This strain achieves 75–80% attenuation and yields 6–7% ABV in a standard 5-gallon batch.
To optimize the flavor profile of your holiday brew, consider comparing S-04 with alternative yeast strains to achieve nuanced ester development, which is particularly beneficial for spiced Christmas beers. Research published in the Journal of the Institute of Brewing (2018) demonstrates that yeast strains can increase fruity ester production by 20–30% when fermented at elevated temperatures.
| Strain | Type | Typical Price | Fermentation Temp | Profile | Pros | Cons |
|---|---|---|---|---|---|---|
| Safale US-05 | Dry | $5 | 65–72 °F | Clean, neutral base | Easy storage | Less ester complexity |
| White Labs WLP002 English Ale | Liquid | $8–12 | 68–73 °F | Fruity esters for holiday spices | High viability | Short shelf life |
| Wyeast 1098 British Ale | Specialty | $8 | 68–72 °F | Malty profile | Rich depth | Requires starter |
Employ the White Labs pitch rate calculator to determine requirements, typically one packet per 5 gallons. For dry yeasts, rehydrate in water at 95°F for 15 minutes prior to pitching to promote robust fermentation.
If you plan to ferment at cooler temperatures or experiment with lager-like profiles, explore our overview of low-temperature yeast strains for more options.
Incorporating Christmas Flavors like Spices
To enhance your brew, incorporate 1 teaspoon of ground cinnamon, 0.5 teaspoon of nutmeg, and 4 whole cloves at flameout for a 5-gallon batch. This addition infuses the beer with warm, holiday-inspired aromas.

Adhere to the following procedures for optimal results, in accordance with the Beer Judge Certification Program (BJCP) guidelines for spiced beers as outlined in Brewing Classic Styles by John Palmer and Jamil Zainasheff:
- Spice Selection: Utilize 2 grams of cinnamon sticks and 1 gram of freshly ground nutmeg to achieve authentic warmth; grind the spices immediately prior to addition.
- Timing: Steep the spices at flameout for 15 minutes to extract flavors effectively while avoiding bitterness from extended exposure to heat.
- Scaling: For a 10-gallon batch, double the quantities to preserve balance.
- Alternatives: Incorporate 1 ounce of grated ginger root to introduce a contrasting, invigorating note.
Sierra Nevada Celebration Ale serves as an exemplary model of citrus and spice integration.
In case of over-spicing, mitigate the intensity by diluting the batch by 10% with unspiced wort during fermentation.
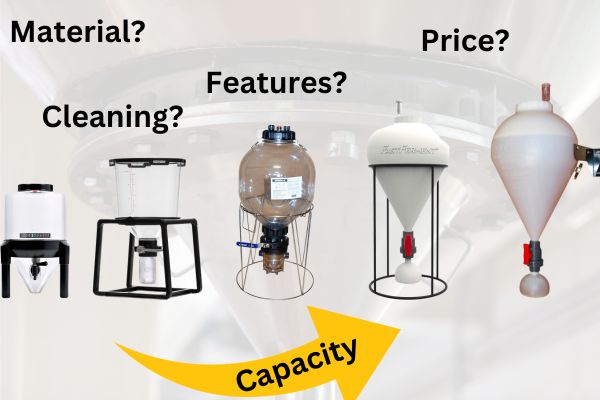
Preparing Equipment
Thorough preparation of brewing equipment is crucial to prevent contamination and ensure an efficient brewing process. This begins with the sanitation of a 6.5-gallon fermenter and the utilization of a hydrometer to obtain accurate readings.
Essential Brewing Tools Checklist
Key essential tools for homebrewing include a 6.5-gallon plastic fermenter (priced at around $15), a stainless steel siphon (~$10), and a pack of 50 crown caps (~$3).
To assemble a comprehensive homebrewing kit, incorporate these essential components to support efficient fermentation and bottling processes. Refer to this checklist to procure items in a cost-effective manner, with a target total initial investment of $150 to $200, as advised by the Homebrewers Association’s beginner guide.
| Item | Purpose | Recommended Brand/Price | Notes |
|---|---|---|---|
| Hydrometer | Measures specific gravity to monitor fermentation progress | Triple scale hydrometer / ~$10 | Range: 1.000–1.120; sanitize prior to use |
| Thermometer | Monitors mash and fermentation temperatures (ideal range: 68–72°F for ales) | VIVOSUN Digital / ~$15 | ±1°F accuracy; affix to fermenter |
| Immersion Chiller | Rapidly cools wort after boiling to minimize contamination risks | Copper immersion chiller / ~$40 | Cools a 5-gallon batch in ~15 minutes |
| Bottle Filler | Minimizes foam and spills during the bottling process | Bottle filler wand / ~$5 | Attaches to siphon for precise transfers |
Begin with a foundational recipe, such as an American Pale Ale, while strictly adhering to American Society of Brewing Chemists (ASBC) sanitation guidelines to prevent off-flavors. This configuration is designed to accommodate 5-gallon batches, yielding approximately 48 bottles.
Sanitizing All Gear Thoroughly
Employ Star San no-rinse sanitizer solution, prepared at a ratio of 1 ounce per 5 gallons of water (a $12 bottle yields approximately 20 batches), which eliminates 99.9% of bacteria with 60 seconds of contact time.
Adhere to the following procedure for effective sanitation in homebrewing:
- Clean the equipment first using PBW at a concentration of 1 tablespoon per gallon of water (~$15 per pound). Soak for 15 minutes to remove residues, such as hop oils or yeast buildup.
- If detergents are used, rinse the equipment thoroughly.
- Prepare the Star San solution to achieve a pH of 3.5 (test with pH strips if available).
- Submerge all equipment—including fermenters, siphons, spoons, and bottles—for at least 60 seconds.
- Allow the equipment to air dry on a rack; avoid using towels to prevent recontamination.
The total time required for this process is 30 to 45 minutes per batch. Common errors include excessive rinsing, which may dilute the sanitizer’s efficacy, or neglecting concealed areas such as bottle necks.
According to the ASBC Methods of Analysis, this protocol reduces microbial risks by more than 99.99%, thereby preventing off-flavors in the beer.
Setting Up Your Brew Station
Establish a dedicated homebrewing station on a well-ventilated kitchen counter, incorporating a suitable propane burner (e.g. CADCO model, priced at ~$50) and an Inkbird ITC-308 temperature controller (~$35) to maintain precise mash temperatures of 155°F.
To optimize your homebrewing setup, adhere to the following guidelines outlined in The Complete Joy of Homebrewing by Charlie Papazian:
- Select a 10×5-foot area on a heat-resistant floor to mitigate potential hazards.
- Organize the workflow efficiently: position a sink to the left for cleaning tasks and the stove or burner to the right for boiling operations, facilitating a seamless progression from grain handling to fermentation.
- Emphasize safety measures, including the availability of a fire extinguisher, heat-resistant gloves, and good ventilation to minimize exposure to fumes and other risks.
- Install essential utilities, such as a water connection and a 120V electrical outlet to support the chiller pump, plus appropriate hoses and thermometers.
Envision the layout as follows: a central counter equipped with the burner, an adjacent sink on the left, and storage racks on the right. The basic configuration requires approximately $100 in additional items, such as hoses and thermometers, resulting in a total investment of less than $200 for enhanced operational efficiency.
The Brewing Process
The brewing process converts grains into flavorful wort over a period of 4 to 6 hours, a critical phase that facilitates the extraction of sugars and ensures the proper balance of hops in the Christmas beer.
Mashing and Steeping Grains
For extract brewing, begin by steeping 1 pound of crystal malt in a mesh bag at a temperature of 150–155°F for 30 minutes. This process imparts color and sweetness to your 5-gallon batch.
After steeping, remove the mesh bag—such as a nylon brew-in-a-bag (BIAB) option—and rinse it with 1 gallon of water heated to 170°F.
Proceed to bring the pot to a boil, then incorporate 6 pounds of liquid malt extract. Maintain the boil for 45–60 minutes, adding hops as specified (for example, 1 ounce of Cascade hops at the 60-minute mark to achieve bitterness).
Once boiling is complete, cool the wort to 70°F using an immersion chiller (priced at around $50), transfer the mixture to the fermenter, and pitch the yeast.
For all-grain brewing, follow these steps:
- Mash 10 pounds of grains (comprising base malt and crystal malt) at 152°F for 60 minutes in a converted cooler (available for approximately $30).
- Sparge with water at 170°F to collect 6.5 gallons of wort.
This all-grain method produces a fuller flavor profile but demands additional time and effort.
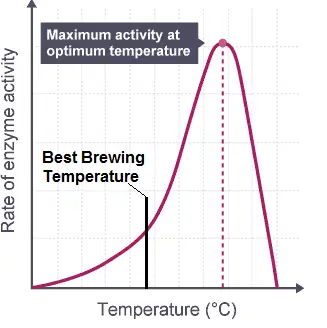
A common error to avoid is overheating the mash above 170°F, which can denature enzymes; therefore, it is essential to monitor temperatures closely with a reliable thermometer.
For further guidance, refer to Chapter 3 of How to Brew by John Palmer.
Boiling the Wort
Commence the boiling process by heating the 3-gallon wort for 60 minutes in an 8-gallon kettle (approximately $40). Incorporate 1 ounce of bittering hops at the outset and 0.5 ounce of flavor hops with 15 minutes remaining in the boil.

Vigilantly monitor the boil to facilitate the evaporation of dimethyl sulfide and to attain 30–40 International Bittering Units (IBUs) from the bittering hops (for example, Magnum at 12% alpha acids). Stir periodically to avert boil-overs, employing FermCap-S drops (approximately $5) as necessary.
Upon flameout, introduce 0.25 ounce of aroma hops, such as Cascade, to impart a floral character. Subsequently, rapidly chill the wort using a copper immersion chiller (approximately $50) to a temperature of 65–70°F within 15–20 minutes—a critical step to prevent contamination, in accordance with American Homebrewers Association (AHA) guidelines.
Transfer the chilled wort to a sanitized 5-gallon fermenter (for example, a plastic bucket, approximately $15), adjust the volume to 5 gallons with filtered water, and aerate the mixture through shaking or the use of an oxygen stone kit (approximately $20). Introduce one packet of Safale US-05 yeast and initiate fermentation at 68°F for 10–14 days.
If clarification is desired, rack the beer to a secondary fermenter; otherwise, proceed directly to bottling with 5 ounces of priming sugar dissolved in boiled water.
The total post-boil duration is 2–3 weeks. This procedure produces a clean American pale ale that conforms to Beer Judge Certification Program (BJCP) style guidelines (IBUs 30–50, ABV 4.5–6.2%).
Cooling and Aerating
To achieve optimal brewing results, cool the wort from 212°F to 70°F within 20 minutes using an immersion chiller, followed by aeration through shaking the carboy or utilizing a pure oxygen kit (approximately $20) to support vigorous yeast performance.
The immersion chiller is typically constructed by coiling 40 feet of 3/8-inch copper tubing (available from homebrew suppliers) inside the kettle. Connect the assembly to a garden hose to facilitate cold water circulation at a rate of 2 gallons per minute; employing an ice bath will help attain the desired 20-minute cooldown period.
It is imperative to sanitize the chiller with Star San prior to use to prevent any risk of contamination.
For aeration, target an oxygen concentration of 8–10 ppm. This can be achieved by vigorously whisking the wort for 5 minutes or by employing an oxygen stone with a diffusion kit for 30 seconds at a flow rate of 1 liter per minute.
According to studies conducted by the American Society of Brewing Chemists, appropriate oxygenation can increase yeast attenuation by up to 10%, thereby reducing the likelihood of off-flavors.
A common error to avoid is hot pitching, which can compromise yeast viability; always ensure the wort is chilled to below 80°F before introducing the yeast.
Fermentation Management
Effective fermentation management entails precise control of temperature and meticulous monitoring of the process to cultivate intricate flavor profiles. For a spiced Christmas ale, this phase typically spans 3 to 4 weeks.
Starting Primary Fermentation
Introduce one packet of rehydrated Safale yeast into aerated wort at 68°F within a 6.5-gallon carboy, with visible krausen anticipated within 12–24 hours.
Maintain fermentation temperature between 65–70°F utilizing a temperature-controlled fermentation chamber or swamp cooler to avert off-flavors, in accordance with recommendations from the American Homebrewers Association (AHA). After 24 hours, gently agitate the carboy daily to stimulate yeast activity while minimizing oxygen introduction.
On days 3–5, conduct a hydrometer reading, targeting a specific gravity of 1.010–1.015 prior to bottling. Utilize a sanitized thief or wine thief tool for sampling to mitigate contamination risks. Should krausen fail to develop within 48 hours, repitch with a fresh packet of yeast.
Active fermentation generally persists for 7–10 days, per AHA guidelines, producing a clean and attenuative ale profile.
Fermentation times vary across beer styles; if you’re curious how a stout differs from this schedule, our post on how long a stout takes to ferment offers a helpful comparison.
Monitoring Temperature and Activity
Employ a digital thermowell probe (approximately $15) in conjunction with an Inkbird controller to maintain a fermentation temperature of 66°F. Commence daily specific gravity checks from day 3 onward, utilizing a sanitized hydrometer.
To achieve successful fermentation, adhere to the following five monitoring practices, as detailed in Chris White’s Yeast: The Practical Guide to Beer Fermentation (Brewers Publications, 2016):
- Record temperatures daily to monitor and ensure stability.
- Visually inspect for indicators of activity, such as consistent airlock bubbling at intervals of 30 to 60 seconds during peak fermentation.
- Collect gravity samples with the objective of attaining 70% attenuation by day 5 and a final gravity (FG) of around 1.012 after ~7 days.
- Address temperature fluctuations exceeding 2°F by introducing frozen water bottles to the fermenter.
- Detect off-aromas through olfactory assessment; a vinegar-like scent suggests potential infection.
Implementing these procedures effectively mitigates risks and promotes consistent outcomes in homebrewing.
Understanding the distinction between top- and bottom-fermenting yeast can also help you manage temperature and flavor. Our guide comparing top-fermented and bottom-fermented beers explains how temperature affects yeast behaviour and beer character.
Transferring to Secondary
After ~10 days, once the specific gravity has stabilized at ~1.015, transfer the wort to a clean 5-gallon secondary carboy using an auto-siphon (priced at around $15). This process clarifies the beer and minimizes sediment.
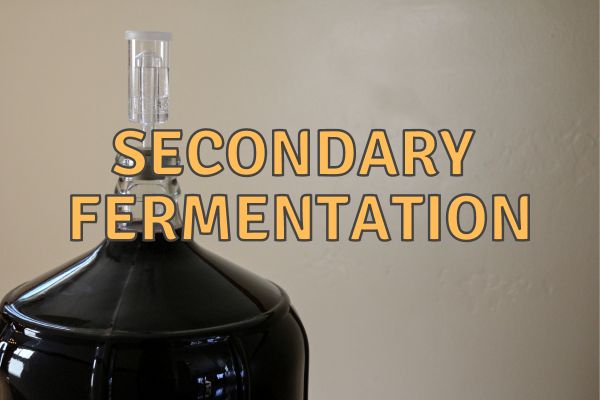
This racking procedure, as recommended by the American Homebrewers Association (AHA), separates the beer from the trub, thereby enhancing clarity by removing approximately 80% of the sediment—a practice particularly advantageous for lagers, though optional for ales. To achieve optimal results, follow these steps, which require approximately 20 minutes in total:
- Sanitize the secondary carboy, tubing, and auto-siphon with Star San no-rinse solution to prevent contamination.
- Perform the siphon gently from above the sediment layer, avoiding splashing to minimize oxidation and off-flavors.
- Leave 1–2 inches of trub behind to ensure cleaner beer without haze.
- Reseal the carboy with a sanitized airlock.
- Continue fermentation for an additional 7–14 days, monitoring the specific gravity periodically.
A common error is disturbing the yeast cake, which reintroduces particles. As illustrated in Dogfish Head recipes, this approach improves clarity and flavor stability at bottling.
Bottling and Carbonation
The bottling process preserves carbonation, ensuring effervescent quality for festive occasions, through the addition of priming sugar to achieve approximately 2.5 volumes of CO₂ in the conditioned beer.
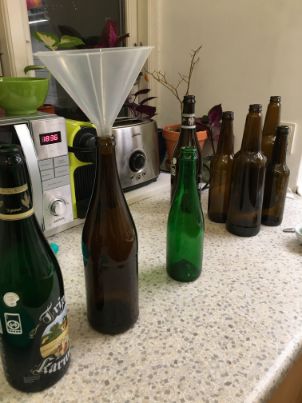
Preparing Bottles and Caps
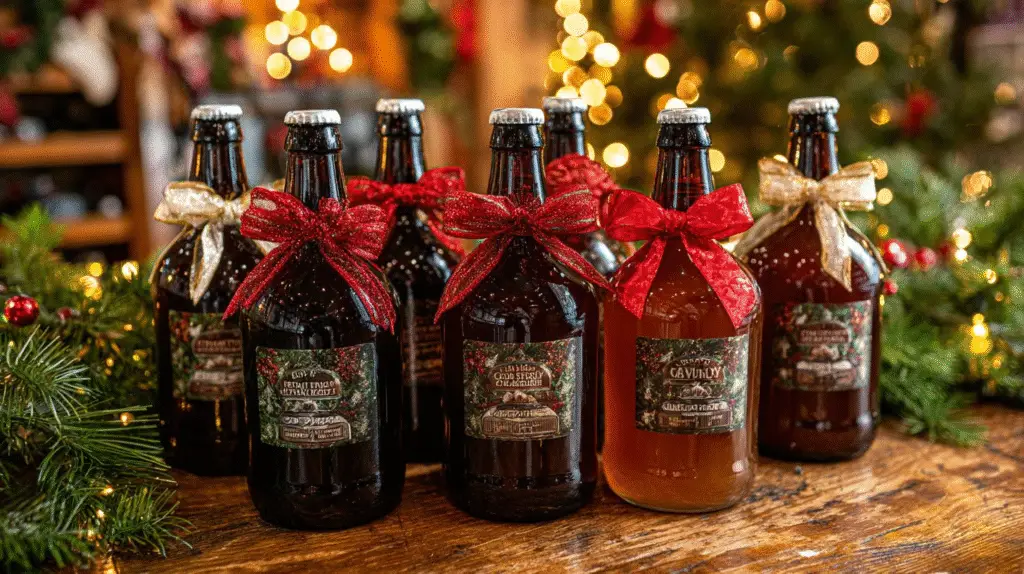
Acquire 48 swing-top or pry-off 12-ounce bottles (approximately $20 for a 24-pack) and 50 oxygen-absorbing crown caps (~$4). Prepare labels featuring festive designs using printable vinyl (£10 per pack).
Adhere to the following checklist to ensure safe and effective bottling procedures:
- Examine all bottles for chips or cracks; discard any damaged items and submerge intact bottles in PBW cleaner for one hour to eliminate residue buildup.
- Verify that caps are either new or have been reused no more than three times to maintain airtight seals.
- Create label designs using Canva software, then print them on Avery 22830 waterproof sheets to achieve a professional and festive appearance.
- Sterilize all equipment and materials by immersing them in Star San no-rinse sanitizer.
A standard 5-gallon batch will produce approximately 53 12-ounce bottles. Supplies can be sourced from homebrew retailers or Amazon.
Recommendation: Commercial bomber bottles may be reused following thorough inspection and cleaning to ensure safety.
Adding Priming Sugar
For a 5-gallon batch, dissolve 4 ounces of cane sugar in 2 cups of boiled water to achieve approximately 2.5 volumes of CO₂, thereby reducing the risk of bottle explosions. This priming technique promotes uniform carbonation throughout the batch.
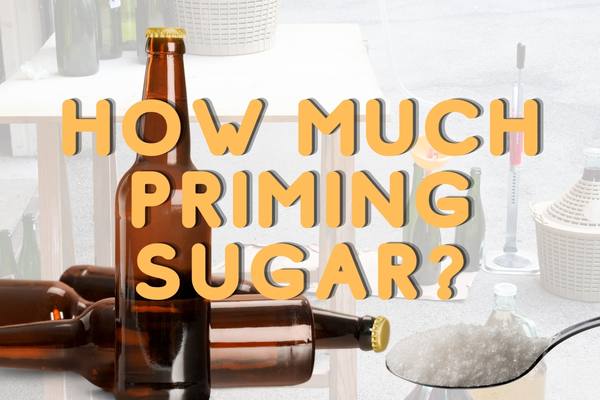
For more accurate measurements, consult a priming calculator (e.g. our online tool), which might suggest around 3.9 ounces of dextrose for medium carbonation levels in a comparable batch.
To execute this process effectively, adhere to the following procedure:
- Boil the sugar solution for 10 minutes to ensure sterilization.
- Allow it to cool to room temperature.
- Gently incorporate the solution into the beer within a bottling bucket, taking care to minimize exposure to excess oxygen.
- Permit the mixture to settle for 10 minutes prior to filling the bottles.
Suitable priming sugars include corn sugar, which costs approximately $2 per pound and imparts a neutral flavor, or honey at about $5 per pound, which introduces subtle aromatic notes.
A common error to avoid is uneven mixing, which can be mitigated by employing a dedicated bottling bucket.
If you’d like to fine‑tune carbonation levels for different styles, our article on how much priming sugar per litre of beer explores appropriate sugar amounts and alternative sweeteners.
Filling and Sealing Bottles
To achieve proper headspace of about 1 inch, fill the bottles using a spring-loaded bottler attachment (approximately $8). Subsequently, seal the bottles with a handheld capper (approximately $25) to ensure secure carbonation.
After sealing, thoroughly sanitize the work area and store the bottles upright in a dark, cool environment maintained at 65–70°F for two weeks. This duration allows carbonation to develop fully, in accordance with guidelines from the American Homebrewers Association.
To verify progress, test a single bottle after 10 days by chilling it and opening it carefully, targeting ~2.5 volumes of CO₂.
Essential tools include a beer hydrometer (approximately $10), which should be used for pre-bottling specific gravity checks (aiming for 1.010–1.015 SG) to prevent the risk of bottle explosions.
Should any issues occur, such as over-carbonation, consult reliable brewing resources (including UC Davis Brewing Studies) for detailed guidance on fermentation monitoring.
This procedure typically produces around 48 bottles within approximately 1 hour following fermentation, while employing tilted filling techniques to minimize foam loss.
Maturing and Final Touches
Age the bottles for 2 to 3 weeks at 70°F to achieve full carbonation, then refrigerate to around 50°F prior to serving alongside turkey. This process enhances holiday meals, especially when you add custom labels.
To ensure optimal results, adhere to the following phases in accordance with BJCP aging guidelines:
- Condition the bottles for 14 to 21 days at 70°F. Test carbonation by opening a bottle, aiming for ~2.5 volumes of CO₂ with a crisp 1–2 inch head on this ~6.5% ABV beer.
- Store in a cool basement at 50–60°F, where the beer will maintain its flavor integrity for 3 to 6 months.
- Apply final touches such as chalkboard vinyl labels and pair with ham or eggnog, as recommended by many festive beer pairings.
- Serve in tulip glasses at about 50°F, decanting to achieve clarity.
For gifting, assemble six-packs for recipients. If haze develops, perform a cold crash at 35°F for 48 hours.
Frequently Asked Questions
How to make your homebrew ready for Christmas: When should I start brewing?
To make your homebrew ready for Christmas, start brewing at least 4–6 weeks in advance. This allows time for fermentation, conditioning, and bottling, ensuring the beer or cider develops full flavors by the holidays. Use fresh ingredients and monitor the process closely for best results.
How to make your homebrew ready for Christmas: What flavors work best for the season?
For making your homebrew ready for Christmas, incorporate seasonal flavors like spices (cinnamon, nutmeg), fruits (cranberry, orange), or even a touch of vanilla to evoke holiday cheer. These additions during secondary fermentation can create festive brews perfect for gatherings.
How to make your homebrew ready for Christmas: How do I bottle it safely?
When making your homebrew ready for Christmas, bottle it after primary fermentation is complete, typically 1–2 weeks in. Sanitize all equipment, prime with sugar for carbonation, and store bottles in a cool, dark place for 2–3 weeks to carbonate properly before enjoying on Christmas.
How to make your homebrew ready for Christmas: Can I gift it to friends?
Yes, making your homebrew ready for Christmas makes it an excellent gift. Label the bottles with festive designs, include brewing details, and ensure they’ve conditioned for at least two weeks. Personal touches like custom tags add to the holiday spirit.
How to make your homebrew ready for Christmas: What equipment do I need?
To make your homebrew ready for Christmas, essential equipment includes a fermenter, airlock, siphon, bottling bucket, and caps or corks. Invest in a hydrometer to track progress and ensure everything is sanitized to avoid spoilage during the holiday prep.
How to make your homebrew ready for Christmas: How do I troubleshoot common issues?
If making your homebrew ready for Christmas hits snags like off-flavors, check temperature control during fermentation (ideal 65–75°F) or contamination. For flat beer, allow more conditioning time. Patience and proper hygiene will salvage your batch for a merry Christmas toast.
-recipe.jpg)
Leave a Reply
You must be logged in to post a comment.