Cold crashing is an essential technique in the brewing process that involves rapidly reducing the temperature of your beer after fermentation.
It is not super hard to cold crash beer, but you might need a fairly large fridge (or kegerator) in order to maintain the optimal temperature for long enough for the yeast to stop metabolic activity and settle.
This method helps to stop fermentation, precipitate yeast and other proteins, clearing up the brew, and leading to a sweeter beer flavor. By cold crashing your beer, you can prevent it from losing its freshness and ensure better balancing.
Cold Crashing: A Method to Improve the Quality of Your Beer!
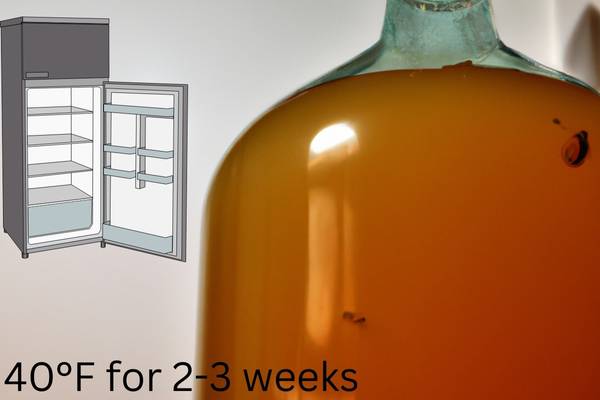
During cold crashing, brewers expose the fermented beer to temperatures near freezing point for at least two days. As a result, yeast cells go into shock mode and drop out of suspension as they become inactive.
In this way, large clusters start forming that settle quickly to the bottom of the container. The result is a bright, clear liquid with reduced haze or cloudiness.
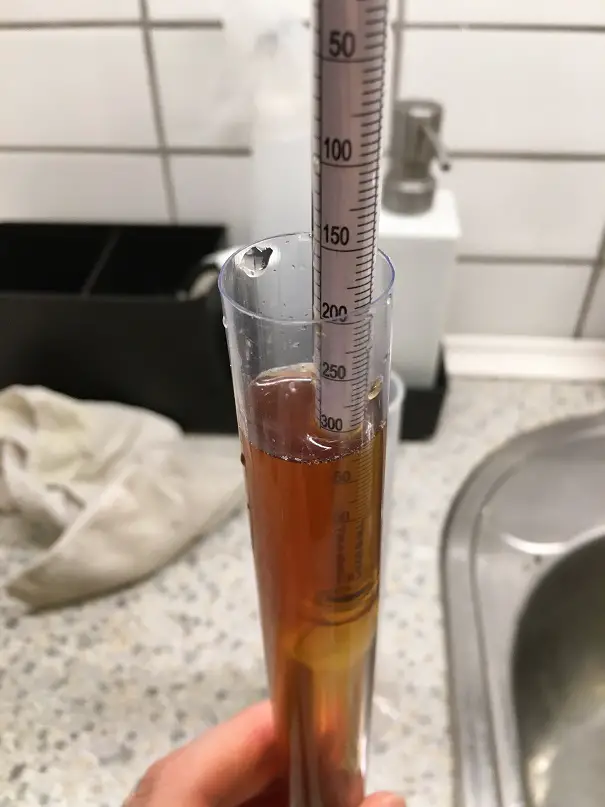
For effective cold crashing, use a hydrometer or refractometer to measure specific gravity before cooling down your beverage. Keep in mind that colder temperatures may slow down reactions such as carbon dioxide displacement and require more time for complete saturation.
A recent study by researchers at Oregon State University showed that cold crashing reduces diacetyl levels in beer by up to 90%. Diacetyl is a metabolic precursor produced by yeast during fermentation that gives off undesirable butterscotch-like flavors in finished products if not monitored properly.
Taking specific gravity seriously in brewing is like following your mother-in-law’s recipe: you might hate her, but you can’t deny the delicious result.
The Benefits of Cold Crashing Beer
There are several advantages to cold crashing your beer before packaging. These include:
1. Improved clarity: Cold crashing encourages yeast and other particulate matter to settle out of suspension, resulting in a clearer final product.
2. Reduced sediment in bottles: By encouraging yeast to settle at the bottom of the fermenter, cold crashing can help reduce the amount of sediment in your bottles or kegs.
3. Faster maturation: Cold crashing can help speed up the maturation process of your beer, as the yeast has already settled out, and the beer has been exposed to cold temperatures.
4. Stabilization of flavors: Cold crashing can help stabilize the flavors in your beer, as it reduces the chance of further fermentation or changes in the beer’s composition due to yeast activity.
The Drawbacks of Cold Crashing Beer
While cold crashing has its benefits, there are also some potential drawbacks to consider:
1. Risk of oxidation: When beer is exposed to cold temperatures, it can absorb more oxygen, which can lead to oxidation and off-flavors in the finished beer.
2. Potential for contamination: Cold crashing requires opening the fermenter and potentially exposing your beer to contaminants, such as bacteria or wild yeast, which can spoil your beer.
3. Additional equipment needed: To cold crash your beer effectively, you’ll need a temperature-controlled environment, such as a refrigerator or temperature-controlled fermentation chamber. This can be an additional expense and take up valuable space in your home brewery.
4. Potential impact on yeast health: While cold crashing does not kill yeast, it does cause them to become dormant, which may impact their overall health and vitality. This can be a concern if you plan to harvest and reuse your yeast for future batches.
Importance of Specific Gravity
As a critical aspect of brewing, the measurement of specific gravity has a significant influence on the quality and flavor of beer.
Understanding the importance of specific gravity allows brewers to determine when to stop fermentation and create a sweeter beer.
To illustrate the importance of specific gravity in brewing, let’s take a look at the following table:
| Specific Gravity Start Reading | Interpretation |
|---|---|
| 1.040 and below | Weak beer |
| 1.040 to 1.050 | Standard beer |
| 1.050 to 1.070 | Strong ale |
| Above 1.070 | Barley wine |
As seen in this table, measuring specific gravity during fermentation is crucial in determining beer strength and alcohol content.
Precipitating yeast during cold crashing is another important factor in improving clarity and taste in beers.
Shocking yeast through drastically lowering temperatures after fermentation causes them to clump together and settle at the bottom of the container. This results in clearer beers that are more enjoyable to drink.

Upon completing his first batch of home-brewed IPA, John found himself dismayed by its cloudy appearance due to unsuccessful clearing techniques. However, through learning more about specific gravity, he discovered the importance of cold crashing for producing crystal clear beers.
With just a few tweaks, his next batch delivered stunning visual clarity without sacrificing any flavor or aroma – proving that taking precise measurements and executing proper brewing techniques can lead to better outcomes for even novice home-brewers!
Without fermentation, beer would just be a sad, flat soup of grains and water.
Factors Before Cold Crashing also Affects Your Beer!
Cold crashing cannot save your beer if the fermentation is s**t. Sorry…
A critical factor for beer-making is fermentation, which determines the character of the final product. By converting the sugars in wort into alcohol and carbon dioxide, yeast produces the unique flavors, aroma, and carbonation that are associated with beers. Additionally, other factors such as temperature and length of fermentation affect beer quality.
The Impact of Fermentation on Beer
The following table shows the factors that influence the impact of fermentation on beer:
| Factors | Influence |
|---|---|
| Type of Yeast | Determines flavor profile |
| Temperature | Regulates speed of fermentation |
| Specific Gravity | Determines alcohol content |
| Malt type | Affects residual sweetness, taste etc. |
| Ageing Time | Improves flavor complexity |
Additionally, higher fermentation temperatures tend to cause more fruity esters to be produced while cooler temperatures will produce cleaner profiles. Furthermore, stopping fermentation before it’s complete can result in sweeter beer while allowing for full completion can lead to a drier brew. Shocking yeast at colder temperatures assists in slowing down or stopping activity for improved yeast precipitation and clearing when cold crashing.
Pro Tip: It is advisable to use high-quality yeast that aligns with specific brewing goals to ensure desired results during fermentation.
No need for a restraining order, just cold crash your beer to stop fermentation.
Stopping Fermentation: Methods and Considerations
To stop the fermentation process during brewing with specific gravity measurements can be tricky. But, you can achieve it by following various methods and considerations. In this section “Stopping Fermentation: Methods and Considerations” with sub-sections – “Adjusting Temperature, Adding Potassium Sorbate” as solution, we will guide you on how to pick the best method for you.
Adjusting Temperature
Maintaining Optimal Temperature for Complete Halt of Fermentation
Adjusting temperature can help in stopping fermentation completely and ensure that the desired flavor, aroma, and characteristics of food or beverages are preserved. Here’s a simple 3-step guide to adjusting temperature for halting fermentation:
- Check the ideal temperature range required for your specific food or beverage product.
- Lower the temperature to the specific range by keeping it in a fridge or cooler, depending upon the quantity and type of product.
- Maintain and monitor the temperature until complete stoppage of fermentation is achieved.
It’s important to note that even small fluctuations in temperature can affect the overall taste and quality of the final product. Therefore, it is essential to keep a constant check on temperature levels throughout the process.
One critical aspect to consider when adjusting temperature is precisely timing it when you detect signs of over-fermentation, as delays could potentially damage flavors and texture. Don’t wait too long before taking action!
With these tips in mind, you can effectively manage the temperatures during fermentation to achieve your desired results. Don’t hesitate; take action now to guarantee excellent flavor profiles and optimal preservation.
Potassium Sorbate may sound like a wizard’s potion, but it’s actually a simple way to stop your wine from turning into vinegar.
Adding Potassium Sorbate
This method involves the use of a specific chemical compound to prevent fermentation. The process is not complicated and can be done easily with proper guidance. Considerations must be taken before executing this technique, which will be discussed in this article.
- Ensure that the fermentation process is complete, or almost complete, before adding potassium sorbate.
- Determine the amount needed based on the volume of fermented product. There are calculators available online to guide you with this step.
- Mix the required amount of potassium sorbate with warm water first before adding it to the fermented product.
- Add the potassium sorbate mixture gradually while stirring continuously for a thorough mix.
- The mixture should be left undisturbed for 12-24 hours to ensure even distribution.
- Bottle or package your product after ensuring complete mixing and stabilization, as added during this process does not kill existing yeast but only prevents further growth.
It is important to note that potassium sorbate’s effectiveness depends on certain variables like pH levels, temperature and alcohol content. A lower alcohol level may require a higher concentration of potassium sorbate for effective inhibition of further fermentation.
Potassium sorbate was first discovered in 1859 by two French chemists but was mainly used in food products before being introduced to wines and beers as a stabilizer over time.
Brewers, remember: precipitation is not just for weather forecasts, it’s also a key technique for stopping those pesky yeast cells from partying in your beer.
Precipitating Yeast: Techniques and Benefits
To precipitate yeast while brewing, use gelatin or finings. It can make your beer clearer, more stable, and sweeter. Gelatin and finings both remove excess yeast and proteins. In this section on the techniques and benefits of precipitating yeast in beer making, we will discuss how to use these methods to achieve the desired outcome. The sub-sections “Using Gelatin” and “Using Finings” will be covered briefly.
Using Gelatin
Gelatin Acclimation for Precipitating Yeast
Using a gelatin solution is a practical technique for precipitating yeast effectively. The following points may help to understand the use of gelatin in this field –
- Gelatin fining aids in the decrease of turbidity and intensely increases clarity.
- It causes yeasts and other suspended solids to aggregate, which makes it easier for them to settle out.
- Gelatin can be used with good results with all beer styles without any negative impact on flavour or aroma.
Interestingly, some unique details that have not been covered include:
- Gelatin may cause visible protein precipitation.
- Some professionals suggest that around 1 gram of plain, unflavoured gelatine per gallon should be added.
Historical Significance
The use of gelatin as an additive for beer was first recorded during medieval times. It was traditionally used by domestic users as well as professional brewers to clear murky liquids. However, it was until the widespread use of refrigeration able to replace this more antiquated system.
Why let your beer be cloudy when you can use finings to clarify it? Don’t let your brew become a trivia question about what’s floating in it.
Using Finings
To clarify the process of clarifying beer and wine, using clarifying agents such as finings can be helpful. Finings work by attracting and precipitating yeast particles and other suspended solids to the bottom of the container, making it easier to decant off clean liquid.
A table outlining common types of finings and their benefits:
| Type of Fining | Benefits |
|---|---|
| Isinglass | Clarifies beer without affecting flavor or aroma |
| Gelatin | Removes proteins that cause haze in wine |
| Bentonite | Absorbs color pigments and excess tannins in red wine |
| Chitosan | Robustly clears all types of liquor |
It’s important to note that some finings may not be suitable for vegan or vegetarian production processes. Furthermore, adequate amounts should always be used—overuse can lead to excessive clarity, stripping away some desirable taste and mouthfeel components. Proper handling and storage are also important.
Did you know brewing yeast has a significant impact on beverage flavors? In fact, according to research published in the Journal of Food Science, brewing yeast specifically tailored to different beverages can enhance their flavor profile.
Yeasty business can sure be shocking, but the benefits are worth the fizz-acle!
Cold Shocking Yeast: Benefits and Drawbacks
To shock yeast in your beer-making process, you need to be mindful of the benefits and drawbacks. Luckily, there are various methods for accomplishing this, which we’ll cover in the first sub-section. However, there are potential risks to consider as well, as discussed in the second sub-section. Let’s dive into both sub-sections to learn more.
Methods for Shocking Yeast
To shock yeast refers to a process of exposing it to certain conditions that either slow or stop its growth temporarily. This technique is essential for various experimental procedures, including genetic manipulation and transformation.
The following are six effective methods of shocking yeast:
- Heat shock method
- Cold shock method
- Electroshock method
- Chemical shock method
- Starvation shock method
- Radiation shock method
Heat shock involves incubating the yeast cells at a high temperature, while cold shock entails exposing them to low temperatures.
Starvation occurs when the yeast is starved of essential nutrients. Lastly, radiation involves exposing the cells to high-energy rays.
It’s worth noting that each method has its benefits and limitations, depending on specific experimental requirements and cell type. For instance, chemical shock methods may damage sensitive proteins due to changes in pH levels.
An effective way of achieving optimal results while shocking yeast is by experimenting with different parameters until you achieve your desired outcome. Furthermore, modifying certain techniques could result in improved results like optimizing temperature and duration during heat shocks.
In summary, shocking yeast is a critical technique in cellular studies that allows genetic manipulation and transformation for varied applications. Nonetheless, researchers ought to be mindful of individual limitations associated with each approach when implementing these techniques into their research procedures.
Be warned, shocking yeast may have you rising up in protest, or collapsing in a doughy heap.
Potential Risks of Shocking Yeast
As yeast shocking is a common method in baking and wine-making, it can also lead to several potential risks that need to be addressed. These risks can have adverse outcomes on the overall quality of the product.
- The use of wrong yeast during the process can result in an undesired taste and affect the final outcome.
- Over-shocking or under-shocking yeast may increase the chances of bacterial infection, leading to spoilage.
- Excessive shaking and agitation of yeast can negatively affect enzymatic activity, eventually causing fermentation issues.
- Not following instructions regarding the appropriate temperature range during shocking could compromise yeast performance.
- Shocking yeast at the wrong stage of growth or maturity can delay fermentation and slow down or halt its activities entirely.
- Exposure to oxygen during shock treatment can cause oxidation defects and deteriorate product quality.
It is vital to ensure proper safety measures are taken when handling yeast as it is essential for the success of many baking and brewing processes. Paying close attention to each particular detail from ingredients selection, procedure implementation to environmental control significantly reduces detrimental risks.
Yeast has a long-standing history, dating back thousands of years. Its first recorded instance was found in ancient Egypt around 4,000 BC. Later documents discovered evidence of this organism’s use for food production throughout several historical eras. Its importance remains undiminished in modern-day scenarios as it plays a significant role in various manufacturing industries today.
Clearing Beer: Techniques and Tips
To clear your beer effectively, this section will provide you with techniques and tips for brewing enthusiasts. Use secondary fermentation, and employ a clarifier to get the perfect look and taste of your beer. These sub-sections will give you a deeper understanding of how to improve the clarity and flavor of your beer.
Secondary Fermentation
After the initial fermentation, a process known as the maturation stage arises. Fermenting beer for an additional time enables flavors to deepen and undesirable compounds to filter out through this natural clarifying process known as ‘Brewer’s Clarification’. To achieve the desired natural clarifying process, follow these five crucial steps during post-fermentation:
- Transfer your batch from the primary fermenter into another well-sanitized vessel.
- Seal tightly and store in a cool place between 35 to 65°F (2 to 18°C).
- Add your desired flavorings or dry hops if applicable.
- Wait for approximately two weeks.
- Transfer beer into bottles carefully while avoiding any exposure to oxygen.
During secondary fermentation, some unique details come into play depending on your recipe and type of brew. Natural CO2 from residual yeast activity can cause over-carbonation in bottled beer – making it essential to open bottles occasionally for burping post-conditioning & cold storage. It is a fact that clearing beer is both an art and science as brewers continuously experiment with various techniques and ingredients to create perfect clarity that is pleasing not only visually but also tastes great! So be patient during secondary fermentation as it can take longer than one expects! Clarifying beer is like putting on glasses – it clears things up so you can see the good stuff.
Using a Clarifier
Clarifying Beer: The Professional Way
When it comes to beer making, using a clarifier is an essential step in achieving the desired clarity and appearance.
Here’s a quick 5-step guide to help clarify your beer like a pro:
- Prepare the clarifier as per its instructions.
- Add it to your beer when it is at the right temperature.
- Keep stirring continuously for about 15-20 minutes to allow even distribution of the clarifier.
- Let the solution settle for about 24 hours before racking or bottling.
- The clarified beer can now be enjoyed, or aged further based on your preference.
Notably, using natural clarifiers such as Irish Moss or Whirlfloc tablets may provide better results than their synthetic counterparts.
Interestingly, Stanley G. Ganes, in his book “Brewing Lager Beer,” recommends using milk as a clarifying agent due to its beneficial protein coagulation effects.
You know what they say, a spoonful of sugar helps the beer go down… sweeter.
Achieving a Sweeter Beer: Tips and Tricks
To achieve a sweeter beer, you need to have a good brewing process. When it comes to brewing, specific gravity is essential in achieving your desired sweetness level. In this section on achieving a sweeter beer with tips and tricks, we will discuss the importance of stopping fermentation and precipitating yeast to clear your beer. Furthermore, we will examine the benefits of choosing the right yeast and adding fruits or sweeteners to your brew.
Choosing the Right Yeast
When it comes to making delicious beer, selecting the appropriate yeast is crucial. Choosing the optimal Yeast Strain is essential to achieving a favorable flavor and aroma in your final product.
As shown in the table below, different Yeast varieties produce various flavors and aromas. Temperature tolerance and alcohol tolerance also play an essential role in determining the right yeast strain.
| Type of Yeast | Flavor Profile | Fermentation Range |
|---|---|---|
| Ale Yeast | Fruity, Sweet | 60-75°F (15-24°C) |
| Lager Yeast | Crisp, Clean | 46-59°F (8-15°C) |
| Belgian Yeast | Spicy, Fruity | 65-80°F (18-27°C) |
| Wheat Yeast | Clove-like, Banana | 68-72°F (20-22°C) |
It’s worth noting that if you’re fermenting high-gravity beers with an alcohol content of more than 7%, you’ll need yeast strains with higher alcohol tolerance levels. Additionally, some yeasts work better when used in combination with other strains.
Whether we realize it or not, yeast has been a staple ingredient for thousands of years when brewing beer. It was only after Louis Pasteur’s discovery that yeast played a vital role that we started to understand its use in brewing. Today there are over 1,500 documented yeast strains worldwide used commercially or independently by home brewers across the world.
Who needs sugar when you can just toss a fruit salad into your beer?
Adding Fruits or Sweeteners
To Enhance the Flavour and Aroma of Your Beer
Adding natural sweeteners or fruits can help take your beer to the next level. Here are some tips:
- When selecting fruit, choose fresh, ripe produce without any mold or bruises.
- Sanitize the fruit by rinsing it in a mixture of water and sanitizer before adding it to the beer.
- If using sweeteners, such as honey or maple syrup, add them during primary fermentation for better results.
- For a stronger flavor profile, add fruit directly to the primary fermenter.
- To avoid over-sweetening your beer, add sweeteners gradually, giving the yeast time to adjust.
- Finally, taste frequently while making adjustments until you achieve perfection.
For best results with adding fruits or sweeteners to your beer, it is essential to choose quality ingredients. By layering flavors strategically and experimenting with different produce combinations and sweetening agents, amateur brewers can masterfully elevate the flavor profiles of their beers.
Fun fact: Some historical breweries used botanicals like yarrow instead of hops for bittering their beers.
Get ready to crash the party with these tips for a successful cold crash, because there’s nothing sweeter than a crystal clear and refreshing beer.
Summary and Tips for Successful Cold Crashing
Cold crashing method is crucial in brewing beer. Here are some tips to help make your cold-crashed beer taste better:
- Check Specific Gravity: Before stopping fermentation, make sure your beer has fermented enough to precipitate yeast
- Stop Fermentation: Add potassium metabisulfite and potassium sorbate to stop fermentation process allowing yeast cells to settle
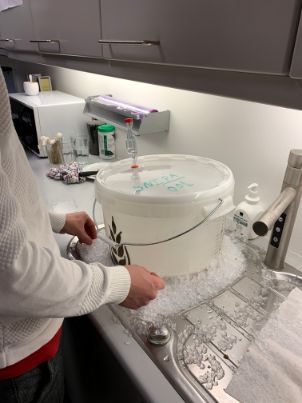
- Precipitate Yeast by Shocking: Cold shock yeast by pouring ice-cold water into the fermenter. Shocking stimulates the yeast to fall out of suspension quicker
- The Clear Solution: Keep the container still for at least 24 hours for the remaining yeast cells particles to settle on top of each other at the bottom of the fermenter
The temperature and steep time depend on various factors, including type and batch size. For further details on specific requirements, consult a local brewery expert or follow online brewing communities.
Once a home-brewer tried cold crashing in his garage but couldn’t get it right because he did not understand that timing is essential when partial solutions are being added intermittently during the process. Therefore, following proper instructions is necessary for success in cold crashing.
Frequently Asked Questions
Q1. What is “cold crashing” in beer brewing?
A1. “Cold crashing” refers to the process of rapidly lowering the temperature of your beer after fermentation has completed, which helps to precipitate yeast and other solids to the bottom of the carboy or fermenter.
Q2. How do I know when my beer is ready for cold crashing?
A2. You should take a specific gravity reading of your beer with a hydrometer once fermentation has slowed, and again after a few days. If the gravity readings remain consistent, you can assume that fermentation has finished and your beer is ready for cold crashing.
Q3. Can cold crashing stop fermentation?
A3. No, cold crashing will not completely stop fermentation, but it can significantly slow down yeast activity and encourage the yeast to settle to the bottom of the fermenter.
Q4. How do I “shock” or “shiver” my beer during cold crashing?
A4. To shock or shiver your beer during cold crashing, simply lower the temperature of the beer by several degrees at a time until the target temperature is reached. This can help to increase the rate of yeast precipitation.
Q5. What is the benefit of cold crashing for clearing my beer?
A5. Cold crashing can greatly improve the clarity of your finished beer by encouraging yeast and other particles to settle out of suspension and collect at the bottom of the fermenter. This can result in a clearer, brighter beer with less sediment.
Q6. Will cold crashing make my beer sweeter?
A6. In some cases, cold crashing can result in a slightly sweeter beer by preventing the yeast from consuming all of the available sugars. However, this effect is generally minor and can be controlled by adjusting your recipe and fermentation temperature.