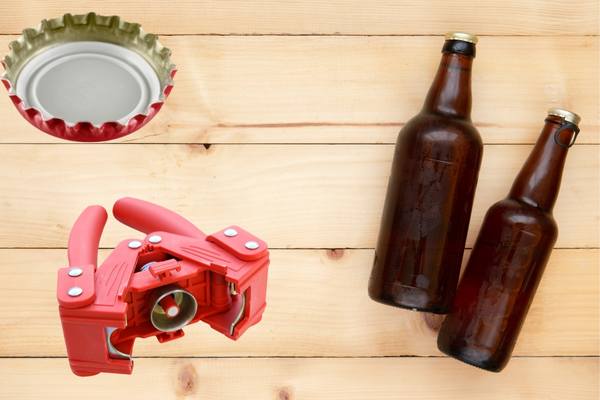
Making your own cider is a simple process. It only requires some simple equipment and a few steps.
For small batches, the best way to grind apples for cidermaking is using a cider mill, but you can even use an electric kitchen blender or juicer. For larger commercial-sized batches, you will need to use a larger electric apple grinder.
Depending on your preference, most amateur cider makers grind apples with an electric or manual cider mill.
Some people own their own medium-sized apple mills, whereas others rent a large electric mill once a year to get the job done.
Personally, I have tried both. And I even still make experimental cider batches using a kitchen juicer machine!
This article provides details on using all these options so you can decide on what is best for you!
How to grind apples for cider?
Grinding apples for cider is an important step in the cider-making process. Apples need to be ground into a pulp before they can be pressed and fermented.
There are several different methods of grinding apples that can be used, depending on the size of your batch and the equipment you have available.
Small Batch Grinding: For small batches, it’s possible to grind apples by hand using a food processor or blender. This method works best with soft varieties such as McIntosh or Honeycrisp, which break down easily when blended.
7 Liter Fruit and Apple Crusher
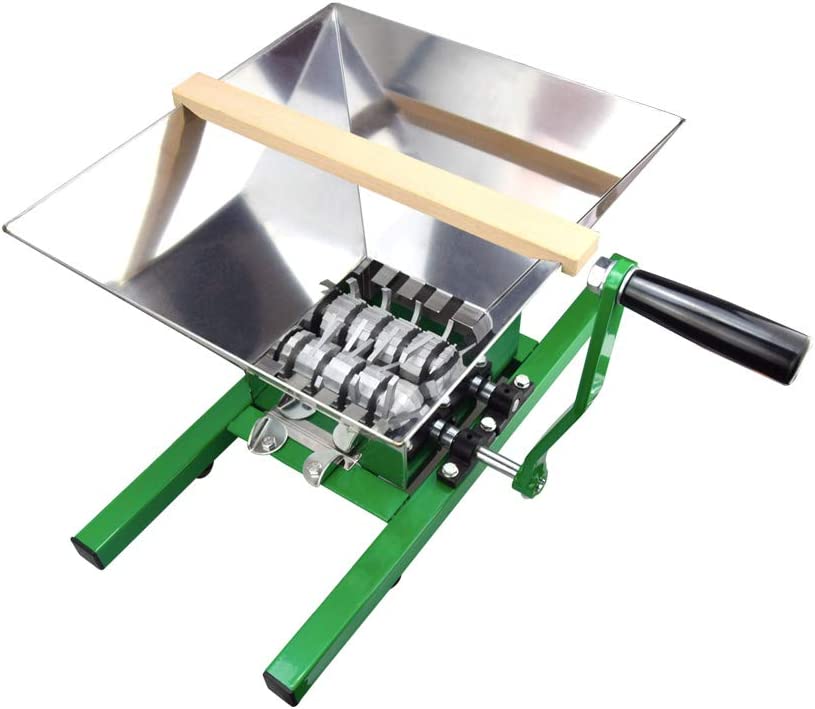
Solid Starter Option
Can be used manually or with an electric drill. You can buy it with a stand or buy the “legs” separately.
- Great value for money
- Can grind up to 45 kg of fruit in an hour.
- Great for apples and pears
- Easy to clean stainless steel
- Also comes with a stand for better working height
Start by cutting the apples into chunks and removing any stems or seeds. Then place them in a food processor or blender and pulse until they reach desired consistency (generally about 1/4 inch pieces). If needed, add some water to help facilitate blending.
Large Batch Grinding: For larger batches of cider, electric apple grinders are often used to quickly process large amounts of fruit at once. These machines typically consist of two stainless steel rollers mounted on an adjustable frame that is powered by either an electric motor or manual crank handle (depending on model).
The rollers rotate against each other while pushing the fruit through them; this action breaks down the cell walls within the apple pieces creating a fine pulp suitable for pressing juice from later on in the process.
Electric models usually come with rotating knives or hoppers that allow you to load up multiple bushels worth of apples at once; manual versions require more labor but offer greater control over how much pressure is applied during grinding since you’re able to adjust tension manually between passes if necessary..
Industrial cider mills are designed specifically for processing large volumes of fruit quickly and efficiently, making them ideal for commercial operations producing hundreds or even thousands of gallons per day.
They work similarly to electric grinders except instead of having two rollers rotating against each other, these machines feature four rotating blades which shred whole fruits into tiny pieces without crushing their pips/seeds, ensuring maximum juice extraction efficiency during pressing later on in the production cycle.
Additionally, industrial mills also come equipped with additional features like automated sorting systems which separate out bad/rotten fruits automatically before they enter the grinder chamber, thus reducing waste significantly compared to traditional methods where all fruits must go through the same process regardless of quality state etc.
Do you need to crush apples before pressing?
Yes, you absolutely do if you want a good yield. One of the first questions you’ll probably ask yourself when making cider at home is “why you cannot just add the apples directly to a press and get the pressing done?”
Pressing is only going to work well if you crush your apples. If you don’t, you will miss out on so much delicious apple juice. And we are talking 50 to 90 percent higher yield here (depending on your press)!
Another benefit of grinding apples finely before pressing is the option of letting them undergo so-called “maceration” which allows the tastes from the peal and other apple components to be extracted as well.
First, no matter the grinding method, it is important to make sure you have sound fruit. You want to avoid moldy or rotten fruit when making cider. If you’re using windfall apples, make sure to clean them thoroughly first.
Size doesn’t matter much, although small fruit will produce less juice than large, juicy apples. The general rule is that if you wouldn’t eat the fruit, it’s probably not good for cider, but you can often get away with going a bit beyond that!
Once you’ve washed the apples, you’ll need a dedicated crusher for larger portions (> 2 gallons). A crusher can be purchased separately or built into an apple press.
Sometimes crushers are attached to the top of the press and work by feeding washed apples into the crusher and out comes juice, but most apple or cider mills are separate manual or electric machines with a set of grinders that crush the apples.
Crush apples using a manual or electric grinder
Crushing apples is the first step in cider making (if you don’t consider growing the apples…), and is essential to extract the most amount of juice from them.
Apples have high-pressure resistance, so they need to be broken down into smaller pieces to release juice. Commercial cider presses always use finely ground apples to feed them, whereas amateur ones can vary substantially in the size of the output.
Apple grinders can be manual or electric. Electric apple grinders are easier to use, since they will do most of the work for you! But you need to be sure that you have a nearby power outlet in your yard, as these machines only run on electricity and cannot be used manually.
Electric grinders will also be more prone to failure and can be harder to repair if something stops working. However, good quality electric grinders will easily last decades in the right hands.
Before using any type of grinder, make sure to rinse the apples thoroughly to remove any foreign objects that could damage the blades or contaminate the cider.
Some cider-making handbooks recommend washing the fruit before pressing it, and I would as well.

A garden hose is an excellent way to get rid of soil, and an old washtub with holes makes a good container. Likewise, washing fruit isn’t necessary if it is hand-picked organically but this is a matter of personal preference.
Most manual cider presses can handle up to 7 kilos of fruit at a time, whereas electric ones come in larger sizes that can handle up to 50 kg.
Using an electric cider mill
Crushing apples is one of the first steps in making cider. This process is crucial to maximize the yield of juice.
Electric cider grinders are by far the most efficient and will usually yield more juice than manual grinders.
However, they do require electricity. If you use one of the electric ones, you will need to make sure you have access to three-phase power. In the U.S., this type of power can supply up to 230 volts.
You can see an example of an electric apple grinder and the preparation process in the video below.
If you want to make cider at home, a smaller electric cider mill may be a good option for you.
These machines can grind apples up to a fairly fine pulp in a few minutes and are much more convenient, but more expensive, than manual ones.
However, the electric mill also allows for more production, which means you will have more profits and lower production costs if you intend to sell your cider.
Using a manual cider mill
The basic principle of using a manual cider mill is the same as an electric one. Just harder. The resulting pulp is often a more rough, but soft, mushy mixture with visible chunks of apple flesh.

A small inexpensive manual grinder is a good place to start!
A good manual grinder, however, can last even longer than an electric one and there is something satisfying in doing the actual grinding work yourself. You have full control over speed and pressure and fewer components that can break!
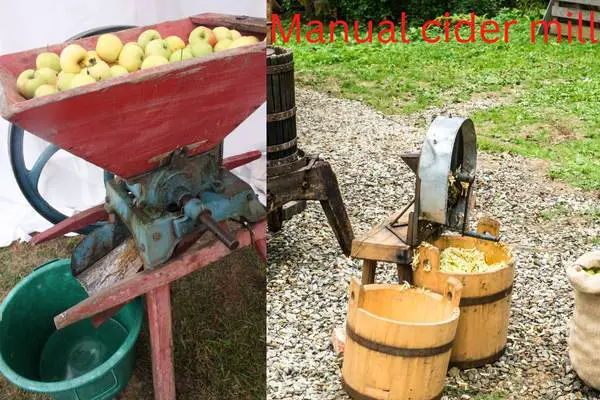
Therefore, manual cider mills are a good choice for beginners and also because they are cheaper than electric grinders.
Manual apple mills do, however, often need more people to operate as one is busy turning the handle for the grinding gears to turn, whereas someone else is needed for refilling and pressing the apples down into the grinding blades.
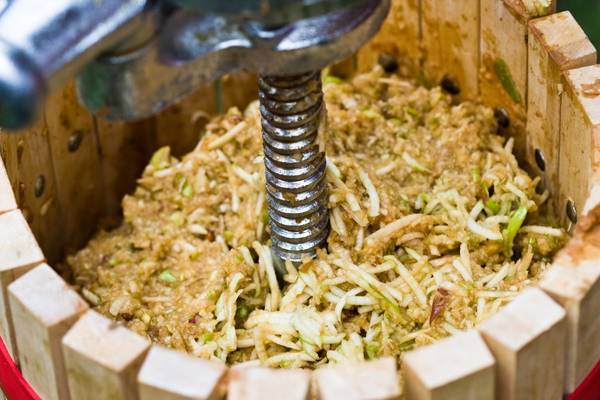
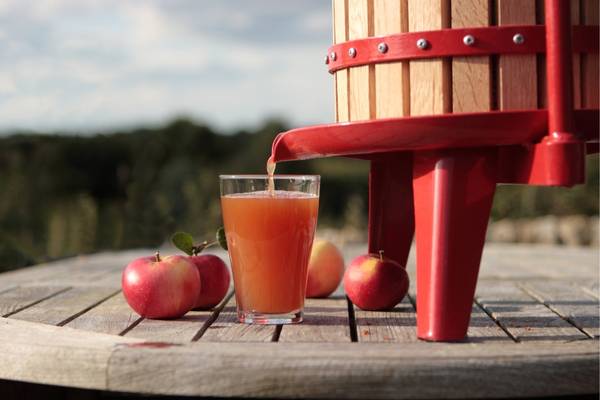
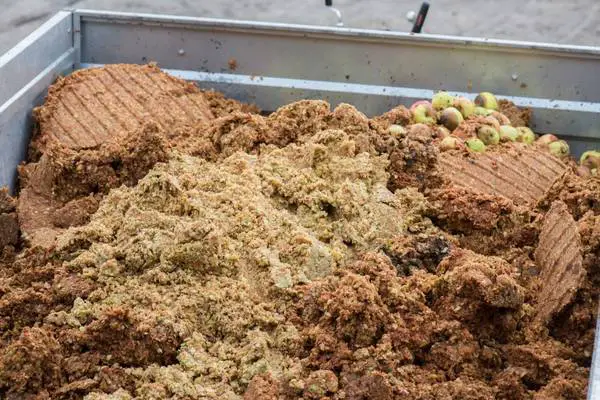
The remaining process is simple and straightforward. After crushing the apples, the cider press releases the juices into the bucket below. You can empty the remaining pulp into a trash bin if you don’t need that much juice.
The juice collected in the mash is then filtered through a polyester cloth, which is draped over the bottom of the press. This step ensures that no seeds are left behind in the finished apple cider.
The juice then oxidizes into a rich amber color. The “froth” of apples will settle on top of the juice and can be skimmed off.
Once the cider has settled, you can add your yeast of choice (or not!) and start to ferment.
Using an electric fruit juicer for small portions
If you’re interested in creating a smaller portion of fresh, homemade cider at home, using an electric fruit juicer can be a great option. The juicer liquefies the ingredients in a matter of minutes, making the process convenient and fast as it does the mashing and pressing in one step!
However, you will need to prepare the fruit a bit more beforehand, so be sure to remove the seeds and outer skins from citrus fruits. It’s important to also remove the pits from stone fruits, as these contain toxic compounds that can harm your health when ground in an efficient juicer.

A small juicer can be used to make a few liters of juice at a time.
Another good thing about preparing the apples well is that the pulp can be reused for other recipes such as apple pie, but I usually add a bit of the juice back in as it can be quite dry…
When using an electric fruit juicer for small amounts of cider, it’s important to clean all parts thoroughly.
The plastic parts of the juicer can be cleaned by putting them into the dishwasher. The pulp bin container should also be emptied by turning off the juicer.
Fortunately, there are affordable juicers available that use anywhere from 100 watts to 1000 watts of power. The best juicers for apple juice should be above 600 watts as it can be tough on the motor (I have had one burn out on me…)!
Some juicers feature a pressure-activated reamer and a drip-free spout etc and some juicers can also function as a pitcher, collecting the pulp in a separate basket.
Many of these features are nice, but not necessary to have for cider making!
How to crush apples for cider without a cider mill
If you do not have a cider mill, you can still crush apples by hand or using simple tools. A good tip is to freeze the apples first so that they will be easier to crush with a heavy tool or a blender.
If you don’t have a press, don’t worry: you can crush apples by hand with a large bucket and a clean piece of timber.
However, you’ll need to be patient and work fast. Also, don’t forget to freeze the apples before crushing them. This will make them easier to process further down the line and let more juice out as you have already “opened up” some of the juicy cells of the apples by creating ice crystals (expanding water).
Crushing apples by hand is a very basic method though, and you can use many different heavy tools to do so. You can also improvise your own solution and use whatever hammer, steel rod or hard wood you have laying around.
After crushing the apples, you’ll need a press. There are several different types of apple presses, and each one has a different purpose.
But pressing and juice extraction is a subject for another post…
Conclusion
The first step to making cider is to grind the apples. The grinding process will make the pressing process go more quickly and easily. However, if you don’t have a grinder, chopping and juicing the apples is another option. You can also use a food processor or blender.
Either way, the best way to do it is to get a good-quality apple mill!
After the apples are washed, they are placed in a large mill to create a fine pulp. The pulp should, generally, be pressed as soon as possible.
This allows for maximum extraction of juice and minimizes oxidation. A portion of the pulp can be used for the cider-making process, or frozen and stored for use all year round.
In case you are making hard cider, this will leave the sugar, water, and other nutrients for the yeast, which will start fermentation and produce a fantastic sparkling experience!