As a long-time brewer and cider enthusiast, I’ve had my fair share of experiences with crafting the perfect hard cider. One question that I’ve encountered time and time again from fellow brewers is, “How long does it take for hard cider to clear on its own?” It’s a valid question, as clarity is an essential aspect of a well-made cider.
The answer to this question is that it generally takes about 2 to 4 weeks after fermentation for hard cider to clear on its own.
However, this time frame can vary depending on factors such as the type of apple juice used, fermentation conditions, and yeast strain.
Storing the cider cold will speed up the clearing, and certain clearing agents can be added too.
To help guide you through the process of achieving a clear hard cider, I’ve broken down this post into nine subheadings that will address everything from the importance of clarity to tips and tricks for speeding up the clearing process. So, grab a glass of your favorite cider and let’s dive in!
1. The Importance of Clarity in Hard Cider
Clarity is important in hard cider for a few reasons. Firstly, a clear cider is more visually appealing, as it allows the natural color and brightness of the cider to shine through.
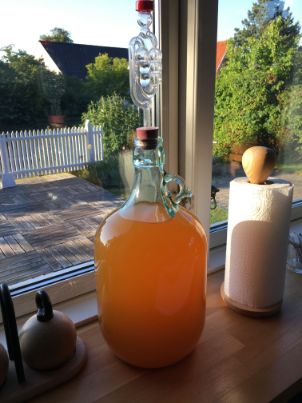
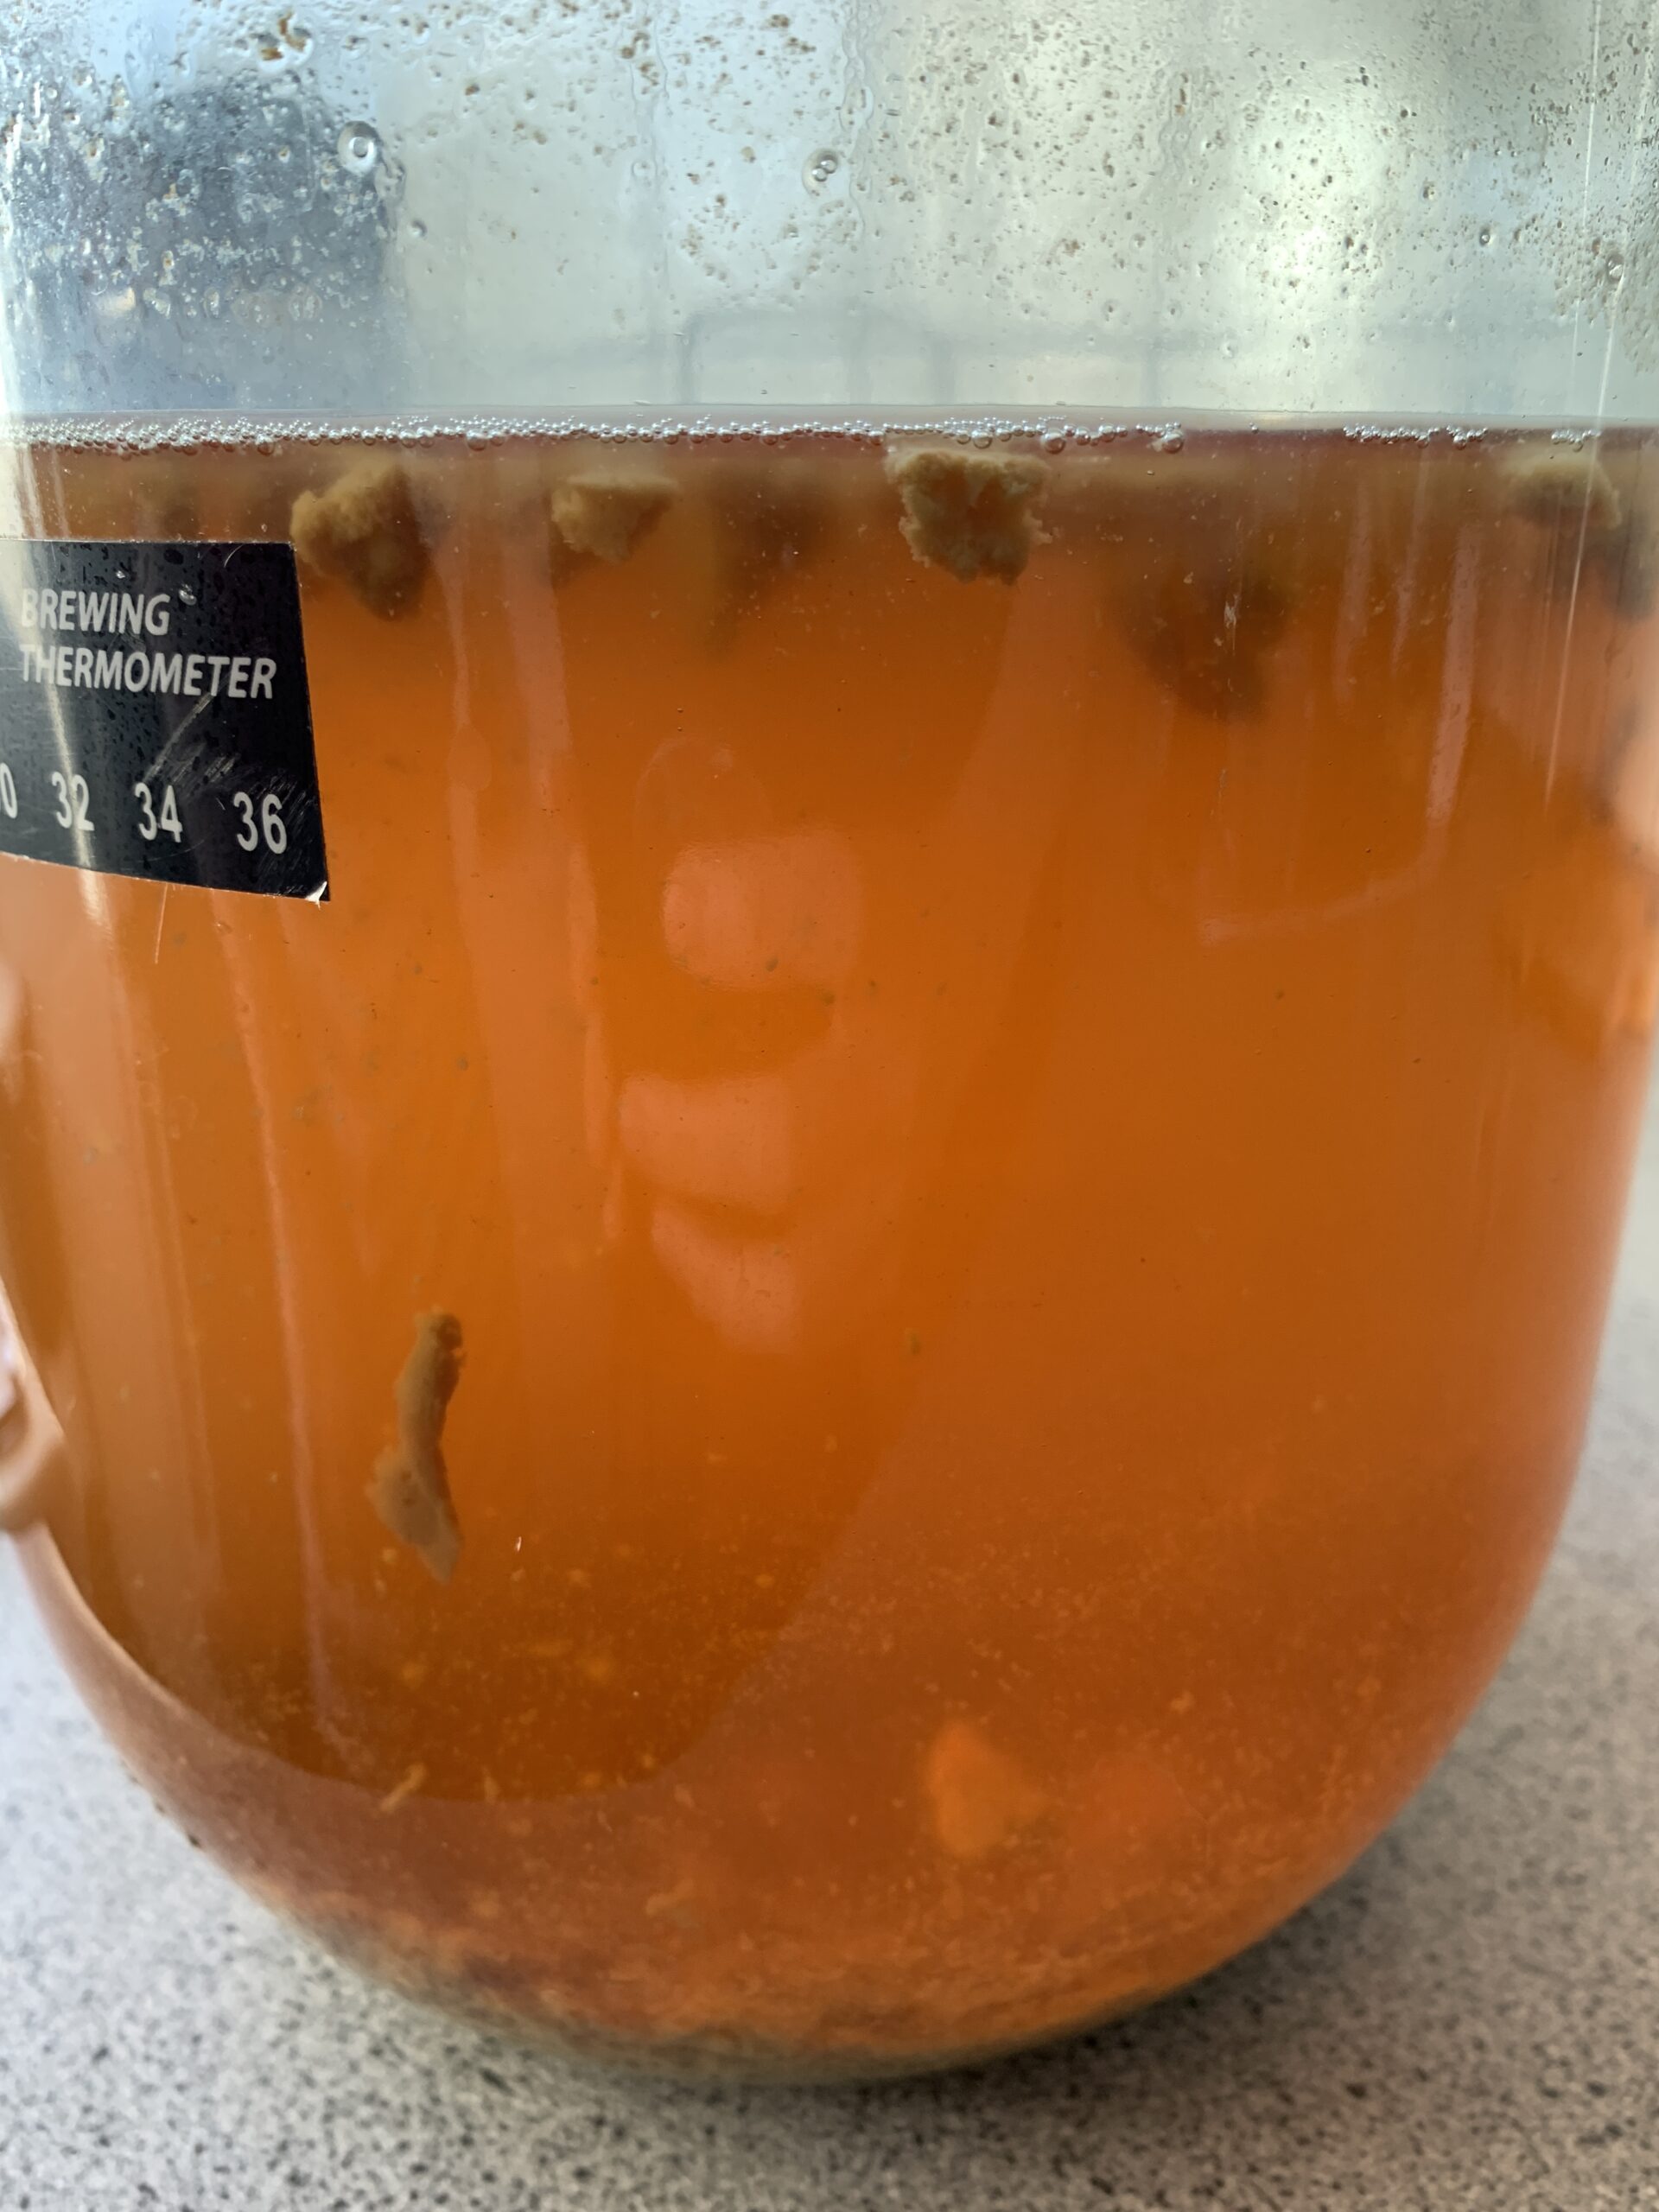
The difference between a hazy fermenting cider and a cleared cider ready to bottle!
Secondly, a clear cider often indicates that it has been properly fermented and aged, which can lead to better flavor and aroma. Lastly, clarity can be a sign that your cider is free from any unwanted particles or impurities that may have been introduced during the brewing process.
2. Factors That Affect Cider Clarity
There are several factors that can impact the clarity of your hard cider, including:
- Type of apple juice used (fresh-pressed vs. store-bought)
- Yeast strain
- Fermentation temperature
- Time allowed for cider to age and settle
Being aware of these factors can help you make informed decisions throughout the brewing process to ensure that your cider clears in a timely manner.
3. The Role of Pectin in Cider Clarity
Pectin is a naturally occurring substance found in the cell walls of fruits, including apples. During the cider-making process, pectin can be released into the juice, causing it to become cloudy. High-pectin apple varieties are more likely to produce a hazy cider, so it’s essential to be aware of the type of apples or apple juice you’re using.
There are commercial pectinase enzymes available that can help break down the pectin in your cider, resulting in a clearer final product. These enzymes are typically added during the fermentation process.
4. The Role of Yeast in Cider Clarity
The yeast strain you use for fermentation can also impact the clarity of your hard cider. Some yeast strains are known to produce clearer ciders, while others may result in a hazier final product. For example, champagne yeast strains are often recommended for cider-making, as they tend to produce a clearer cider compared to other strains.
In addition to the type of yeast used, the health and vitality of your yeast can also play a role in cider clarity. A healthy, active yeast population will be more effective at consuming the sugars in your cider, which can help to reduce cloudiness.
5. The Impact of Fermentation Temperature on Cider Clarity
Fermentation temperature can also have a significant impact on the clarity of your hard cider. Lower fermentation temperatures (around 60-65°F / 15-18°C) are generally recommended for cider-making, as they can help to promote a slower, more controlled fermentation process. This can lead to better clarity in the final product, as yeast and other particulates have more time to settle out of the cider.
However, it’s essential to be aware of the temperature tolerance of your chosen yeast strain, as some strains may not perform well at lower temperatures.
6. Allowing Time for Cider to Age and Settle
Patience is key when it comes to achieving a clear hard cider. As mentioned earlier, it can take anywhere from 2 to 4 weeks for your cider to clear on its own. This time frame allows for the yeast and other particulates to slowly settle out of your cider and form a layer of sediment at the bottom of your fermentation vessel.
Resist the temptation to rush the process by bottling or kegging your cider too soon. Doing so can result in a cloudy final product and may even lead to off-flavors or increased sediment in your bottles or kegs.
7. Using Fining Agents to Speed Up the Clearing Process
If you’re in a hurry to achieve a clear cider, there are several fining agents available that can help to speed up the clearing process. Fining agents work by binding to particles in your cider, causing them to become larger and heavier, which allows them to settle out more quickly. Some common fining agents used in cider-making include:
- Bentonite
- Gelatin
- Isinglass
- Sparkolloid
Keep in mind that some fining agents are derived from animal products, so be sure to choose a fining agent that aligns with your personal preferences or dietary restrictions.
8. Keeving your cider
Keeving is a traditional method of making hard cider that originated in France. It involves creating a naturally sweet and sparkling cider by allowing the pectin in the apple juice to settle and form a layer, known as the “chapeau brun” or brown cap, which helps retain the cider’s natural sugars. This guide will take you through the process of keeving hard cider, step by step.
Ingredients and Equipment:
- Fresh apples (preferably cider apples)
- Pectinase enzyme
- Yeast (optional, for fermentation)
- Sulfite (optional, for preservation)
- Keeving agents (such as calcium chloride, tannin, and bentonite)
- Fermentation vessel (glass carboy or food-grade plastic container)
- Airlock and bung
- Siphoning tube
- Hydrometer (for measuring specific gravity)
- Bottles for storing the finished cider
Procedure:
- Selection of Apples:
- Choose a mix of sweet, acidic, and bittersweet cider apples for a balanced flavor profile.
- Avoid using apples treated with pesticides or wax.
- Milling and Pressing:
- Wash the apples thoroughly and remove any bruised or rotten parts.
- Use a fruit mill or grinder to crush the apples into a pulp.
- Press the pulp to extract the juice. A cider press or a clean cloth wrapped around the pulp and squeezed tightly can be used.
- Pectinase Treatment:
- Transfer the juice to a clean fermentation vessel.
- Add pectinase enzyme to the juice according to the manufacturer’s instructions.
- Stir well and cover the vessel with a clean cloth or lid.
- Initial Settling:
- Allow the juice to settle at a cool temperature (around 45-55°F/7-13°C) for about 12-24 hours.
- During this time, the pectin in the juice will form a brown cap, which will trap impurities and create a natural sweetness.
- Racking:
- Gently siphon the clear juice from above the brown cap into a new fermentation vessel, leaving behind the sediment.
- If desired, add yeast and sulfite at this stage for fermentation and preservation, respectively.
- Keeving Process:
- Add keeving agents such as calcium chloride, tannin, and bentonite to the clear juice, following their respective instructions.
- Stir gently to dissolve the agents and promote further settling.
- Place an airlock and bung on the vessel to allow gas to escape during fermentation.
- Fermentation and Aging:
- Store the keeved juice at a cool temperature (around 55-65°F/13-18°C) for slow fermentation.
- The fermentation process may take several weeks to several months.
- Once fermentation is complete, the cider can be aged in the same vessel or transferred to individual bottles.
- Bottling:
- Use a siphoning tube to transfer the keeved cider into clean, sterilized bottles.
- Leave some headspace in each bottle to allow for carbonation.
- Seal the bottles with crown caps or champagne corks, ensuring a tight seal.
- Conditioning:
- Store the bottles in a cool, dark place for a period of conditioning.
- This will allow the cider to carbonate naturally, creating a delightful sparkle.
- Enjoyment:
- After conditioning for a few weeks or more, your keeved hard cider will be ready to enjoy.
- Serve chilled and savor the

9. Cold Crashing Your Cider
Another technique that can help to speed up the clearing process is cold crashing. Cold crashing involves lowering the temperature of your cider to near-freezing temperatures (around 32-40°F / 0-4°C) for a short period (typically 24-48 hours).

This rapid temperature drop causes yeast and other particles to settle out of the cider more quickly, resulting in a clearer final product.
It’s essential to ensure that your fermentation vessel can withstand the colder temperatures and that you’re able to maintain a stable temperature during the cold crashing process.
10. Racking Your Cider Often
Racking is the process of transferring your cider from one vessel to another, leaving the sediment behind. This process can help to separate your cider from any settled yeast or other particles, resulting in a clearer final product.
You may need to rack your cider multiple times throughout the aging process to achieve the desired clarity.
Be careful not to introduce oxygen into your cider during the racking process, as this can lead to oxidation and off-flavors.
Conclusion
To sum up, it generally takes about 2 to 4 weeks for hard cider to clear on its own. However, various factors can impact the clarity of your cider, such as the type of apple juice used, yeast strain, fermentation temperature, and the time allowed for the cider to age and settle. If you’re looking to speed up the clearing process, consider using fining agents, cold crashing, or racking your cider.
Here are ten quick facts about hard cider clarity:
1. Clarity is important for visual appeal, flavor, and aroma.
2. Factors affecting clarity include apple juice type, yeast strain, fermentation temperature, and aging time.
3. High-pectin apple varieties can produce cloudier ciders.
4. Yeast strain selection can impact cider clarity.
5. Lower fermentation temperatures (around 60-65°F / 15-18°C) can promote better clarity.
6. Patience is key; allow 2 to 4 weeks for your cider to clear on its own.
7. Fining agents can be used to speed up the clearing process.
8. Cold crashing can help to clear your cider more quickly.
9. Racking your cider can improve clarity by separating it from sediment.
10. Always be mindful of potential oxidation during the racking process.
FAQs
Why won t my hard cider clear?
There could be several reasons why your hard cider won’t clear, including incomplete fermentation, high pectin levels, or insufficient fining agents. It’s important to troubleshoot each of these potential issues to determine the root cause and take appropriate steps to clarify your cider.
How do you make your hard cider clear?
To make hard cider clear, you can use fining agents such as gelatin, isinglass, or bentonite, which will help to clarify the cider by binding to the particulate matter and settling it to the bottom of the container. You can also use time and cold temperatures to allow the sediment to settle naturally.
How long does it take for cider to turn into vinegar?
It typically takes about 2-4 weeks for cider to turn into vinegar, but the exact time can vary based on factors such as temperature and the presence of vinegar bacteria.
How long does it take for a mother to form in apple cider vinegar?
It takes approximately 2-4 weeks for a mother to form in apple cider vinegar.
Does apple cider vinegar get too old to use?
Apple cider vinegar does not expire or get too old to use, but its quality and taste may deteriorate over time. It is recommended to use it within 5 years of opening and store it in a cool, dark place.
How do I know if my cider has turned to vinegar?
If your cider has turned to vinegar, it will have a strong, sour taste and smell like vinegar. Additionally, you may notice a cloudy appearance and the presence of a gelatinous substance called “mother” floating in the liquid.