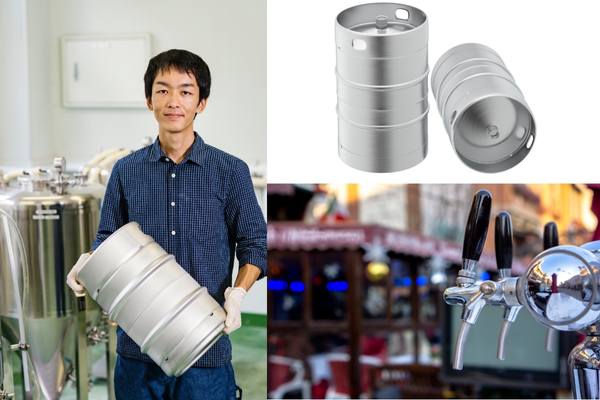
Are you looking to take your hard cider brewing game up a notch? Kegging hard cider is an excellent way to store and serve it.
Not only will kegging give you the convenience of having easy access to freshly tapped, carbonated hard cider whenever you want, kegging hard cider allows you to control the carbonation level, so you can enjoy your cider exactly how you like it.
Kegging also makes serving and storing large quantities of cider much easier.
In this blog post we’ll cover everything from why kegging can be advantageous for homebrewers all the way through tips and troubleshooting for serving hard cider from a keg.
In this article, we’ll show you everything you need to know about kegging hard cider, from setting up your system to filling and serving your finished product.
What Is Kegging?
Kegging is a process of transferring cider into a pressurized container, typically a Cornelius keg, for storage, force carbonation and serving. This allows the cider to be stored for longer periods of time without losing carbonation or flavor.
Kegging also makes it easier to serve hard cider on draft as no manual pumping is required. The most common type of container used for kegging is called a Cornelius Keg, which holds about 5 gallons (19 L) of liquid.
There are two main types of Cornelius Kegs:
Ball lock and pin lock fittings. Ball lock fittings have a quick connect/disconnect coupling that uses balls to seal in pressure, while pin lock couplings use pins.
Both work equally well; however, some people prefer one over the other because they find either the disconnecting or connecting action easier. Cornelius Kegs were originally used by the Coca-Cola company to store and distribute their syrup.
They have become popular among homebrewers because they are durable, easy to clean, and relatively inexpensive.
Most importantly for cidermakers, they allow for a good seal so that no oxygen can enter the keg during storage or serving, which would cause oxidation of the cider.
Main Takeaway: Kegging is a process of transferring cider into a pressurized container, typically a Cornelius keg, for storage, force carbonation and serving. This allows the cider to be stored for longer periods of time without losing carbonation or flavor.
Why Would You Want to Keg Your Cider?
Kegging cider has a few major benefits that make it an attractive option for home brewers. For starters, kegging cuts down on the amount of time needed to bottle your cider. Instead of having to fill and cap each individual bottle, you can simply transfer your finished product into a keg and be ready to serve in no time.
Secondly, carbonating your cider is much easier with a keg than with bottles. When bottling, you have to add priming sugar or wait several weeks for natural carbonation before serving.
With a keg system, however, you can force-carbonate quickly and easily by adjusting the pressure inside the vessel—allowing you to enjoy your hard cider sooner!
Thirdly, kegs take up less space than cases of bottled cider would require—which makes them ideal if storage space is limited or if you’re looking for portability when taking your homebrew out and about.
Finally (and perhaps most importantly!), serving from a keg just looks cooler than popping open a bunch of bottles! It also allows guests at parties or events to help themselves without needing assistance from the host—saving everyone time and hassle while still providing delicious refreshment throughout the night!
All in all, there are many reasons why home brewers may want to switch from bottling their hard ciders to using a kegging system. These include convenience, speed, cost savings and style points.
Kegging your cider is a great way to store and serve your hard cider with ease, so let’s take a look at the process of kegging it.
Choosing the Right Equipment
Kegs: When it comes to kegging hard cider, there are a few different types of kegs available. The most common type is the stainless steel Cornelius-style keg, which holds 5 gallons and is pressurized with CO2.
This type of keg is easy to use and maintain, making it a popular choice for home brewers. Another option is the plastic soda keg, which holds 2.5 gallons and can be used in place of a Cornelius-style keg if you don’t need as much capacity or want something lighter weight.
CO2 System: A CO2 system consists of two main components – the regulator and the tank – that work together to provide consistent pressure for carbonating your hard cider.
The regulator controls how much pressure goes into the tank while also allowing you to adjust the level of carbonation in your cider by adjusting its output pressure setting.
The tank stores compressed gas (usually CO2) that powers your system when needed. It’s important to choose a regulator and tank that are compatible with each other so they will work properly together.
Faucets & Taps: Faucets and taps allow you to easily dispense your hard cider from your kegs without having to manually pour them out every time you want some hard cider or cider on tap at home or at an event/party/etc.
There are several different types available including traditional faucets, jockey boxes (which keep drinks cold), growler fillers (for filling up bottles), etc.. Depending on what kind of setup you have, there may be certain requirements for what kind of faucet/tap works best with it so make sure do research before purchasing one!
In addition to all the major components, there are several other accessories needed for setting up a complete homebrewing system. These include tubing and hoses for connecting everything together, clamps and gaskets, airlocks, thermometers, hydrometers and more.
But, in theory, you can brew the cider very cheaply without any huge investments.
Although these items may not seem important at first glance, they play an essential role in ensuring that the entire process runs smoothly. Therefore it is important to remember them when putting together your equipment list.
Having the right equipment is essential to making a delicious hard cider. The next step in kegging your hard cider is preparing and carbonating it.
Main Takeaway: Kegging hard cider requires a few different components, such as stainless steel Cornelius-style kegs, CO2 systems with regulators and tanks, faucets and taps for dispensing the cider, and various accessories. It is important to research which type of equipment works best for your setup in order to ensure that everything runs smoothly.
Preparing the Cider for Kegging
Before kegging your hard cider, it is essential to sanitize all of your equipment. This includes any buckets, hoses, airlocks and other tools that will come into contact with the cider.
To do this, you can use a no-rinse sanitizer such as Star San or Iodophor. Make sure to follow the instructions on the package for proper dilution and application.
Carbonating the Cider: Once you have sanitized all of your equipment, it’s time to carbonate your hard cider before transferring it to a keg.
You can do this by adding sugar directly to the cider or using a CO2 system if you are looking for more precise control over carbonation levels. If using sugar, make sure not to add too much as this could lead to bottle bombs!
Transferring To Kegs: After carbonating your hard cider, transfer it from its fermentation vessel into clean and sanitized kegs. It is important that you keep oxygen out of these vessels during transfer so be sure not to splash when filling them up with liquid from higher heights than necessary.
If you are doing carbonation via secondary fermentation rather than force carbonation you will need to add sugar at a level to achie the desired carbonation levels after packaging.
Priming involves adding additional fermentable sugars such as dextrose or honey which will help create natural carbonation within each bottle once they have been capped off and allowed some additional fermentation time prior to consumption.
By following these steps, you will be well on your way to kegging and serving delicious hard cider. Next, we’ll discuss the process of tapping and pouring the cider from a keg.
Maintaining Your Hard Cider Keg System
Maintaining your hard cider keg system is essential for producing the best tasting and highest quality beverage. Keeping it clean, sanitized, and properly pressurized will ensure that you can enjoy a delicious glass of hard cider every time.
Cleaning and Sanitizing the Kegs and Lines: Cleaning your kegs regularly is important to prevent any bacteria or other contaminants from affecting the taste of your cider. You should also make sure to sanitize all lines before transferring new batches into them.
This can be done with a food-grade cleaner or by using a cleaning solution specifically designed for hard cider lines. Make sure to rinse thoroughly after each use so that no residue remains in the lines which could affect flavor or cause off-flavors in future batches.
Adjusting Pressure Settings: The pressure settings on your CO2 regulator should be adjusted based on how much carbonation you want in your finished product as well as what type of container you are serving from (keg vs bottle).
Generally speaking, higher pressures are needed when serving from bottles while lower pressures work better when pouring directly from a keg. It’s important to adjust these settings correctly so that there isn’t too much foam created during pouring which would result in wasted product and an unappealing presentation.
When something goes wrong with your system, such as foaming issues or slow pours due to incorrect pressure settings, it is important to troubleshoot quickly in order to avoid wasting product.
If possible, try adjusting different parts of the system first before replacing components entirely; this will save both time and money. Increase or decrease pressure levels if necessary and check for any other potential causes of the issue.
Maintaining your hard cider keg system is an essential part of the brewing process. With proper care and maintenance, you can ensure that your hard cider will be fresh and delicious for every pour. Next, we’ll discuss how to adjust pressure settings for optimal carbonation levels.
Main Takeaway: Maintaining a hard cider keg system requires regular cleaning and sanitizing of the kegs and lines, as well as adjusting pressure settings based on the desired carbonation level. Troubleshooting any issues quickly is important to avoid wasting product, so it’s best to try adjusting different parts of the system before replacing components entirely.
How Do You Set Up a Kegging System for Cider?
Setting up a kegging system for cider is not as difficult as it may seem. With the right equipment and knowledge, you can have your own keg of hard cider in no time.
First, you’ll need to gather all the necessary components for your kegging system: a CO2 tank and regulator, hard cider lines, fittings, and of course the keg itself. It’s best to have your local homebrew shop assemble the gas side of your system so that everything is properly set up and functioning correctly.
For hard cider lines we suggest using 3/16″ ID beverage tubing – this will minimize foam when serving. Finally, make sure you have a way to keep your hard cider cold either by chilling the keg before serving or by using a dedicated refrigerator (kegerator).
Next step is filling up the keg with cider! This can be done through gravity-filling or pressure-filling depending on what type of setup you are using.
Gravity-filling requires two containers – one filled with sanitized water at room temperature and another container filled with chilled hard cider – connected together via hose clamps or quick disconnects which allow liquid to flow from one container into another without any air bubbles entering into it.
Pressure-filling involves connecting an adapter onto a pressurized carbon dioxide tank which then connects directly onto the top of the empty sanitized keg allowing liquid to flow from one vessel into another under pressure while also pushing out any oxygen present inside it ensuring that there are no off flavors in your finished product due to oxidation caused by oxygen exposure during transfer process .
Once transferred into its new home within an airtight sealed environment provided by being inside a pressurized vessel such as this , now comes time for carbonation process which needs to take place in order for us get desired level of fizziness in our final product.
The amount of CO2 needed depends on how much carbonation we want our drink but generally speaking most ciders require 2–3 volumes of CO2 .
To achieve this level ,we need adjust regulator attached onto our CO2 tank accordingly before attaching it directly onto gas post located at top part our fulled up & sealed off ready-to go mini barrel containing deliciousness awaiting us just few steps away!
Finally, after all these steps are completed, all that is left to do is enjoy a freshly made batch of delicious homemade hard apple cider.
With the right supplies and a bit of patience, you can easily set up a kegging system for cider. Now let’s look at how to carbonate your hard cider.
Main Takeaway: Kegging hard cider is not as difficult as it may seem. With the right equipment and knowledge, you can have your own keg of hard cider in no time. You’ll need a CO2 tank and regulator, hard cider lines, fittings, and a keg to get started. Once filled with cider, carbonation must be adjusted for desired fizziness before serving. Enjoy your homemade hard apple cider!
How Do You Transfer Cider to Keg?
Kegging your hard cider is a great way to store and serve it. It’s easy, efficient, and you can carbonate the cider in the keg for an extra fizzy kick. But before you can enjoy that perfect pint of bubbly goodness, you need to transfer your cider from its fermentation vessel into the keg. Here’s how:
Gather Your Supplies
Before transferring your cider to a keg, make sure you have all the necessary supplies on hand. You will need:
• A sanitized hard cider or soda line with clamps
• An airlock and stopper (if using carboy)
• Sanitizing solution such as Star San or Iodophor
• Your fermentation vessel (carboy or bucket)
• CO2 tank with regulator attached
Sanitize Everything!
The most important step when transferring any beverage is sanitation. Make sure everything that comes into contact with your cider is clean and free of bacteria by thoroughly sanitizing it first.
Use a food-grade sanitizer like Star San or Iodophor according to package instructions; this will help prevent contamination during transfer and ensure a safe product for consumption later on.
Connecting The Line
Once everything has been properly sanitized, connect one end of the hard cider/soda line to the spigot at the bottom of your fermentation vessel (bucket or carboy). Secure it tightly with clamps so there are no leaks during transfer.
Attach an airlock and stopper if using a carboy – this will allow CO2 created during fermentation escape while keeping oxygen out – then attach the other end of the line to either side port on top of your empty keg lid (the side ports are usually marked “IN” & “OUT”). Again secure tightly with clamps so there are no leaks here either!
To transfer the cider, turn off both valves at each end of the hard cider/soda line. One valve should be connected directly to the spigot at the bottom fermenter and the other valve should be connected to the side port atop an empty keg lid.
Then open up the valve connected directly to the spigot at bottom fermenter, allowing gravity to fill up all of hard cider/soda line until it reaches inside of empty keg lid.
Once this is done, opening up second valve will allow flow continue further into now filled-up keg itself, thus completing process of transferring fermented liquid contents from original container over new storage receptacle for use when desired.
Kegging your hard cider is a great way to store and dispense your brew. Next, we’ll discuss the necessary equipment needed for kegging hard cider.
How to carbonate cider in a keg
As a home brewer, one of the main benefits of kegging your hard cider is the ability to force carbonate it. This means that you can add carbonation while keeping a clean, clear look.
Aging and filtering your hard cider will make it look nice and clear, and the last thing you want to do is cloud it back up by bottle conditioning it.
What You Need
The first step in force carbonating your hard cider is gathering the necessary equipment. To do this, you’ll need a CO2 tank, regulator, gas line, picnic tap or other dispensing device, and a keg with all the appropriate fittings. If you don’t already have these items on hand they can be purchased from most home brew supply stores or online retailers.
Then, just follow these steps:
1. Make sure your cider is at the correct temperature. It should be between 35-45°F.
2. Clean and sanitize your keg, lines, and faucet.
3. Fill the keg with cider, leaving at lest an inch of headspace at the top.
4. Close the keg and connect the gas line to the inlet connection, making sure it is secure.
5. Connect your regulator to the CO2 tank and open the valve slowly until you reach the desired pressure. Most ciders are carbonated at around 2-2.5 volumes of CO2. Would be around 12-14 psi in most cases.
6. Open the valve on the gas line and allow CO2 to flow into the keg until it reaches the desired pressure. This may take a few minutes depending on how much cider is in the keg and how much CO2 you are using.
7. Once carbonated, disconnect the gas line and close the valve on the keg lid. store in a cool place until ready to serve!Force carbonation is an effective way to add carbonation while keeping a clean look.
Once you have all of the necessary components, it is time to set up your system. Start by connecting the regulator to the CO2 tank using an appropriate fitting and then attach one end of the gas line to the regulator outlet valve and connect it securely with clamps or hose clamps as needed.
Then attach one end of another length of tubing (or use more than one if desired) onto either side of a “T” connector before attaching them both securely into place at each end where they meet up with their respective lines coming off from either side of the regulator outlet valve.
Now connect one end of this newly formed looped tube directly into your keg’s liquid-out post while attaching its other free end back onto itself so that it forms a closed loop around itself before tightening down both ends securely once again with clamps or hose clamps as needed until everything fits snugly together without any leaks present whatsoever throughout its entire length when pressurized properly during operation later on.
A big refrigerator in the garage is also a big help as the colder you can make your cider, the more carbonation you can force into it.
Force carbonation doesn’t require any additional equipment once you have the base system.
So if you’re looking for a way to add carbonation to your hard cider without losing any of the quality, kegging is the way to go.
How Much CO2 Do You Need for Hard Cider?
The amount of CO2 needed for hard cider depends on several factors including desired level of carbonation, temperature, pressure and type of container used.
Generally speaking, most commercial ciders are carbonated at 2-3 volumes of CO2 while home brewers often aim for 3-4 volumes when kegging their cider.
It’s important to note that higher levels of carbonation will require more pressure in order to achieve them; this means you may need an upgraded regulator if your current one doesn’t go up high enough!
Calculating Pressure Settings
When setting up your keg system, you will need to calculate what pressure settings are required in order to achieve your desired level of carbonation. To do this you will need two pieces of information – temperature and target volume(s).
The first step is determining how much sugar has been added during fermentation (this should have been noted when brewing).
Once this is known, use a chart like those provided by Brewer’s Friend or Home Brew Talk which provide recommended pressures based on these variables. For example; if aiming for 4 volumes at 68°F then 8 PSI would be required in order to achieve that level of carbonation.
Final Thoughts
It is important not to overcarbonate your hard cider as too much gas can cause off flavors and make it difficult to pour properly from a tap without excessive foaming occurring, resulting in wasted product.
Start with lower levels until you find what works best for you before gradually increasing the pressure settings accordingly over time if necessary. With practice and patience, you will soon become an expert at getting just the right amount every time.
Knowing how many volumes of CO2 you need for hard cider is essential in order to create a great tasting and carbonated product. Next, we’ll discuss the process of kegging your hard cider.
Main Takeaway: Kegging hard cider requires careful consideration of factors such as temperature, pressure and type of container used in order to achieve the desired level of carbonation. It is important not to overcarbonate as this can lead to off flavors and wasted product. With practice and patience, you will be able to find the perfect balance for your own unique brews.
How Do You Fill a Keg With Hard Cider?
As home brewers, we’re always looking for ways to improve our process and product. One way to do this is by kegging your hard cider instead of bottling it.
Kegging has a few advantages over bottling, including less chance for oxidation and quicker carbonation.
Plus, let’s be honest – who doesn’t love draft cider?
! If you’re new to kegging or just need a refresher on the basics, read on for a step-by-step guide on how to fill and serve from a keg of hard cider.
Once you have all of your supplies, follow these steps to keg your cider:
- Clean and sanitize your keg, canister, and hoses. This is a very important step, as you don’t want to introduce any unwanted bacteria into your cider.
- Connect your hoses to the keg and CO2 canister.
- Slowly add CO2 to the keg, until it is full.
- Disconnect the hoses and close the keg.
- Store the keg in a cool, dark place.
Sanitize all equipment that will come into contact with the cider, including the keg, lines, taps, and anything else. This is critical in order to prevent contamination of your batch.
Fill the keg by attaching one end of a hose to the output on your fermenter and running the other end into opening at top of keg. Slowly open valves until cider begins flowing into filling being careful not to overfill.
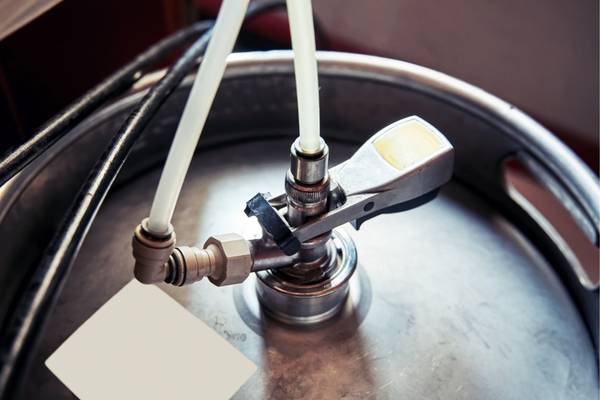
Once full, close off all valves and disconnect hoses before moving on to serving. To serve from hard cider keg, start by ensuring that both your CO2 tank and regulator are turned off.
Next, attach gas lines from your CO2 tank and regulator setup to the corresponding inputs on the picnic pump coupler (“kegging side”). Make sure these connections are tight so no air can get in.
This will help prevent issues with dispensing later. Now connect hard cider lines from the outputs on the nickel (“kegging side”) to the faucets installed near where you’ll be serving drinks.
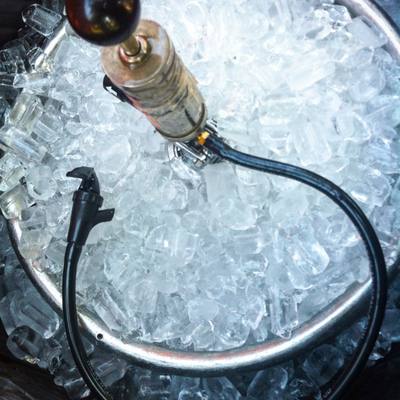
It’s helpful if the cider lines go through an ice bath prior to reaching the faucet. This will help keep beverages cold as they dispense!
Finally, turn on the picnic pump and set the pressure release valve(s) on the coupler to the desired carbonation level for pouring. And that’s it!
Now you know how to fill and serve from a keg of hard cider. If you have any questions, feel free to comment below.
Main Takeaway: To serve from a hard cider keg, connect gas and hard cider lines to the corresponding inputs and outputs on the picnic pump coupler, then turn on the pump and set the pressure release valve(s) to the desired carbonation level.
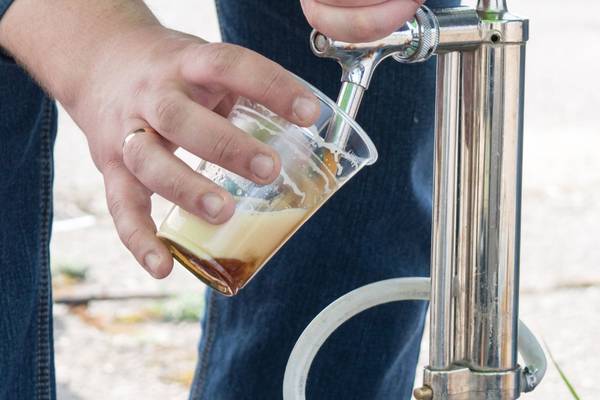
Serving Hard Cider From a Keg System
Serving hard cider from a keg system is an efficient and cost-effective way to enjoy your homemade brew. With the right equipment, you can easily set up a draft system that will allow you to serve cold, fresh hard cider in no time.
Setting Up Your Draft System: To get started, you’ll need a few essential pieces of equipment: kegs, CO2 tanks or systems, faucets and taps, and other accessories like hoses and clamps. Once these items are assembled together properly according to manufacturer instructions, your draft system should be ready for use.
Temperature Control: Temperature control is key when serving hard cider from a keg system. You want to make sure that the temperature of the hard cider remains consistent throughout its entire life cycle – from fermentation through serving – so it tastes great every time it’s poured into a glass. The ideal temperature range for storing and serving hard cider is between 45°F (7°C) – 55°F (13°C).
Pouring techniques are important for achieving the best flavor potential in hard cider. To do this, pour slowly at first until about half of the glass is full, then increase speed as needed until a desired level of foam head appears on top of the drink.
This technique helps create more carbonation which enhances aroma and taste while reducing bitterness caused by over-pouring too quickly or pouring too much foam head onto the drink surface area.
Doing so can result in flat tasting cider due to loss of carbon dioxide bubbles during this process.
Serving hard cider from a keg system is an efficient and cost-effective way to enjoy your homemade brew. Next, we will look at the importance of proper sanitation in order to keep your hard cider safe and flavorful.
How Long Does Cider Last on a Keg?
Assuming you are talking about hard cider that is already fermented and just sitting on the keg:
Cider will last indefinitely on a keg as long as it is kept under pressure. The main concern with keeping cider (or any beverage) on a keg for too long is loss of carbonation.
As the CO2 escapes from the liquid, it also takes flavor with it. For this reason, most people recommend only keeping hard cider or cider on a tap for 3-4 weeks before replacing it with a fresh batch.
However, if not done correctly, the cider may only last for a few months before going bad.
There are several things that must be taken into account when kegging hard cider in order to ensure its longevity:
1. The pH of the Final Product Must Be Below 3.8 in Order to Prevent Spoilage Bacteria from Growing and Causing Problems.
This can be achieved by adding an acid blend during the brewing process or by using tart apple juice as your base instead of sweet apple juice.
2. The Alcohol Content of the Finished Product Should Ideally Be Around 7% ABV or Higher; This Will Help to Preserve It Over Time Since Ethanol Is a Natural Antimicrobial Agent.
Higher ABV ciders will also have less sugar available for yeast growth/fermentation which further reduces the risk of spoilage organisms taking hold (although some residual sweetness is still necessary for stability).
Types of Kegs
There are two main types of kegs used for storing hard cider: stainless steel cornelius (or “corny”) kegs, and plastic hard cider ball-lock barrels. Both types have their advantages and disadvantages, so it’s important to choose the right one for your needs.
Cornelius kegs are more expensive but they offer better insulation which helps maintain carbonation levels over time.
Plastic barrels are cheaper but they don’t insulate as well, so carbonation will dissipate faster in them than in a corny keg.
Shelf Life
The shelf life of hard cider stored in a properly maintained corny or barrel depends on several factors such as temperature, oxygen exposure, light exposure, pH level and alcohol content.
Generally speaking though, if all these conditions remain constant then most ciders will last at least 2-3 months before starting to go flat or souring due to oxidation from air exposure.
If you want to extend this shelf life further then you should consider using an inert gas like nitrogen or CO2 when transferring your cider into the keg – this will help reduce oxygen exposure and preserve flavor longer than just relying on pressure alone from carbon dioxide (CO2).
Maintenance Tips
To ensure that your hard cider stays fresh while stored in a keg there are some simple maintenance tips that you should follow:
Make sure the lid is tightly sealed after each pour; Keep temperatures consistent by storing the filled container away from direct sunlight.
Clean any sediment off the bottom of the container regularly; Monitor pH levels with test strips periodically.
And finally check CO2 pressure often – too much pressure can cause foaming issues when pouring out drinks!
To ensure that your hard cider remains delicious for weeks or even months after being transferred into a barrel or corny keg, follow these steps:
1. Sanitize the barrel/keg and all equipment used to transfer the cider.
2. Rack the cider into the container using a sanitized racking cane and hose. Make sure to leave at least an inch of headspace in order to prevent oxidation and spoilage from occurring.
3. Add sulfites (such as potassium metabisulfite) according to package instructions in order to inhibit bacterial growth and preserve flavor compounds over time.
4. Seal the container tightly with a lid or airlock so that no oxygen can enter during storage, which could cause off-flavors or spoilage due to oxidation reactions taking place within the liquid itself. 5. Store your hard cider in a cool, dark location away from direct sunlight for optimal results!
Cider stored on a keg can last for several months, depending on the recipe and storage conditions. Next, we’ll explore what factors affect how long cider lasts in a keg.
Oxygen Free Aging
As a hard cider brewer, one of the most important things you can do to ensure your cider ages well and tastes great is to minimize its exposure to oxygen.
Oxygen is essential for primary fermentation, but after that, it can cause spoilage and off-flavors.
That’s why many cidermakers choose to keg their cider instead of bottling it. Kegging allows you to protect your cider from oxygen while still being able to easily dispense it.
There are a few things to keep in mind when kegging your cider. First, make sure you purging your keg with CO2 before you rack your cider into it.
This will displace the oxygen in the keg and help protect your cider. Additionally, you’ll want to make sure you don’t disturb the sediment in your cider when you’re transferring it to the keg.
Sediment can contain oxygen-loving bacteria that can spoil your cider and turn it into vinegar.
Kegging is a great way to protect your cider from oxygen and ensure that it ages well. Keep these tips in mind and you’ll be able to enjoy your cider for months to come.
If done correctly, following these guidelines should allow you keep hard cider stored in a keg for many months – even years – without any issues.
Tips and Troubleshooting for Kegging Cider
Kegging your cider is a great way to store and dispense it, but there are a few things you should know before getting started.
Here are some tips and troubleshooting advice for Kegging hard cider:
- It is critical that all equipment used during packaging sanitized thoroughly prior to use; any contaminants introduced at this stage could quickly ruin an otherwise good batch of cider through infection/spoilage.
- It is much easier to carbonate a well cooled keg! Put it in the fridge, or even better a fridge close to (but not below!) freezing point, overnight to make carbonation much easier.
- The cider must be completely free of oxygen before being sealed in the keg; this can be accomplished by purging the headspace with CO2 gas prior to capping.
- Once everything is ready, it is important to carbonate your cider properly in order to prevent over-carbonation and explosive pouring!
- Rather carbonate your kegged cider too little than too much – you can always add more if not sufficient.
First, make sure that the tap is open all the way and that there isn’t any blockage in the line. If this doesn’t help, then adjust the pressure on your regulator. The ideal pressure for carbonating and dispensing cider is between 12-14 PSI (pounds per square inch). Too much or too little pressure can cause problems with foaming or slow pouring.
Cleaning your lines regularly will also help prevent problems with foamy pours or off flavors due to bacteria buildup in the lines.
You should clean out your lines every couple of weeks using an approved cleaner like PBW (Powdered Brewery Wash) or Star San sanitizer solution followed by hot water rinses until they run clear. Make sure to disconnect all hoses and faucets before cleaning them so you don’t damage them with harsh chemicals.
If you’re still having issues after trying these tips, check for leaks in your system by looking for wet spots around connections and fittings while pressurizing them with CO2 gas from a tank connected directly to one of those points.
If no bubbles appear when pressing down on each connection point then chances are good that everything is sealed correctly and working properly; however if bubbles do appear then tighten up those connections until they stop leaking air/CO2 gas into the system which could be causing overcarbonation issues as well as foaminess during pour outs..
Finally, if none of these tips work for solving your problem, consider consulting an expert who specializes in kegging systems.
This could be a homebrew shop employee or local brewery technician who may be able to diagnose what is wrong more accurately than just guessing based off online advice alone.
By following these tips and troubleshooting steps, you can confidently serve hard cider from a keg. Next, we’ll discuss the best ways to carbonate your hard cider for a perfect pour every time.
Kegging Cider FAQs
Is Kegging better than bottling?
There is no definitive answer to this question as it depends on personal preferences.
Some people prefer kegging their hard cider because it requires less work and time than bottling, while others find that bottling gives them more control over the final product.
You can also more easily make a sweeter cider when using a keg as bottle carbonation is hard when residual sugar is present.
Ultimately, it comes down to what works best for you and your brewing setup.
Is Kegging cheaper than bottling?
Kegging is only cheaper than bottling if you do it often and are buying your ingredients in bulk. The initial investment in a keg system may be higher than the cost of bottles and capping equipment, but over time, kegging will save you money.
If you are brewing large quantities of cider, or plan to sell your product commercially, then a kegerator is likely the best option for both financial and practical reasons.
Do You Add Sugar When Kegging?
If you’re wondering whether or not you should add sugar when kegging your hard cider, the answer depends on your process but priming sugar is not necessary if you force carbonate!
However, if you want a sweeter brew, you may add sugar to taste after filtering out all yeast.
Additionally, sugar is not needed for carbonation purposes as you can force carbonate in a keg.
Conclusion
It’s easy to set up, and with the right equipment and knowledge you can have delicious, carbonated cider in no time.
The process of kegging hard cider requires some patience as it takes time for the CO2 to infuse into the liquid but once done correctly you will be rewarded with a tasty beverage that can last for weeks or even months depending on how well it is stored.
Remember that when kegging hard cider, it’s important to use clean equipment and follow all safety guidelines so that your brew remains safe and enjoyable!
If you’re looking for a way to enjoy your favorite cider in an easier, more convenient form, then look no further!