Embarking on the exciting journey of making homemade wine? Then, mastering the art of racking is essential for achieving top-notch quality and taste.
Racking is a crucial step in the winemaking process that separates your precious wine from unwanted sediment or lees – those particles that settle at the bottom during fermentation.
In this blog, we’ll walk you through everything you need to know about racking homemade wine: why it’s important, when and how often to do it, various tools and methods, tips for success, and much more!
So pour yourself a glass of your favorite vino and join us as we unravel the secrets behind expertly racked homemade wines.
Key Takeaways
- Racking is a crucial step in the winemaking process that removes sediment and impurities, enhances flavor and clarity, and prepares the wine for aging.
- Homemade wines should be racked after 14-21 days of fermentation for the first time, and then every 2-3 months or as needed to remove sediments.
- Auto-siphon racking cane is the most convenient tool to use when transferring homemade wine from one container to another without oxygen exposure.
- Proper sanitation of equipment and workspace, careful siphoning techniques, storing wine upright before bottling it in new or previously used bottles are some important steps necessary to ensure high-quality racked homemade wine.
Understanding Racking: What Is It And Why Is It Important In Wine Brewing?
In wine brewing, racking is the process of transferring wine from one container to another while leaving behind any sediment or “lees,” and it’s essential to remove impurities, enhance flavor and clarity, and prepare the wine for aging.
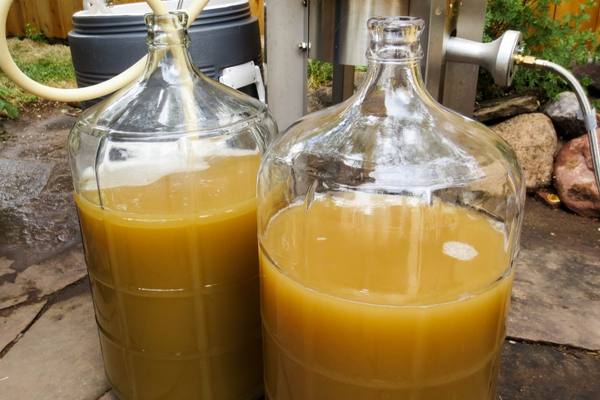
Removing Sediments And Impurities
One of the key aspects of racking homemade wine is removing sediments and impurities, which significantly contributes to enhancing the overall quality of your final product.
During fermentation, dead yeast cells, grape remnants, and other particles settle at the bottom of the container as lees.
The siphoning method used during racking enables you to carefully transfer the wine from one container to another while leaving behind unwanted sediment. This process helps in creating a crystal clear wine that not only looks appealing but also tastes better.
Enhancing Flavor And Clarity
Racking plays a crucial role in enhancing the flavor and clarity of homemade wine, making it an essential part of the winemaking process.
By removing sediment and impurities from your wine during racking, you pave the way for more refined flavors to develop, ultimately leading to a higher-quality finished product.
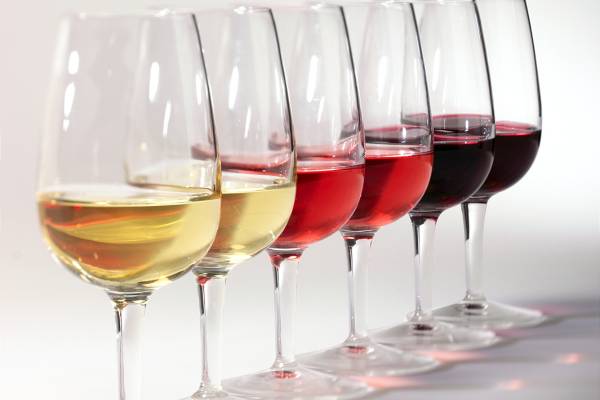
For instance, imagine tasting two samples of homemade Chardonnay—one that has been carefully racked over time with attention paid to removing sediments at each stage versus one that has had minimal or no racking procedures carried out.
The former would boast bright and lustrous characteristics with complex aromas and flavors while maintaining refreshing acidity levels; whereas the latter may appear murky due to unwanted impurities clouding its appearance and interfering with its overall taste as well as mouthfeel.
Preparing Wine For Aging
One crucial aspect of the winemaking process is preparing wine for aging, which involves refining and clarifying the beverage until it reaches its desired taste and appearance.
Racking plays a significant role in this preparation by helping to remove sediment from the bottom of fermentation vessels, improving both flavor and clarity over time. For example, a home brewer may choose to rack their homemade red wine after primary fermentation as they transfer it to a secondary container or barrel for extended aging.

Throughout the racking process, it’s essential for home brewers to keep an eye on oxygen exposure since too much contact with air can lead to spoilage or off-flavors in their wines.
By carefully siphoning the liquid during each racking session without splashing or excessive agitation, winemakers can maintain control over their product’s quality as it progresses through various stages of maturation.
When To Rack Homemade Wine And How Often?
Rack homemade wine after 14-21 days of fermentation for the first time, and subsequent rackings should occur every 2-3 months or as needed.
First Racking After 14-21 Days Of Fermentation
The first racking of homemade wine should occur about two to three weeks after primary fermentation has begun. This is done to remove the sediment that has settled at the bottom of the container, which can affect the taste and clarity of the wine if left too long.
It’s important not to rush this process, as transferring too early can result in incomplete fermentation or spoilage, while waiting too long risks off-flavors and cloudiness.
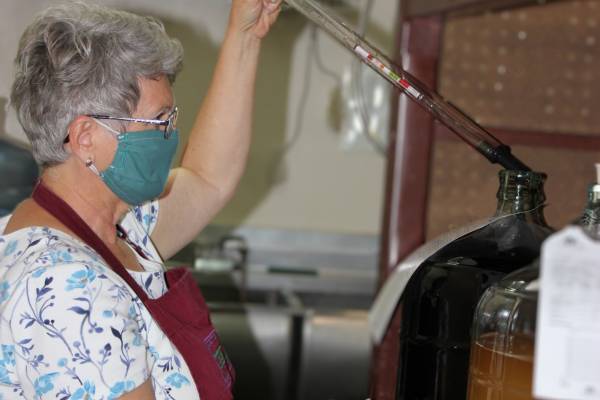
I usually rack my wine when the yeast has settled after the primary fermentation. Some yeast particles in the supernatant is fine as long as the CO2 production has sthbilized with bubbles through the airlock at regular 5-10 second intervals.
As a rule of thumb, wait until there is no more visible yeast activity before racking for the first time.
Subsequent Rackings Every 2-3 Months Or As Needed
After the first racking, it’s critical to rack your homemade wine every 2-3 months or whenever you see sediment starting to collect at the bottom of the container.
These subsequent rackings remove any remaining sediments and ensure that your wine stays bright, clear, and ready for aging.
Remember not to rush this process as patience is key when making high-quality homemade wine.
To maintain consistency in taste and aroma, keep notes about these subsequent rackings, including dates and other relevant observations.
Your goal is to produce high-quality homemade wine, so take the time necessary between each racking for optimal results.
Steps To Successfully Rack Homemade Wine
To ensure a successful racking process for your homemade wine, it’s important to follow these four steps: sterilize your equipment and work area, carefully siphon the wine while preparing the new container, store the wine properly after racking, and utilize fining agents or filters as needed.
Sterilizing Equipment And Work Area
Sterilizing your equipment and workspace is a crucial step in making sure that your wine comes out safe to drink and tasting great. Before starting the winemaking process, it’s essential to sanitize all of your equipment thoroughly, including any containers you plan to use.
To sterilize your work area, start by cleaning it with soap and water. Then use a sanitizing solution like Star San to kill off any remaining microbes. Be sure to read the instructions on the package carefully to ensure proper dilution and application.
Remember that proper sanitation isn’t just about keeping things clean – it’s also about preventing cross-contamination between batches of wine.
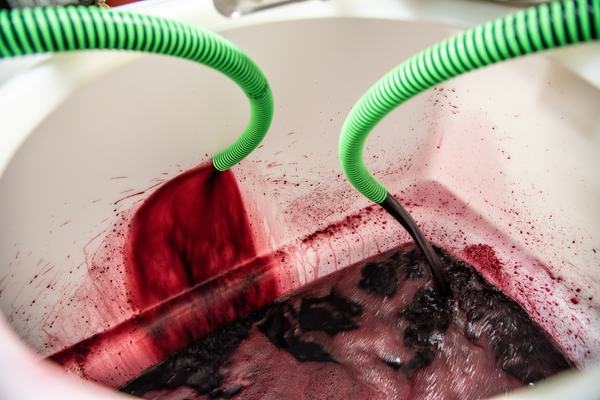
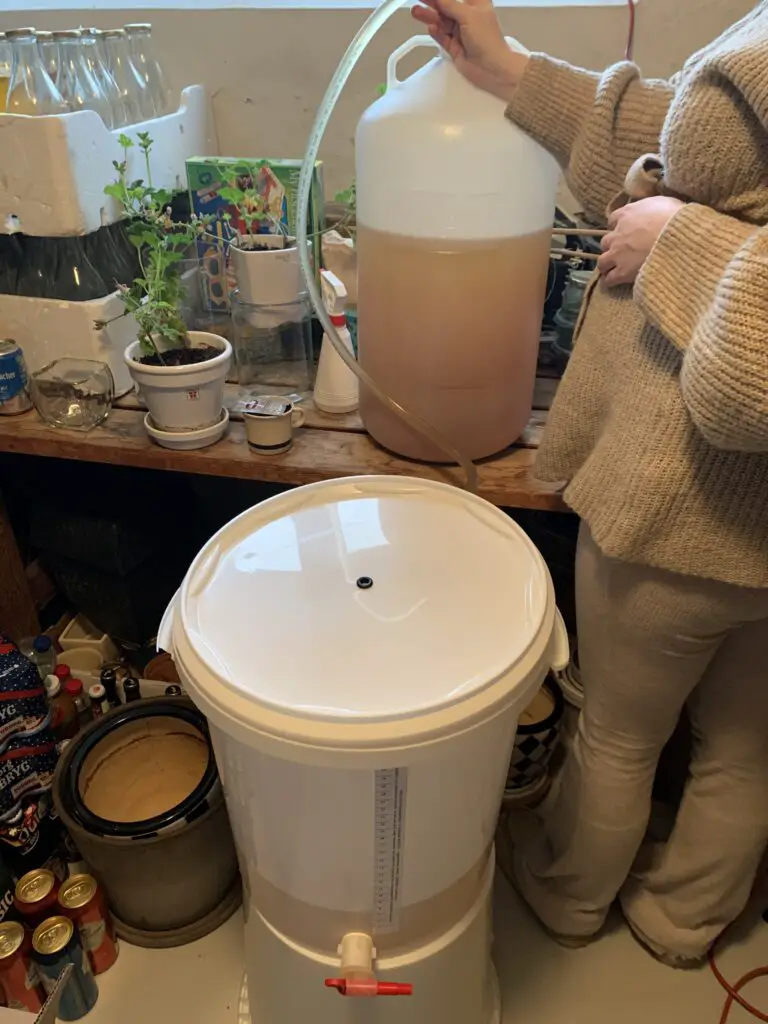
Siphoning Wine And Preparing The New Container
After sterilizing your equipment and work area, it’s time to siphon the wine from one container to another. This process involves using a hose or tube that is placed in the wine and then moved to the new container.
Make sure that you prepare your new container by cleaning and sanitizing it before you start siphoning. You can also add sulfite solution or other preservatives into your new container before transferring.
Proper siphoning techniques will help improve both clarity and shelf-life while reducing risks such as oxidation.
Storing Wine Properly After Racking
Once you’ve successfully racked your homemade wine, it’s important to store it properly in order to preserve its flavors and aromas.
The first step is to keep the bottles upright for around two to three days after filling them with wine.
This allows any sediment that may have been transferred during racking to settle at the bottom of the bottle.
It’s also crucial that bottles used for storing homemade wine are either new or have only ever held wine before. This prevents contamination from other substances which could negatively impact the taste of your wine over time.
Types Of Siphons For Racking
There are different types of siphons available for racking, including the auto-siphon racking cane, simple racking tube, and pump-assisted racking.
Auto Siphon Racking Cane
One of the most useful tools for homebrewers and winemakers is the Auto Siphon Racking Cane. This device makes siphoning wine from one container to another an easy and efficient process.

The racking cane is composed of tubing attached to a piston assembly that starts a siphon when immersed in beer or wine. It’s perfect for preventing sediment from being transferred, which helps to create clearer, better-tasting wines.
Using an auto-siphon also reduces oxygen exposure, preserving the delicate flavors of homemade wine while transferring it between containers.
Simple Racking Tube
One of the most common types of siphons used for racking homemade wine is a simple racking tube. This type of siphon is made from a rigid piece of clear tubing that acts as a wand to point at the source of the wine during the racking process.
The benefit of using this type of siphon is that it allows you to see when sediment and impurities are about to be transferred, giving you better control over how much wine you transfer into your new vessel.
Pump Assisted Racking
Pump assisted racking is an effective option for home winemakers when moving wine from one vessel to another during the racking process.
Diaphragm pumps are commonly used and gentle on the wine during transfers, ensuring that oxygen exposure is minimized.
This method can also be more convenient and efficient than traditional siphoning methods, especially when dealing with larger batches of wine or heavier vessels such as barrels.
It’s important to choose a pump that’s appropriate for your needs, and use it carefully to avoid stirring up sediment or damaging the wine in any way.
How To Rack Wine From A Carboy
Using an auto-siphon is the easiest method for racking wine from a carboy, but beware of the wine level and avoid splashing to minimize yeast carryover.
Using An Auto-Siphon Is The Easiest Method
If you’re new to wine making, using an auto-siphon is the easiest way to rack or transfer your homemade wine from one container to another.
An auto-siphon works by sucking out the wine from one vessel and then transferring it into another, leaving behind any sediment or impurities.
The best thing about using an auto-siphon is that it requires minimal effort and reduces the risk of oxygen exposure during racking.
Beware Of The Wine Level
When racking wine from a carboy, it is crucial to be aware of the wine level. The process of transferring wine from one container to another leaves behind any sediment or “lees” that have settled at the bottom.
However, if you are not careful and the wine level is too low in the carboy, oxygen can seep into the container and spoil your batch.
To avoid this problem, make sure to check and adjust the levels before beginning to siphon out your homemade wine. It’s always better to have a little bit more than not enough – you can always pour off excess later on.
Avoid Splashing And Yeast Carryover
When racking homemade wine, it’s essential to take precautions to avoid splashing and yeast carryover. Excessive splashing during the transfer process can introduce too much oxygen into your wine, resulting in oxidation that can negatively impact its flavor.

To minimize these risks, using a siphon is crucial when transferring wine from one vessel to another. Siphoning allows you to gently move the wine without introducing air or agitating any sediment at the bottom of your container.
By avoiding splashing and yeast carryover during racking, you’ll help ensure that each batch of homemade wine has optimal clarity and flavor.
Pouring Is Also An Option But Beware Of Lees Spillover
While siphoning is the most commonly used method for racking homemade wine, pouring can also be an option. However, it’s essential to beware of lees spillover that can occur when transferring the wine between containers.
Lees are dead yeast cells that settle at the bottom and form sediment in the wine bottles.

To avoid this, one should pour slowly and carefully without agitating the wine too much and stop just before reaching down where lees have settled. Alternatively, using containers with built-in tabs allows you to transfer your wine into a clean container without worrying about disturbing sediment.
Overall, whether using siphons or pouring methods when racking homemade wine, being mindful of avoiding splashing and yeast carryover will always result in a better quality final product worth drinking and sharing with family & friends!
Tips And Tricks For Successfully Racking Homemade Wine
Avoiding oxygen exposure, tasting and adjusting wine, utilizing fining agents or filters, and proper bottle or aging after final racking are some important tips for successfully racking homemade wine.
Avoiding Oxygen Exposure
Oxygen exposure during wine racking can lead to oxidation, which spoils the quality of your homemade wine. To limit oxygen exposure, it is recommended that you use an inert gas cover such as carbon dioxide or nitrogen.

These gases help push out the oxygen from the vessel and create a protective layer over the wine. Additionally, minimizing headspace during racking can also reduce oxygen exposure by leaving less room for air to enter around the wine.
Another tip for avoiding oxygen exposure is to ensure that your equipment is properly sanitized and free of any impurities before using them in racking operations. Any contaminants could potentially interact with your homemade wine and cause unwanted spoilage or off-flavors.
Tasting And Adjusting Wine
Once you’ve racked your homemade wine, it’s important to taste and adjust the flavor as needed. Making small adjustments to the flavor can drastically improve the quality of your wine.
The key is to make changes gradually by adding a little bit at a time, tasting, then adding more if necessary.
Another tip is to consider using fining agents or filters during racking to clarify and stabilize your wine. These agents help remove impurities that may affect the final taste of your wine.
Overall, successfully racking homemade wine takes practice and attention to detail but is well worth it for a delicious end product.
Utilizing Fining Agents Or Filters
Fining agents and filtration are treatments that can be used to improve the quality of homemade wine. Fining agents, such as egg whites, gelatin, and isinglass, work by attracting impurities and sediment in the wine.
Careful filtration techniques can also be used to remove particles that cloud the wine. However, it’s important to note that fining agents should only be used when necessary and with low addition rates to avoid removing positive flavor characteristics from the homemade wine.

This Mini Jet Hydraulic Filtering system is a good simple option for home brewers.
Additionally, different fining agents may yield varying results depending on the type of wine and desired outcome.
Proper Bottle Or Aging After Final Racking
After the final racking process, it is crucial to bottle or age your homemade wine properly. This step allows further clarification and maturation of the wine, improving its flavor and quality over time.
When bottling, ensure that you use clean bottles with tight-fitting corks or screw caps to prevent air exposure.
Aging can range from a few months to several years depending on the type and style of wine produced. For example, white wines generally need less aging than full-bodied reds like Cabernet Sauvignon or Syrah.
During this period, it’s essential to periodically taste your wine and adjust acidity or sweetness levels as necessary using appropriate additives like tartaric acid or grape concentrate.
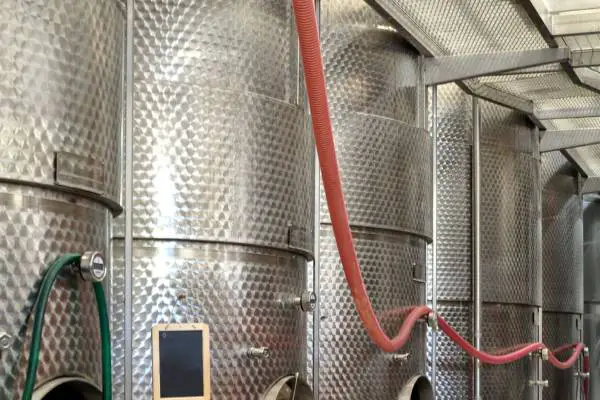
How To Rack Wine From A Barrel
Learn how to rack wine from a barrel using either an electric pump or gravity-fed hose and container method.
Using An Electric Pump
Using an electric pump to rack wine from a barrel is becoming increasingly popular among home winemakers. This system utilizes pressurized gas to push the wine out of the barrel instead of a traditional pump, which can potentially damage the delicate flavors and aromas of the wine.
The electric pump also allows for greater control over the flow rate and pressure, ensuring a gentle racking process that minimizes sediment disturbance.
It’s important to note that while an electric pump may be helpful in certain situations, it’s not always the best option for every winemaker or type of wine. For example, red wines may require more oxygen exposure during racking than white wines, which could be compromised by using an electric pump.
Using A Hose And Gravity
Racking wine from a barrel can be done using an electric pump or, for those who prefer a more traditional approach, by using gravity. Simply elevate the barrel and place it above the receiving receptacle.
Connect a hose to the spigot at the bottom of the barrel and let gravity do its job.
Gravity feed is also useful when transferring wine between containers without using a siphon tube. Pouring from one container into another can effectively separate clean wine from sedimented lees.
Just ensure that you are pouring carefully to limit oxygen exposure and minimize splashing that may cause unwanted oxidation in your homemade wine.
How To Rack Wine Without A Siphon
Pouring Wine between Containers or using containers with built-in tabs are both effective methods for racking wine without a siphon.
Pouring Wine Between Containers
If you don’t have a siphon or prefer not to use one, pouring the wine between containers can be an alternative method for racking homemade wine. First, carefully pour the wine from the original vessel into a clean and sterilized secondary container slowly.
Doing it gradually will allow any potential debris at the bottom to settle before you continue transferring your wine.
With careful handling and patience, this process can result in successfully transferring your homemade wine while leaving sediment behind. This method is ideal for small batches or if you only need to transfer a small amount of liquid.
However, keep in mind that using such technique could introduce oxygen which may lead to spoilage and affecting overall quality.
Using Containers With Built-in Tabs
Another option for racking homemade wine without a siphon is to use containers with built-in tabs. These containers have a tab at the bottom that allows you to easily drain the wine into another container while leaving behind any sediment.
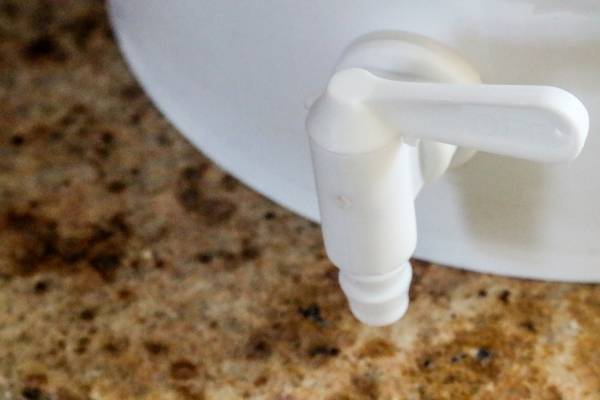
It’s important to note that while using containers with built-in faucet can make the racking process easier, it’s still essential to sterilize all equipment and work areas before starting.
Additionally, it’s crucial not to fill your new container too high when transferring the wine, as this could lead to spills or overflow.
Conclusion
Racking homemade wine is an essential step in creating a delicious and high-quality product. It removes impurities, enhances flavor and clarity, and prepares the wine for aging.
Knowing when to rack and how often is crucial to achieving your desired result. Proper sterilization of equipment, using the right siphoning method, and storing the wine correctly after racking are also important factors to consider.