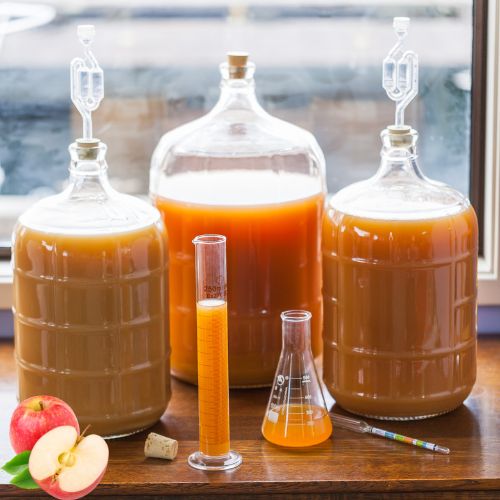
As a home brewer with more than a few batches of cider under my belt, I know that one of the most critical steps in the process of making a delicious, well-crafted cider is knowing when to rack it.
Racking is the process of moving your cider from one vessel to another, usually to separate it from sediment or to introduce new flavors.
But when is the best time to rack your cider, and how can you ensure that you’re doing it in the most effective way possible?
The best time to rack your cider is when the primary fermentation has almost finished, and the cider has cleared most of the yeast haze. This typically occurs between 10 days and a month after starting the fermentation process, but depends on the yeast strain used, the type of juice and the temperature.
In this blog post, I’ll cover everything you need to know, from the initial fermentation stage all the way to bottling.
1. Understanding Primary Fermentation
Before we dive into the specifics of when to rack your cider, it’s essential to understand the primary fermentation process.
This is when the yeast consumes the sugar in your apple juice or cider, converting it into alcohol and carbon dioxide. This process is what ultimately transforms your juice into hard cider.

During primary fermentation, it’s common to see a layer of sediment form at the bottom of your fermentation vessel. This sediment, known as lees, is mainly composed of dead yeast cells and apple solids. While some contact with the lees is okay, extended exposure can lead to off-flavors in your finished cider.
When primary fermentation has finished, it’s time to rack your cider.This typically occurs between 10 days and two weeks after starting the fermentation process, depending on the yeast strain and fermentation temperature.
2. Signs that Fermentation is Complete
How can you tell when primary fermentation has finished, and it’s time to rack your cider? Here are a few signs to look for:
- The airlock activity has slowed or stopped entirely. This indicates that the yeast has consumed most of the available sugar, and fermentation is nearing its end.
- The specific gravity of your cider has stabilized. Using a hydrometer, take readings over several days. If the specific gravity remains consistent, it’s an indication that fermentation is complete.
- The cider has cleared significantly. As fermentation ends and yeast cells die off, they will drop out of suspension and settle to the bottom of the vessel, leaving your cider much clearer.
Remember to be patient and allow the fermentation process to run its course. Rushing to rack your cider before fermentation is complete can result in off-flavors and a lower alcohol content.
3. Preparing to Rack
Before racking your cider, there are a few steps you should take to ensure a smooth and successful process:
1. Clean and sanitize your secondary fermentation vessel, as well as any equipment you’ll be using to transfer the cider, such as a siphon and tubing.
2. Position your primary fermentation vessel on a raised surface, like a table or countertop, with the secondary vessel on the floor below.
3. Attach your sanitized siphon and tubing to the primary vessel, ensuring that the end of the tubing is near the bottom of the secondary vessel. This will help to minimize oxidation during the transfer process.

4. The Racking Process
To rack your cider, follow these steps:
1. Gently lower the siphon into the primary fermentation vessel, taking care not to disturb the sediment at the bottom.
2. Begin siphoning the cider into the secondary vessel, either by using an auto-siphon or by sucking on the tubing to create a vacuum. Be sure to sanitize your mouth if using the latter method.
3. Keep an eye on the sediment level as you siphon, adjusting the siphon’s depth as needed to avoid transferring too much sediment to the secondary vessel.
4. Once the majority of the cider has been transferred, stop the siphon and discard the remaining sediment.
5. Secondary Fermentation and Aging
After racking, your cider will undergo secondary fermentation and aging in the new vessel. This stage can last anywhere from a few weeks to several months, depending on your desired flavor profile and the type of cider you’re making.

During secondary fermentation, you may notice additional sediment forming at the bottom of the vessel. This is normal, and it’s a sign that your cider is continuing to clear and mature.
6. Additional Rackings
For some ciders, particularly those with more complex flavor profiles or higher alcohol content, additional racking may be necessary. This can help to further clarify the cider and remove any remaining sediment.
To determine whether additional racking is necessary, monitor the clarity of your cider and the amount of sediment present. If you notice a significant layer of sediment forming, or if your cider has not reached your desired level of clarity after several weeks in secondary fermentation, you may want to consider racking again.
7. Racking to Introduce New Flavors
Racking can also be used as an opportunity to introduce new flavors to your cider. For example, you might choose to rack your cider onto fruit, spices, or oak chips to add depth and complexity to the finished product.
If you choose to do this, be sure to thoroughly clean and sanitize any ingredients or equipment that will come into contact with your cider. Also, keep in mind that introducing new flavors may extend the secondary fermentation and aging process.
8. Racking Before Bottling
The final time you’ll need to rack your cider is just before bottling. This step helps to ensure that you’re bottling a clear, sediment-free product.
Follow the same racking process as before, transferring your cider to a clean and sanitized bottling bucket. From there, you can proceed with bottling and carbonating your cider, if desired.
9. Tips for Successful Racking
Here are a few tips to help you master the racking process and ensure a delicious, well-crafted cider:
- Be patient, and don’t rush the fermentation process. Racking too early can lead to off-flavors and a lower alcohol content.
- Keep everything clean and sanitized. This will help to prevent contamination and spoilage.
- Minimize oxidation during the racking process by keeping the end of the siphon tubing near the bottom of the secondary vessel.
- Monitor the clarity and sediment levels of your cider to determine whether additional racking is necessary.
- Don’t be afraid to experiment with introducing new flavors during the racking process.
In conclusion, the best time to rack your cider is when primary fermentation has finished, and the cider has cleared of sediment. This typically occurs between 10 days and two weeks after starting the fermentation process. With patience, attention to detail, and a bit of experimentation, you can master the racking process and produce fantastic, flavorful ciders that you’ll be proud to share with friends and family.
FAQs
When should you rack off cider?
You should rack off cider when the fermentation process is complete, and the cider has reached its desired level of clarity and taste.
How often do you rack cider?
I rack mine once a month or so on average in the first 3 months. However, the general recommendation is to rack cider every 4-6 weeks until it is clear and then again before bottling.
How many times should I rack cider?
It is recommended to rack cider at least two to three times during the fermentation process, or until the cider is clear and free of sediment.
Can I skip racking for cider?
No, racking is an important step in the cider-making process as it helps to clarify the cider and remove any sediment or impurities. Skipping this step can result in a cloudy and potentially off-flavored final product.
Is racking beer necessary?
Yes, racking beer is necessary as it helps to clarify the beer by removing sediment and yeast that can affect the flavor and appearance of the final product. It also allows for carbonation to occur more evenly and reduces the risk of contamination.
How many times do you rack cider?
Typically, my cider is racked twice during the fermentation process. I mostly do it in the beginning and then let it sit after 2 to 3 rackings.


