A microscope is the perfect brewing tool for many home brewers. What could be geekier than looking at the microbes that produce our beer? But what is considered the best microscopes for home brewing?
When it comes to choosing a microscope for your home brewing, a basic one with 10, 20, and 40X objectives, as well as 10X eyepieces, will suffice. These components are essential to monitor and ensure that the yeast cells and bacteria in your brew are developing properly.
Continue reading to learn more about home brewing microscopes, as well as which ones are considered the best, where you can find them, and more.
I will also show you how to use a Neubauer slide to count your precious yeast cells!
Why do you need a microscope for brewing?
A microscope is not strictly necessary for brewing, but it can be useful in certain situations. For example, a microscope can be used to examine the yeast cells in a sample of beer or wine to ensure they are healthy and active.
Additionally, a microscope can be used to identify and diagnose any contaminants that may be present in the brewing process.
Additionally, these are just a few good reasons to use a microscope when brewing:
- Observing Yeast Cells: A microscope allows home brewers to observe yeast cells and monitor their activity, which can help with fermentation control and yeast selection.
- Identifying Contaminants: Microscopes can be used to identify contaminants such as bacteria or wild yeast in a brew, which can help prevent spoilage or off-flavors.
- Measuring Cell Counts: By counting cells under a microscope, home brewers can measure the concentration of yeast or bacteria in a brew, which can help with estimating the fermentation timeline, quality control, and when to add nutrients etc.
- Checking Purity of Cultures: A microscope can be used to check the purity of yeast or bacteria cultures, ensuring that only the desired strain is being used in the brew.
- Examining Raw Materials: Microscopes can be used to examine juice, grains and hops, helping home brewers to identify the best quality hops for their brews.
- Monitoring Fermentation Progress: By observing yeast cells under a microscope, home brewers can monitor fermentation progress and make adjustments as needed.
- Checking for Clarity: A microscope can be used to check the clarity of a brew, helping home brewers to identify any particles or haze that may be present and wether it can be removed or not.
Overall, a microscope can help to ensure the quality and consistency of the final product.
The microscope is a useful piece of equipment for anybody interested in DIY microbiology. When attempting to count yeast cells, estimate viability counts, and identify impurities, these devices are incredibly beneficial.
Microscopy is useful for any home brewing project, since healthy yeast is necessary for generating better-tasting beer and wine.
Microscopes are, thus, regarded as necessary in any microbiology lab since they allow you to view the microorganisms that dwell in your brew.
And lastly – it’s just really fun to look at your own brew!
How Do Home Brewing Microscopes Work?
So, should a homebrewer consider purchasing a microscope? Isn’t it simply another needless and costly gadget?
Interestingly enough, there are several variables to consider when running a good, healthy fermentation, but the first and most important is inoculating the wort with a population of healthy yeast cells at the appropriate dose or pitching rate.

To achieve a more precise count of their pitching population, professional brewers and labs employ hemacytometers and a microscope. Since the experts do this to obtain a better-quality brew, why shouldn’t you?
What Are Considered the Top 5 Best Microscopes for Home Brewing?
I’ve gone through the best, not too expensive, options on the market for people getting into microscopy and yeast quantification.
The AmScope M150C-I Compound Microscope
The AmScope M150C-MS is a compact monocular microscope loaded with advantages. Firstly, this microscope is considered one of the best microscopes for its size.

This model also features magnification settings of 40x, 100x, 250x, 400x, and 1000x. Fortunately, that’s usually all you’ll need for most homebrewing tasks.
You’ll also notice that this model is positioned at a 45° angle. The majority of bigger binocular microscopes only have a 30° slope, however considering the size of this device, a 45° incline is appropriate.
Furthermore, this microscope is designed with a 360° rotating head, which is beneficial when sharing the microscope with others.
Available on Amazon.com for 60$ on sale, this microscope is considered one of the best value options if you’re new to the home brewing microscopy game and looking for an excellent starter microscope.
The AmScope M170C-E 40X-1000X Dual LED Solid-Metal Portable Compound Microscope
The AmScope M170C-E 40X-1000X Dual LED Microscope is a monocular compound microscope that is light enough to be considered portable. When used with both sets of eyepieces, the microscope also offers five magnification levels (40X, 100X, 250X, 400X, and 1000X).

Overall, this microscope is suggested for both home and field usage since it can be operated with both batteries and AC power. As a result, this microscope is an excellent choice for individuals who are just getting started with a home brewery.
This microscope also features a 640x480px digital camera for taking images and videos via the microscope.
These photographs can then be saved to your computer and analyzed later. This allows you to photograph the development of your yeast production and compare the progress as you brew.
Available on Amazon for $132, this microscope is a great starter microscope for those looking to learn more about the biology side of their brewing process.
The AmScope B120C Siedentopf Binocular Compound Microscope
The B120 binocular compound microscope is intended for clinical use, home brewing, and laboratory work. As a result, it is an excellent microscope for both home brewers and students alike.

Overall, this microscope boasts a variety of functional enhancements over previous microscopes in its class, including improved LED illumination, a central condenser, and Siedentopf head adjustments.
Available on Amazon.com for $235, this microscope is great for those looking to upgrade their home brewing microscope to something a little more professional.
The OMAX 40X-2000X Lab LED Binocular Compound Microscope
The Omax M82ES microscope comes fully equipped with 40X – 2000X magnification and an LED Binocular head. Overall, this is a well-made and sturdy microscope.

The majority of online reviews are favourable, maintaining the idea of a high-quality microscope at a reasonable price. This microscope, which sells for $240 on Amazon.com, is a good choice for anybody wishing to produce professional-looking brews.
The Swift SW380B Research-Grade Binocular Compound Lab Microscope
The Swift SW380B Research-Grade Binocular Compound Lab Microscope is designed to meet the needs of colleges, universities, and medical schools, and it establishes a new price-performance benchmark for optical quality.

Since the magnification and specifications of this microscope are built for even the tiniest of cells, it is a fantastic choice for homebrewers.
The Swift SW380B Research-Grade Binocular Compound Lab Microscope offers cutting-edge technology such as second-generation EC Plan optics, a revolutionary rackless stage movement, and a sophisticated, modular lighting system with halogen and LED interchangeability.
This microscope, available online at Amazon.com for around $295, is regarded as the most professional options to consider for a home brewery without breaking the bank.
How to count yeast cells using a microscope?
To count yeast cells in a microscope using a Neubauer slide, you will need the following materials:
- Microscope
- Neubauer counting chamber
- Diluted yeast suspension (usually in a 1:10 or 1:100 ratio)
Neubauer Counting Chambers
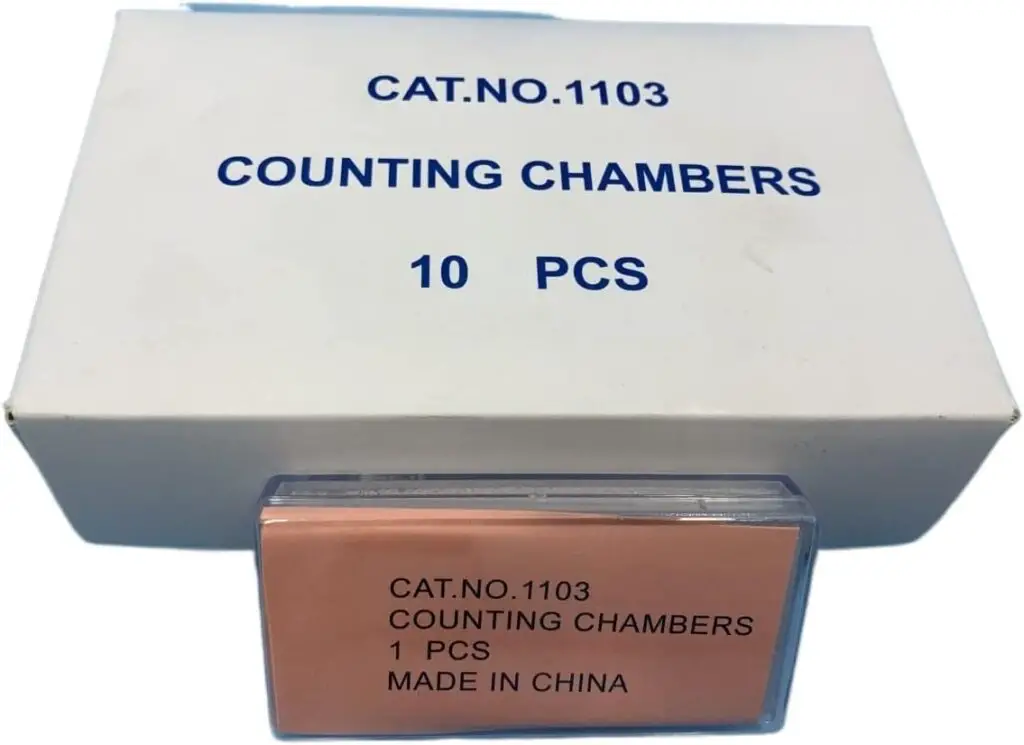
Precisely count your yeast cells!
Perfect for counting yeast cells and assessing their size/health during brewing.
- Fits any microscope
- Improved Neubauer slides
- Strong contrast grid lines for easy measurements
- Defined area for comparable counts each time
- Comes with 10 slides.
The steps to count yeast cells using a Neubauer slide are as follows:
- Mix the yeast suspension thoroughly to ensure that the cells are evenly distributed.
- Take a Neubauer counting chamber and place it on the stage of a microscope.
- Add a drop of the yeast suspension to the chamber using a pipette.
- Place a cover slip gently over the chamber, taking care not to introduce any air bubbles.
- Allow the yeast cells to settle for a few minutes.
- Observe the cells under the microscope using the 10x or 20x objective.
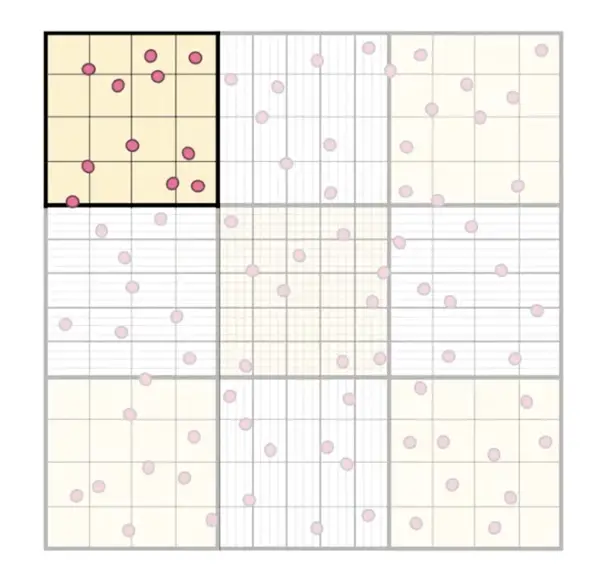
- Count the yeast cells in the central area of the chamber (the large square in the center, or the four smaller squares in the corners of the center square) by focusing on the upper plane of the grid lines.
- To count the cells, move the microscope stage in a systematic pattern, counting each cell that falls within the grid lines.
- Record the number of yeast cells counted in each of the squares.
- To calculate the concentration of yeast cells, multiply the number of cells counted in each square by the dilution factor (how much you dilluted your brew) and divide by the volume of the square (0.1 ul). Finally, calculate the average number of cells counted in each square and multiply by the appropriate factor to obtain the concentration of yeast cells per milliliter.
E.g. each square (e.g. on of the yellow ones on the image below) contains 0.1 ul (micro-liter) and will therefore have to be multiplied by 10.000 to give you the cell count per ml (mili-liter) of whatever dillution you applied to the slide.
If you diluted 100 times (which is generally recommended), you will end up with a formula like this:
(Count / 0.1 ul) x 10.000 x 100 = cells pr. ml of brew
If you plot these counts over time, you will get a curve that looks like this:
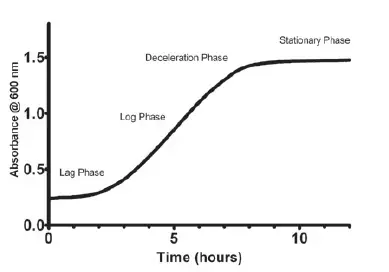
This will help you estimate when your brew is done and when it could benefit from more nutrients etc.
Note: it is important to use a diluted yeast suspension to ensure that the cells are evenly distributed and the counting is accurate. Also, make sure to clean and dry the Neubauer counting chamber before and after use.
Final Thoughts
For many home brewers, a microscope is the ideal brewing instrument. After all, what could be geekier than studying the yeast cells that make our beer?
When it comes to home brewing microscopes, a simple one with 10, 20, and 40X objectives, as well as 10X eyepieces, will suffice.
These components are required to monitor and ensure the appropriate development of the yeast cells and bacteria in your brew. Discover contaminations and diagnosing the source of different off-tastes in cider brewing.
Overall, to make professional-quality brews from the comfort of your own home, look no further than the AmScope M150C-I, AmScope M170C-E, AmScope B120C, OMAX 40X-2000X Lab LED, or Swift SW380B Microscopes models.
Fortunately, any of these microscope options will be able to provide you with the magnification and specks needed to count yeast cells, estimate viability counts, and identify impurities in your homebrew.