
Fermenting mead with wild yeast is a rewarding and natural process that involves capturing wild yeast from your environment and using it to ferment your honey and water mixture.
Mead is a delicious ancient beverage made from honey, water, and yeast. While many homebrewers use commercial yeast strains, it is entirely possible to ferment mead with wild yeast.
In this blog post, we will explore the process of capturing wild yeast, preparing the mead must, and managing fermentation to create a delicious and unique mead.
Let’s dive into the fascinating world of wild yeast fermentation in mead-making!
A quick intro to wild fermentation
Wild fermentation is a fascinating and time-honored method of food preservation and flavor enhancement that harnesses the power of naturally occurring microorganisms. Unlike controlled fermentations that rely on specific strains of cultured yeasts or bacteria, wild fermentation embraces the diverse and ever-present microbial communities found in the surrounding environment.
This process allows for the creation of unique flavors, textures, and aromas that are distinct to each batch of fermented food or drink.
The fundamental principle behind wild fermentation is the conversion of sugars into various byproducts by microorganisms, primarily bacteria and yeast. These microorganisms, which are naturally present in the air, water, and on the surfaces of fruits, vegetables, and grains, initiate the fermentation process when introduced to a suitable environment.

As the microorganisms consume the sugars in the food, they produce acids, alcohol, gases, and other compounds that transform the raw ingredients into a new, complex, and often more digestible form.
The process of wild fermentation typically begins with selecting high-quality, fresh produce or grains. Fruits, vegetables, dairy, grains, and even beverages like tea can all undergo wild fermentation.
It is essential to thoroughly clean the ingredients to remove any potential contaminants, while also being mindful not to completely sterilize them, as this would eliminate the natural microorganisms required for fermentation.
Once the ingredients are prepared, they are placed in a fermentation vessel, which can vary depending on the specific food being fermented. Common vessels include ceramic crocks, glass jars, or even wooden barrels.
The container should be clean, but not sterilized, to allow the natural microflora to thrive. Additionally, it is important to create an environment conducive to fermentation by providing proper temperature and humidity conditions.
During the fermentation process, wild microorganisms begin to multiply and metabolize the sugars present in the food. Different types of bacteria and yeast may dominate at various stages of fermentation, leading to the development of distinct flavors and aromas.
Lactic acid bacteria, for example, are often responsible for creating a tangy or sour taste, while yeasts can contribute to the production of alcohol or carbonation.
Monitoring the fermentation is crucial to ensure both safety and desirable outcomes. Factors such as temperature, acidity, and the presence of mold or off-putting odors need to be carefully observed.
Adjustments may be made, such as controlling the temperature or adding salt, to encourage the growth of beneficial microorganisms and discourage harmful ones.
The duration of wild fermentation can vary greatly depending on the specific food, ambient conditions, and desired outcomes. Fermentation may take anywhere from a few days to several weeks or even months.
Throughout this period, regular tasting and sensory evaluation can guide the fermenter in determining the optimal moment to halt the fermentation process, such as when the desired flavors, textures, and acidity levels are achieved.
Once the fermentation is complete, the fermented food or drink is typically transferred to clean, airtight containers for storage. In some cases, additional aging or maturation may be desirable to further develop the flavors and allow the microorganisms to continue their transformative work.
It is worth noting that while wild fermentation can yield delicious and nutritious results, it also carries some risks. The proliferation of undesirable microorganisms, such as harmful bacteria or molds, is a possibility. To mitigate these risks, it is crucial to maintain cleanliness and proper sanitation practices throughout the entire process.
In recent years, wild fermentation has experienced a resurgence in popularity, driven by a renewed interest in traditional food preservation methods, experimentation with flavors, and a desire to reconnect with the natural world.
This ancient culinary technique offers a glimpse into the complex and diverse microbial ecosystems that shape the flavors of our food and the intricacies of fermentation.
1. Capturing Wild Yeast
The first step in fermenting mead with wild yeast is capturing the wild yeast itself.
Wild yeast is present everywhere in our environment, including on the surfaces of fruits, flowers, and even in the air.
To capture wild yeast, create a simple yeast starter using honey, water, and a source of wild yeast.
- Mix a small amount of honey with water in a clean jar (a ratio of 1:4 honey to water is ideal).
- Add a source of wild yeast, such as a few organic grapes, apple peels, or even a handful of flowers from your backyard.
- Cover the jar with a clean cloth or coffee filter, secured with a rubber band, and let it sit at room temperature for a few days. Stir the mixture daily.
- After a few days, you should see signs of fermentation, such as bubbles and a pleasant yeasty smell. This means you have successfully captured wild yeast!
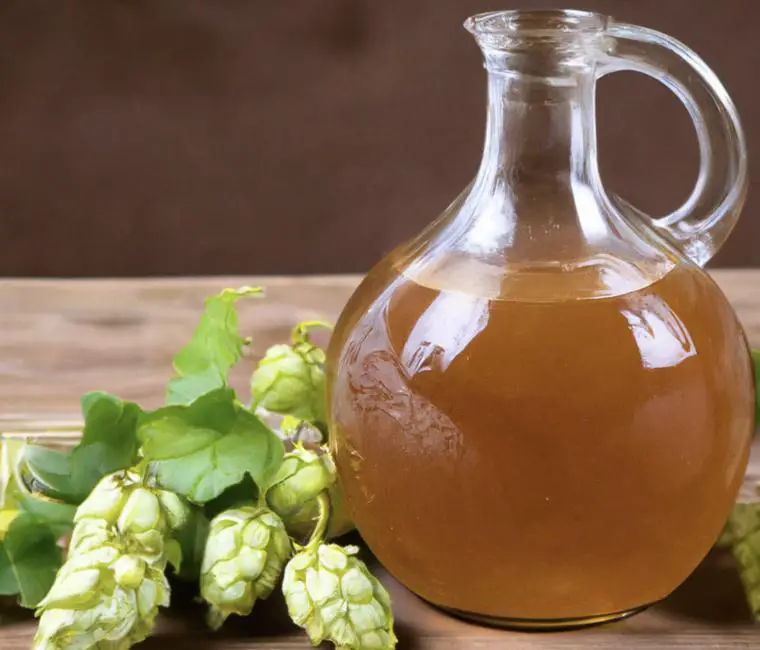
2. Preparing the Mead Must
Once you have captured your wild yeast, it’s time to prepare the mead must. The must is the mixture of honey and water that will be fermented to create mead.
For a one-gallon batch of mead, you will need approximately 3 pounds of honey and enough water to fill up the remainder of the one-gallon container.
- Mix the honey and water in a sanitized fermentation vessel, stirring well to dissolve the honey.
- Add any additional ingredients, such as herbs, spices, or fruit, to create a flavored mead.
- Take an initial gravity reading with a hydrometer to determine the potential alcohol content of your mead. This will also help you track fermentation progress.
3. Pitching the Wild Yeast
Now that your mead must is prepared, it’s time to introduce your captured wild yeast.
Add your wild yeast starter to the mead must, making sure to stir well to distribute the yeast evenly.
- When adding the starter, it’s a good idea to strain out any solids, such as fruit or flowers, that were used to capture the yeast.
- It’s important to note that wild yeast fermentation may start slower than when using commercial yeast strains. Be patient and give the yeast time to multiply and begin fermenting the must.
4. Aerating the Must
During the initial stages of fermentation, it’s essential to provide your wild yeast with oxygen to promote healthy yeast growth.
Aerate the must daily for the first few days of fermentation by stirring vigorously or using a sanitized wine whip.
- Aerating the must also helps to mix in any additional ingredients, such as fruit or spices, which may have settled at the bottom of the fermentation vessel.
5. Monitoring Fermentation
Fermenting mead with wild yeast requires careful monitoring to ensure a successful fermentation.
Keep an eye on the fermentation process by looking for signs of activity, such as bubbles in the airlock, changes in the must’s aroma, and a drop in specific gravity.
- Wild yeast fermentation may have a slower start and take longer to complete compared to commercial yeast strains.
- Monitor the specific gravity with a hydrometer to track fermentation progress and determine when fermentation is complete.
6. Managing Fermentation Temperature
Fermentation temperature can significantly impact the flavors and aromas produced during mead fermentation.
Maintain a consistent fermentation temperature, ideally between 60-70°F (15-21°C), to promote a clean fermentation with minimal off-flavors.
- Wild yeast strains may have different temperature preferences and tolerances compared to commercial strains. Experiment with different temperatures to find the ideal conditions for your captured wild yeast.
7. Racking and Secondary Fermentation
Once the primary fermentation is complete, it’s time to rack the mead into a secondary fermentation vessel.
Racking helps to clarify the mead and allows any remaining fermentation to finish without being influenced by dead yeast cells and other sediment.
- After racking, you may choose to age your mead with additional flavorings, such as oak chips or fruit, to enhance its complexity and character.
8. Bottling and Aging
When the mead has reached the desired level of clarity and flavor, it’s time to bottle and age it.
Bottle the mead in sanitized bottles with airtight closures, such as corks or swing-top caps, and allow it to age for several months or even years to develop its flavors fully.
- Mead made with wild yeast may have a more complex flavor profile that evolves over time, making it an excellent candidate for extended aging.
9. Enjoying Your Wild Yeast Mead
After aging your mead, it’s time to sit back and enjoy the fruits of your labor!
Taste your wild yeast mead and savor its unique flavors and aromas, which are a direct result of the wild yeast you captured and nurtured throughout the fermentation process.
- Share your mead with friends and family, and don’t forget to take notes on your wild yeast fermentation experience to continue refining and perfecting your mead-making skills.
In conclusion, fermenting mead with wild yeast is a rewarding and natural process that produces unique and complex flavors. To successfully ferment mead with wild yeast, follow these steps:
1. Capture wild yeast by creating a yeast starter with honey, water, and a source of wild yeast.
2. Prepare the mead must by mixing honey and water in a sanitized fermentation vessel.
3. Pitch the wild yeast starter into the mead must.
4. Aerate the must daily during the initial stages of fermentation.
5. Monitor fermentation by looking for signs of activity and tracking specific gravity.
6. Manage fermentation temperature to promote a clean fermentation.
7. Rack the mead into a secondary fermentation vessel for clarification and aging.
8. Bottle and age the mead to develop its flavors fully.
9. Enjoy your wild yeast mead and share it with friends and family.
By following these steps, you can create a delicious and unique mead that showcases the natural biodiversity of your environment and the fascinating world of wild yeast fermentation. Happy mead-making!
FAQs
How long does fermentation take for wild yeast?
Fermentation with wild yeast can take anywhere from a few weeks to a few months, depending on factors such as temperature, humidity, and the type of ingredients being fermented.
It is important to monitor the fermentation process closely and taste the product regularly to determine when it has reached the desired level of fermentation.
How long does it take for wild fermentation to start?
Wild fermentation can start within a few hours to a few days, depending on various factors such as temperature, humidity, and the presence of microorganisms in the environment.
How long does fermentation take to start?
Fermentation can start within a few hours to a few days, depending on the type of fermentation, the environmental conditions, and the presence of starter cultures or yeast.
Can you make mead with wild yeast?
Yes, mead can be made with wild yeast. However, it is important to note that using wild yeast can be unpredictable and may result in inconsistent flavors or fermentation issues. It is recommended to use a reliable yeast strain for consistent results, but experimenting with wild yeast can be a fun and unique experience for mead-making enthusiasts.