Cider making is not a complicated process, but it does involve a certain amount of waiting time. Especially if you make it from scratch – starting from the apples!
The first steps of cider making are picking, washing, and crushing apples, which will take half a day or so. Some cider makers perform maceration, which will add another few days. Then the crushed apples need to be pressed, which can take anywhere from an hour to half a day.
Finally, the fermentation itself can take between a few days and a few months depending on the apples and yeast strains used, pH and especially the fermentation temperature!
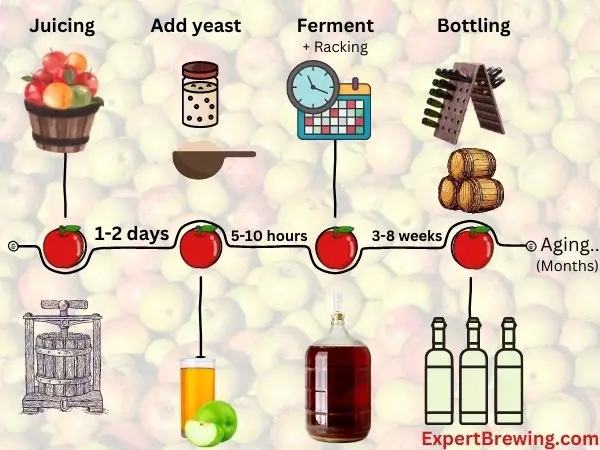
In theory a cider can be ready to drink in as little as 2-3 weeks, but most cider makes spend 6 months or more to give the cider appropriate time to develop and age.
This first part of cider making is the same no matter if you want to ferment it or not. Depending on what setup you use for juicing or if you prefer store bought juice, the steps preceding fermentation may take a few hours to a day or two (if you dont count growing the apples etc…).
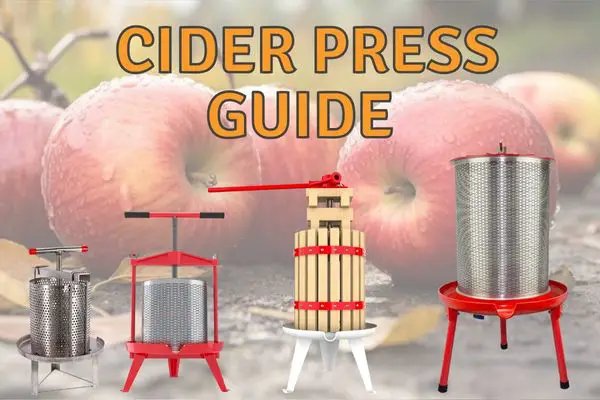
But the fermentation process can be done in a lot of ways, which will determine the speed of the process.
The factors affecting the speed of fermentation is the focus of this article.
How Long Does Cider Fermentation Take?
Generally, the cider will start to ferment 1-5 hours after the yeast is added to the juice. You might not be able to see bubbles yet, but the yeast will start multiplying to levels where visible CO2 will form and small bubbles are appearing in the brew.
Wet yeast will start fermentation faster than dried yeast, and re-hydrated dried yeast (preculture) will start faster than dry yeast added directly.
After the fermentation has started, it will need to ferment for at least 2 to 3 weeks or 14 to 21 days at room temperature to become hard cider, or alcoholic cider.
This is the time it takes the average cider yeast to convert all the sugars in the initial apple juice into alcohol and CO2. A process called primary fermentation.
The primary fermentation will take longer if you are using a slow cider or wild yeast strain or if the conditions of your fermentation are such that the yeast will be slower.
Most yeast strains grow optimally around 30 degrees celsius (86F) but few would brew their cider at that high a temperature!
However, it is not always best to add more yeast or to create the optimal conditions for the yeast as this may compromise the quality of the final product.
In fact, many cider brewers brew their cider at suboptimal conditions on purpose to achieve a more flavorful aromatic product.
For example, it is quite common to brew at lower temperatures to encourage a different metabolism of the yeast and to prevent aromatic compounds from evaporating too fast.
The juice itself, and therefore the apples chosen, will also affect the speed of fermentation because the nutrient content (other than sugars!), the pH and the types of acids present in the juice affect how fast the yeast grows.
Many traditional French and Spanish cider makers use the wild yeasts present on the apples, without adding anything else.
They may even perform a process known as “keeving” to remove nutrients from the fermenting brew, which results in an even slower process!
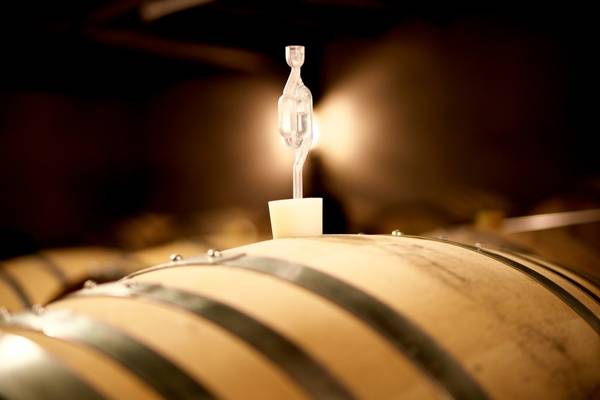
Using these methods of wild yeasts, low nutrient high acid apple juice, and often also lower temperatures, a primary fermentation can easily take months to finish!
On the other side of the spectrum are the more modern craft ciders made in large fermentation vessels for the masses.
These optimized commercial processes are often performed in large well-stirred tanks with low acidity apple juices, yeast nutrients added, and fast commercial yeasts that ferment faster and with more consistency than wild yeasts.
In addition, the cider might not undergo secondary fermentation but is instead filtered and force carbonated, which is much faster and provides more stability and consistency than waiting for the yeast to carbonate the cider on the bottle.
In that case, thousands of gallons of cider can be produced and ready for selling in less than two weeks.
For home brewers and traditional cider makers, we usually prefer a slower more consistent fermentation over at least three weeks at lower (maximum 65F or 18C) temperatures and most people do not measure sugar levels every day to bottle at the first opportunity.
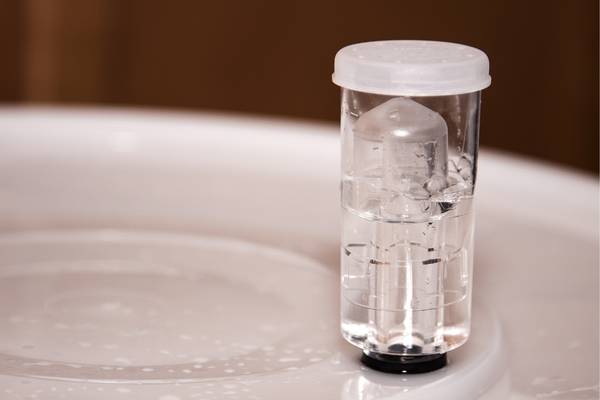
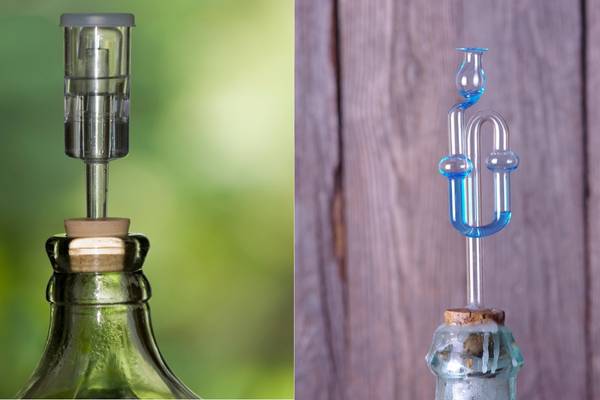
Normally, one would just observe the CO2 bubbles in the airlock and wait for 1-2 weeks after the frequency drops below 1 per minute.
At this point, you can bottle the brew to obtain a still or non-carbonated cider, but you will have to do a secondary fermentation on the bottle or use another carbonation system to get it sparkling!
I will look into the timeline of secondary fermentation later in this article.
How long does it take for apple cider to turn into alcohol on its own?
If you simply take freshly pressed raw apple juice and leave it to ferment on its own without adding any yeast, it will typically take a week or so before you will be able to observe active fermentation.
The wild yeasts are naturally present on the surface of the apples, but in smaller amounts, so they will need some time to multiply into significant numbers before fermentation can be observed as CO2 bubbles in the cider.

In the case of store-bought cider, which is most likely pasteurized, there will be no live yeast available to begin with.
But if an open bottle is left out at room temperature, yeast will eventually fall from the air and natural fermentation will begin in a matter of days.
After the initiation of spontaneous fermentation, the wild yeast will typically need at least 3-4 weeks or around 25 days to finish the job at room temperature.
However, towards the end of fermentation, if no airlock is fitted to make the cider free of oxygen, it will eventually spoil and turn into apple cider vinegar!
If you want to learn more about making your own cider, check out our free guide for starters in cider brewing here!
How do I know when my cider is done fermenting?
There are a few things you can look for to ensure that your cider is done fermenting:
1. The specific gravity of your cider should typically be below 1.010. You can measure this with a hydrometer. But it depends on the amount of non-fermentable sugars in the juice used but for most apples, this is a good rule of thumb.
For perry and some other fruits, the SG will be slightly higher at the end of primary fermentation as they contain more sorbitol.
2. Your cider should be clear and not cloudy. This is a sign that all yeast is done fermenting and has sunk to the bottom. However, this only works for highly flocculating yeasts and usually not for wild yeasts or very cloudy juices.
3. There should be no more bubbles coming out of your airlock (this means that fermentation has slowed down or stopped). Again, this is a sign that the yeast is done fermenting the sugar and is dying off.
4. If you taste your cider, it should be dry and not sweet (this is why many people like to add sweetness back after fermentation is complete).
5. The pH of your cider might go up. If performing a wild fermentation at moderate temperatures, the lactic acid bacteria will convert malic acid to lactic acids resulting in a less sour brew.
Finally, the cider will start to clear up as the yeast will die off and fall to the bottom.
When to stop cider fermentation?
Typically, there is no reason to worry about stopping an active cider fermentation as it will stop on its own when all sugars are used up by the yeast.
The only reason you would want to stop active fermentation is to make a sweeter cider or ensure high stability on the bottles.

To stop fermentation prematurely, you would need to remove or inactivate the yeast, which is doable but not easy for amateur brewers.
To remove the yeast completely, one needs a fine filter and a pump to circulate the cider with high pressure in a sterile setting.
This is usually a bit too much work for simple home brewers like you and me.
Therefore, inactivation of the yeast is somewhat more achievable for most home brewers.
Industrially, this is sometimes done via micro pasteurization where the cider is heated to above 70°C (158°F) for less than a minute to kill off the yeast without ruining the taste or evaporating the alcohol of the cider.
You can in principle do this at home by adding sugar just before bottling and then heating the freshly bottled cider bottles to around 70°C (158°F) in a water bath (or a dishwasher!) for about 5 minutes. Be careful though as the bottles may break!

A more accessible way for home brewers is to inactivate the yeast with chemicals such as metabisulfite and sorbate, sometimes combined with a cold shock, to inactivate the yeast, after which sugar in any form can be added to sweeten the finished cider.
While these methods can work, there is always the risk that some yeast will survive and start producing CO2, which in the best case removes the sugar again, and in the worst case makes the bottles explode…
However, more often it will work out fine, but you will have to figure out other ways of adding carbonation to your cider as the yeast will not perform the task for you!
Another option is to simply drink the cider as a non-carbonated “still” cider, which is historically the most common way of drinking cider…
You can also try performing cold crashing, which is a way to shock and precipitate the yeast without the use of filters, heat, or chemicals.
What about bottle fermentation and carbonation time?
Secondary fermentation, or bottle fermentation, leading to proper carbonation usually takes at least 1 week or 7 days at room temperature, but some people store their cider at lower temperatures where it will take twice as long or longer.
You can bottle this cider without adding any additional sugars or fresh juice to achieve “still” or non-carbonated cider (which is the norm in some regions of the world!).
But if you want a sparkling cider, you will need to perform bottle fermentation also known as secondary fermentation.
Secondary fermentation happens when you add a bit more sugar to the fermented cider just before you bottle it.
This allows the yeast to produce a bit more CO2 that becomes the bubbles or fizz that most people associate with hard cider.
When the secondary fermentation is done, we would call the following phase the “aging” phase of the cider.

This is optional, but many people feel that it results in a better-tasting less bitter product. Secondary fermentation usually takes place in a glass carboy or bottle and takes anywhere from two weeks to two months, but most people do not transfer the cider from there! Except when they drink it…
The cider can be stored in many ways during this phase, and I have written much more about the topic of storing cider here.
Conclusion
Cider making involves many steps and a lot of waiting time. The fermentation process can be done in different ways, which will determine the speed of the process.
The primary fermentation usually takes around 3 weeks. To achieve a sparkling cider, you will need to perform bottle fermentation (secondary fermentation), which takes around 2 weeks.
The main factors that would slow down cider fermentation are:
- A slow (wild) yeast strain.
- A low temperature compared to the yeast strains optimum.
- A juice from nutriet poor apples.
- Highly acidic (low pH) apple juice
- Presence of other inhibitors such as sulfites, antifungals etc.
- High amounts of sugars to ferment (SG > 1.100).
If all of these factors are suboptimal, a fermentaiton can take months but if they are present to a lesser extend the fermentation time will decrease significantly.

