Brewing hard cider is an art form that takes patience, precision and creativity. Whether you are a novice or experienced brewer, it can be a challenge to retain some of that natural sweetness from the apples in your final brew.
To achieve a sweet, and stable, hard cider requires understanding of fermentation techniques as well as how to back sweeten your brew for optimal flavor and safety.
There are multiple ways to make a sweeter hard cider:
- Stopping fermentation early using chemicals
- Cold crashing to precipitate yeast and leave behind residual sugars
- Adding sugar beyond yeast tolerance
- Back-sweetening using undigestible sweeteners
- Filtering out yeast and force carbonating
In this article we will discuss tweaking the cider fermentation process, stopping it with cold crashing and campden tablets, using sugars or artificial sweeteners to backsweeten when necessary – even after carbonation!
Finally we’ll review some final steps to ensure success in making a delicious batch of homemade sweet hard cider every time! So let’s get started on our journey into learning how to make sweet hard cider!
Table of Contents:
- How To Brew Sweeter Cider
- Tweeking The Cider Fermentation Process
- Stopping Fermentation
- Cold Crashing
- Back Sweetening
- What types of sugars to use for back sweetening?
- Artificial sweeteners for backsweetening
- When to back sweeten cider?
- Can you back sweeten cider after carbonation?
- Final Steps
- Conclusion
How To Brew Sweeter Cider
Brewing hard cider is a great way to enjoy the sweet taste of apples without having to worry about making apple pies or other desserts.
Hard cider is an alcoholic beverage made from fermented apples and can be enjoyed by adults of all ages.
To make sweeter hard cider, there are several steps that must be taken during and after the brewing process.
Back Sweetening
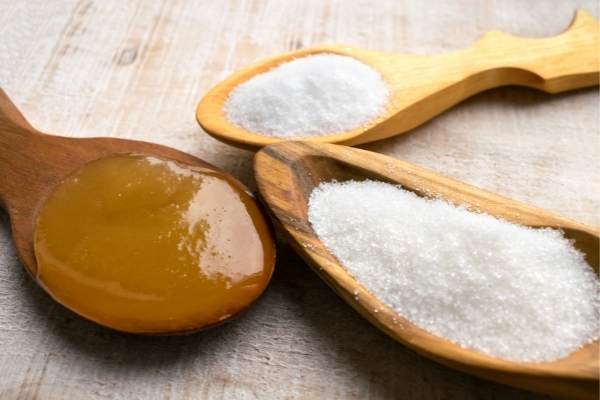
Back sweetening involves adding sugar after fermentation has finished in order to increase the sweetness of your hard cider. There are many different types of sugars you can use for back sweetening, including white sugar, brown sugar, honey, maple syrup and molasses.
Artificial sweeteners such as stevia and sucralose are safest to use, but may affect the flavor of your final product.
You should experiment with different types of sugars until you find one that gives you the desired sweetness level for your hard cider.
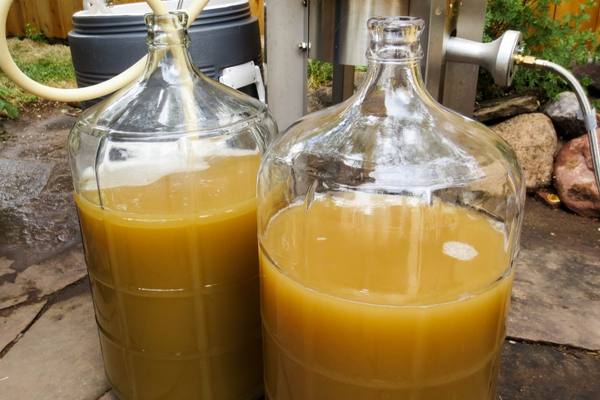
Cold Crashing, Keeving & Campden Tablets
Cold crashing is a technique used to reduce yeast activity in order to stop fermentation before it’s complete to prevent further sugar fermentation while preserving residual sweetness in the final product.
This method requires chilling your fermenter down below 40°F (4°C) for at least 48 hours before bottling or kegging your beer or cider so that any remaining yeast will become dormant and inactive due to cold temperatures which will help retain some residual sweetness in the final product.
Keeving is another method by which you can starve the yeast of other nutrients so that it runs dry before eating all the sugar in your cider. I wrote a whole article about keeving cider here.
Additionally, campden tablets (potassium metabisulfite) can also be added prior to bottling/kegging which helps kill off any remaining active yeast cells thus preventing further fermentation once bottled/kegged up into individual containers ready for consumption!
Campden + Sorbate & Filtration
Potassium sorbate is another chemical additive commonly used when back-sweetening ciders as it prevents any re-fermentation from occurring within bottles/kegs once they have been filled with finished liquid post cold crash period – this ensures no additional carbonation occurs within bottles/kegs over time leading towards potential bottle bombs if not monitored closely!
Filtration through microporous brewing filters can also help remove suspended solids like living yeast cells which could potentially lead towards future re-fermentation if left behind post cold crash period – these two processes combined together ensure no future re-fermentations occur even after adding large amounts of sugars during back-sweetening process itself!
In summary, there are many ways to make a sweeter hard cider. Techniques such as cold crashing, campden tablets, sorbate addition and filtration processes can be used in combination with various types of sugars available on the market today. Experimentation is key until the desired results are achieved; then enjoy responsibly afterwards.
By following the steps outlined in this guide, you can create a sweet and delicious hard cider that will be sure to please your taste buds. Next up, let’s explore how to properly store and age your freshly brewed cider.
Main Takeaway: To make sweet hard cider, brewers should use a combination of techniques such as cold crashing, campden tablets, sorbate addition and filtration processes in combination with different types of sugars. Experimentation is key to find the desired sweetness level for your hard cider before bottling or kegging it up. This will ensure no future re-fermentations occur even after adding large amounts of sugars during back-sweetening process itself!
Tweeking The Cider Fermentation Process
When it comes to making sweet cider, the fermentation process plays a major role. It is important to understand how this process works and what can be done to tweak it in order to achieve the desired sweetness level.
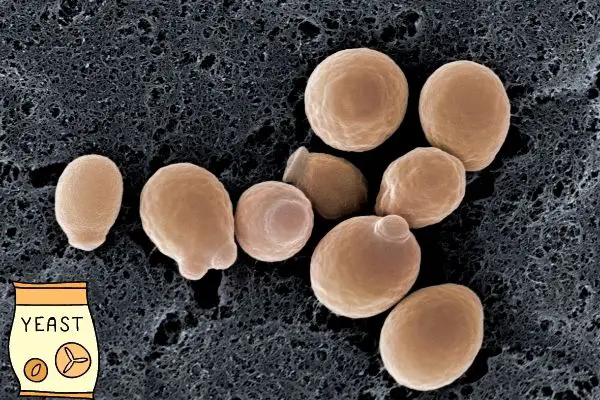
Yeast Selection: The type of yeast used for fermenting hard cider will have an effect on its sweetness. Yeasts with low alcohol tolerance or those that are sensitive to sulfites are better suited for making sweeter ciders as they tend not to produce high levels of alcohol. In addition, certain yeasts such as champagne yeast may also be used if you want a dryer cider with more complexity and flavor notes.

Fermentation Temperature: Fermenting at lower temperatures helps retain more of the sugars present in the juice which results in a sweeter end product.
Whereas many yeasts have optimal temperatures around 86°F (30°C), this is almost never the best temperature to use when brewing quality cider!
Generally speaking, temperatures between 65-75°F (18-24°C) work best for most types of yeasts when producing sweet ciders.
Fermentation Time: Longer fermentation times allow more sugar conversion by the yeast resulting in less residual sugar and thus drier ciders, while shorter and interrupted fermentations result in higher levels of residual sugar leading to sweeter ciders overall.
Depending on your desired outcome, you can adjust your fermentation time accordingly but keep in mind that longer fermentations require more patience!
Sulfite Addition: Adding sulfites during fermentation helps inhibit wild yeasts from taking over which can lead to off flavors or aromas being produced by these unwanted organisms rather than from the intended yeast strain alone. Sulfites also help reduce oxidation which can cause discoloration or other undesirable changes during storage so adding them is recommended if you plan on aging your cider for any length of time before consumption .
Lowering the pH level through acidification prior to pitching your chosen yeast strain can help create an environment where fewer unwanted bacteria survive while encouraging desirable ones like Saccharomyces cerevisiae, the species responsible for alcoholic fermentation.
This gives brewers greater control over their final product’s flavor profile since different strains respond differently depending on their environment.
Adjusting pH levels prior to pitching provides brewers with greater flexibility when creating unique recipes tailored specifically towards their tastes.
By understanding the process of cider fermentation, you can tweak it to create a sweet hard cider that is perfect for your taste. Next, we’ll look at ways to flavor and carbonate your cider.
Main Takeaway: The fermentation process is key to making sweet hard cider. Brewers should consider the type of yeast used, fermentation temperature, time and sulfite addition when creating their recipes. Additionally, lowering the pH level prior to pitching can help create an environment that encourages desirable yeast strains and gives brewers greater control over their final product’s flavor profile.
Use wild yeast to obtain sweeter cider
One of my preferred ways of obtaining sweet, less bitter, and smooth ciders is to do wild fermentations.
This method relies on the yeasts already present on the apples and if you are lucky, you get a population of yeasts that will not tolerate high alcohol levels and therefore leave a bit of residual sugar for you to enjoy!
In a way, it is the easiest method as it requires you to add nothing and do nothing to the juice other than leaving it at the right conditions with an airlock to prevent oxygen from reaching the juice.
The downside of the method is that it does not always work. Sometimes yeasts with a higher alcohol tolerance are present and they will ferment the cider dry.
Other times, if you bottle too late, the yeast will die and you will get a still cider instead of a sparkling one.
In my experience, waiting a few weeks after the fermentation has stopped and then racking and placing the cider in a cold place below 10°C (50°F) for a few months inactivates most of the yeast and gives you a sweet, less bitter, cider. This process is also known as cold crashing.
Sometimes, there is surviving yeast left to allow carbonation upon the addition of sugar before bottling, but this is not always the case.
For some wild yeasts, the pressure developed after bottling is actually enough to kill the yeast when combined with cold storage, and this will give you the perfect match between sweetness and carbonation!
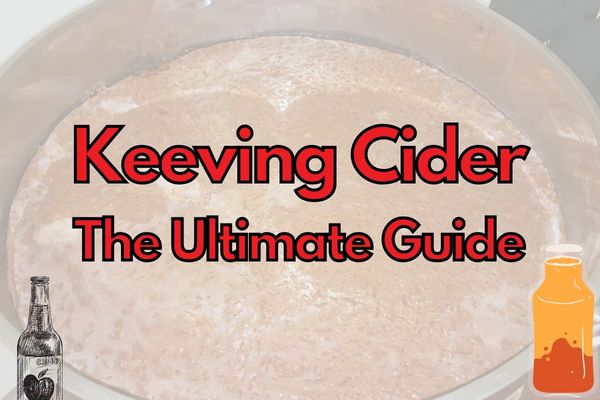
Keeving – The Art of Starving Your Yeast!
Keeving is an ancient technique used to make cider that results in a natural, low-alcohol, and sweeter, more clear, cider.
This process was developed in Ireland and France centuries ago and involves allowing the juice to ferment slowly over several months.
The result of this method is a complex flavor profile with notes of sweetness that can be enjoyed by both novice and experienced cider drinkers alike.
The History of Keeving
The keeving process has been around for hundreds of years, though it wasn’t until recently that its popularity began to rise again among home brewers.
It all started when Irish farmers noticed that their apples, high in calcium, were naturally sweetening during fermentation due to the presence of natural pectinase enzymes released from the apple skins as they broke down during pressing.
These enzymes cause pectin molecules in the juice to break apart and form a pectin gel with the calcium. They racked it off and got a clearer, sweeter, cider!
Benefits Of Keeving:
The main benefit associated with keeving is that it produces ciders with natural sweetness without having to add additional sugar prior to fermentation, as many other brewing processes require.
Additionally, because less nutrients and less yeast growth is needed overall there tends to be fewer off flavors produced during fermentation resulting in smoother tasting beverages free from harshness or yeast taste and bitterness often found in higher ABV ciders made using alternative methods like champagne yeast pitching rates etc.
Finally due the lower nutrient content of keeved cider compared to most modern day brewing techniques you’ll find that these types of drinks tend to have longer shelf lives after bottling too.
What do you need to make keeved cider?
Depending on how you got your juice and the calcium content of your apples, you might need to ad Calcium Chloride and pectinase, but the process might also happen on its own if the fermentation is left untouched at low temperatures!
Making your own keeved cider requires only a few basic ingredients: fresh-pressed apple juice (or other fruit juices), yeast, sugar (optional), and water if needed for dilution purposes.
You will also need the typical cider brewing equipment such as an airlock, vessel, bottles or jugs for storage; and something like Campden tablets or potassium metabisulfite powder for stabilization at the end or for sanitation purposes prior to bottling/kegging your finished product.
How To Make A Traditional Sweet Cider Using The Keeving Method
In short, you perform a natural fermentation for a few weeks after which you encourage the polymerization of pectin and the subsequent precipitation of nutrients from your cider.
To encourage this, you use colder temperatures and add calcium chloride along with a pectinase ezyme.
With a bit of luck, this will be all you need and a brown cap will form on top of your brew. The cider that is left behind will be more clear and have lower nutrient levels than before.
Keeving is a unique and rewarding brewing process that requires careful attention to detail, but can yield delicious results. With the right steps in place, you’ll be well on your way to crafting a perfect hard cider! Next up, let’s look at the basics of how to keeve.
Main Takeaway: Keeving is an ancient method of making cider that results in a naturally sweet, low-alcohol drink.
Stopping Fermentation To Keep Residual Sugars
Stopping fermentation is one way to make a sweeter hard cider because you will end up with leftover sugars.
There are several methods for stopping the fermentation process, such as cold crashing, campden tablets, sorbate and filtration.
Each of these techniques can be used on their own, but will usually be used together to help create a sweeter cider that will have more residual sugar left behind before the fermentation process has finished.
Cold Crashing: Cold crashing involves cooling down the temperature of your fermenter quickly by placing it in a refrigerator or freezer. This sudden drop in temperature will cause yeast cells to become dormant and stop producing alcohol. The result is a sweet cider with some residual sugar still present from the original ingredients used during brewing. It’s important to note that cold crashing should only be done when you’re sure that all of your desired flavors have been extracted from the must (unfermented juice).
You can read more about how exactly to perform cold crashing in my cider cold crashing guide.
Campden Tablets: Campden tablets contain sulfites (it is metabisulfite) which act as an antimicrobial agent and inhibit yeast growth while also killing off any bacteria present in your brew. Adding one tablet per gallon of must before pitching yeast will ensure that no wild yeasts or bacteria can contaminate your batch and spoil its flavor profile. After adding Campden tablets you should wait 24 hours before pitching yeast so they can take effect properly on any unwanted microorganisms present in your brew.
Sorbate: Potassium sorbate works similarly to Campden tablets but instead of killing off wild yeasts it inhibits their ability to reproduce further once added into solution, thus preventing them from creating additional alcohol content during fermentation process which would make your final product less sweet than intended if not taken into account beforehand.
When using potassium sorbate it’s best practice to add 1 teaspoon per gallon at least two weeks prior bottling time so it has enough time take full effect on any remaining active yeasts cells before packaging up finished product for consumption later on down line .
Filtration: Filtration is another way to stop fermentation early by removing most living yeast cells , proteins , hop particles etc…from solution leaving behind clear liquid ready for bottling without fear of further contamination or spoilage due too presence foreign materials floating around inside bottle itself.
While this method does require use specialized equipment such as fine mashed pressurised filters etc. it does offer great benefit being able achieve crystal clear clarity and the exact sweetnes you want at any point in fermentation much faster than other traditional methods available out there today.

This Mini Jet Hydraulic Filtering system is a good simple option for home brewers.
Overall, stopping fermentation early is a key ingredient in achieving the desired sweetness level within hard ciders without sacrificing the overall quality of the end product itself since each technique mentioned above offers unique advantages depending on the situation at hand.
Whether trying to kill off unwanted microbes or prevent reproduction of existing ones, or even remove solid particulates from suspension altogether in order to achieve a clearer beverage finish, up with perfect tasting glass every single time.
Once fermentation has been stopped, it is important to bottle the hard cider and allow it to condition for a few weeks before enjoying. Next, we’ll look at how to carbonate your hard cider.
Main Takeaway: There are several methods to stop fermentation and create a sweeter hard cider, such as cold crashing, Campden tablets, sorbate and filtration. Each technique has its own advantages depending on the situation at hand:
• Cold crashing quickly cools down the temperature of your fermenter to cause yeast cells to become dormant.
• Sorbate inhibits reproduction of existing yeasts cells so they can’t produce additional alcohol content during fermentation process.
• Campden tablets contain sulfites which act as an antimicrobial agent and inhibit yeast growth while also killing off any bacteria present in your brew.
• Filtration removes suspended solids like dead yeast cells, proteins, hop particles etc., from solution leaving behind clear liquid ready for bottling without fear of further contamination or spoilage due too presence foreign materials floating around inside bottle itself.
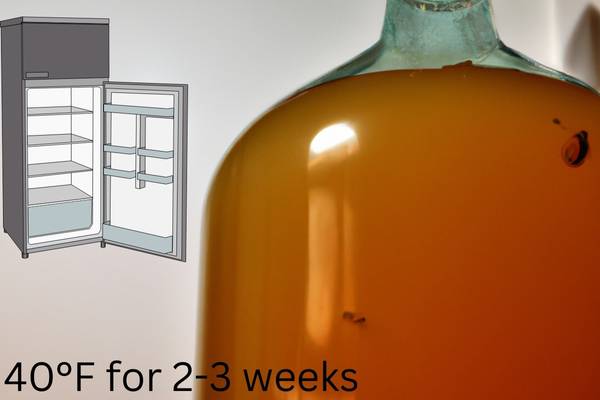
Cold Crashing
Cold crashing is a process used to stop fermentation and inactivate the yeast. It involves cooling your cider down quickly, usually within 24 hours, to temperatures below 50°F (10°C). This causes the yeast cells to become dormant and settle out of suspension. The result is a clearer cider with more residual sugar than before.

When cold crashing your cider, it’s important to cool it as quickly as possible while avoiding any temperature shocks that could damage or kill off the yeast cells.
To do this, you can use an ice bath or place your fermenter in a refrigerator set at 30-45°F (0-7°C). You should also avoid exposing the fermenter directly to light during this process since UV rays can cause oxidation and spoilage of the finished product.
Once cooled down, allow for several days for all of the sediment from inactive yeast cells to settle out of suspension at the bottom of your fermenter before racking off into bottles or kegs for storage.
If done correctly, cold crashing will leave behind residual sugars which will give your hard cider some sweetness without having to add additional sweeteners later on.
It is important not to let your hard cider sit too long after cold crashing, as there may still be some active yeast present that could continue fermentation if given enough time and warm temperatures again.
Therefore, once you have achieved the desired clarity and sweetness levels through cold crashing, it is best to transfer immediately into bottles or kegs for storage until ready for consumption.
Cold crashing is a great way to make sweet hard cider, and the next step in the process is to transfer your cider into bottles or kegs.
Main Takeaway: Cold crashing is a process used to stop fermentation and inactivate the yeast, resulting in a clearer cider with more residual sugar. To cold crash your cider successfully: 1. Cool it quickly but avoid temperature shocks. 2. Place fermenter in refrigerator at 30-45°F (0-7°C) 3. Avoid exposing directly to light during this process. 4. Allow several days for sediment to settle out of suspension before racking off into bottles or kegs for storage.
Back Sweetening
Back sweetening is a process used to make hard cider sweeter. It involves adding sugar or artificial sweeteners after fermentation has finished and the alcohol content of the cider has been determined. This can be done at any point during the brewing process, but it’s best to wait until after primary fermentation is complete before back sweetening.
The most common way to back sweeten cider is by adding sugar or honey directly into the batch. This will increase both sweetness and body in your final product. You can also use other types of sugars such as brown sugar, molasses, maple syrup, agave nectar, etc., depending on what flavor profile you’re looking for in your cider.
Just remember that each type of sugar will affect your ABV differently so keep an eye on that when deciding how much to add!
Another option for back sweetening is using artificial sweeteners like stevia or sucralose (Splenda).
These are great options if you don’t want to worry about restarting fermentation and the yeast using up the sweetness before you get to taste it!
However, they may not provide quite as much sweetness as regular sugars would so you may need to experiment with different amounts until you find what works best for your particular recipe and desired level of sweetness.
Finally, some brewers opt for natural sources of sweetness such as fruit juices or purees which can add complexity and depth of flavor while still providing enough residual sweetness from fructose and other natural sugars present in these ingredients.
It is important to note that back sweetening with fermentable sugars should only be done once all fermentation processes have stopped completely, otherwise it could lead to bottle bombs due to increased pressure from trapped CO2 bubbles created by active yeast cells consuming added sugars or sweeteners during secondary fermentation stages.
Cold crashing (rapidly cooling down) your beer prior to bottling can help prevent this issue by forcing yeast cells into dormancy where they will not consume additional fermentable sugars post-bottling, thus avoiding over-carbonation issues caused by excessive CO2 buildup inside bottles, kegs, etc.
Additionally, campden tablets (potassium metabisulfite), sorbate (potassium sorbate), and filtration techniques are often employed alongside cold crashing methods in order to ensure complete cessation of all yeast activity prior to bottling or kegging timeframes.
Back sweetening is an important step in making hard cider, as it ensures the desired sweetness and flavor. Next, we will look at how to ferment your hard cider.
Main Takeaway: Back sweetening is a process used to make hard cider sweeter and can be done at any point during the brewing process. The most common way to back sweeten is by adding sugar or honey directly into the batch, but artificial sweeteners like stevia or sucralose (Splenda) and natural sources of sweetness such as fruit juices or purees can also be used.
When to back sweeten cider?
The best time to backsweeten your cider is preferentially after primary fermentation and after filtering out or inactivating the yeast (if doing so). This ensures that any residual sugar you add will not be fermented by the yeast, resulting in a sweeter end product.
Most brewers backsweeten just before bottling their cider as this allows them to adjust the sweetness of their beverage without having to re-ferment it. It also gives them more control over how much carbonation they want in their finished product since they can stop fermentation at whatever point they desire prior to bottling.

If you are looking for a way to get an even smoother finish on your hard cider, then cold crashing your cider first may be something worth considering before adding any sugars or artificial sweeteners.
Cold crashing involves cooling down your fermenting beer or wine so that all of the suspended solids drop out and settle at the bottom of your fermenter, leaving behind a clearer liquid with fewer off flavors and aromas. This process can take anywhere from one day up to two weeks depending on how cold you keep your fermenter and what type of yeast was used during fermentation.
Once you have completed cold crashing (or skipped it altogether), then it’s time for back sweetening! There are several different types of sugars available for use when back sweetening ciders such as honey, brown sugar, molasses, maple syrup etc.
But most brewers prefer using white table sugar due its neutrality in flavor and low cost compared with other options like honey or maple syrup which tend to impart additional flavors into the final product beyond just sweetness alone.
If desired however these other natural sugars can still be used if desired but should generally only make up no more than 25% of total added sugars when doing so otherwise risk overpowering the flavor profile with too much complexity from additional ingredients like those found in honey or maple syrup.
In addition there are also several artificial sweeteners available such as Splenda® which can provide an even greater degree of control over final sweetness levels while avoiding potential issues associated with bottle bombs caused by excess priming sugar being added directly into bottles prior packaging .
When using artificial sweeteners however caution must still be taken not exceed recommended usage levels otherwise off flavors could result from excessive amounts being used instead .
Once all desired adjustments have been made, the last step would involve capping/corking/kegging/bottling according to our preferred method. After this is done, we should allow sufficient conditioning time (usually 1-2 months) before serving our homebrewed hard cider.
Back sweetening cider is an important step in the hard cider brewing process, and knowing when to do it will ensure that your cider has the perfect balance of sweetness and tartness. Next, let’s look at how to back sweeten your hard cider.
Main Takeaway: When making sweet hard cider, timing is key. The best time to backsweeten your cider is after primary fermentation and filtering out the yeast. Cold crashing can be done for a smoother finish before adding sugars or artificial sweeteners. Popular natural sugars used are white table sugar, honey, brown sugar, molasses and maple syrup (but no more than 25% of total added sugars). Artificial sweeteners like Splenda® should also not exceed recommended usage levels. Lastly allow sufficient conditioning time before serving your homebrewed hard cider.
What types of sugars to use for back sweetening?
Using the right type of sugar for back sweetening can make all the difference in your hard cider.
Back sweetening is a popular technique used by home brewers to make sweeter hard cider. It involves adding sugar or artificial sweeteners after fermentation has finished, and can be done in several ways.
Apple Juice: Apple juice is the most common way to back sweeten cider. It adds natural sweetness without altering the flavor of the cider too much. To use apple juice for back sweetening, simply add it to your fermenter at a rate of 1/2 cup per gallon until you reach your desired level of sweetness. Make sure that you do not add too much as this will cause off-flavors and an overly-sweet taste.
Lactose: Lactose is another option for back sweetening hard cider. A major benefit of lactose is that it is not fermented by yeast! But it should only be used if you are looking for a very subtle sweetness as it does not have much flavor on its own.
When using lactose, start with 1/4 teaspoon per gallon and adjust accordingly until you reach your desired level of sweetness. Keep in mind that lactose takes longer than other sugars to dissolve so give it plenty of time before tasting again!
Honey: Honey can also be used to back sweeten hard cider but should be added sparingly as its strong flavor can easily overpower the delicate flavors of the fermented beverage. Start with 1 tablespoon per gallon and adjust from there until you reach your desired level of sweetness – keep in mind that honey will also contribute some body and mouthfeel which may affect how much additional sugar needs to be added depending on what type of texture you’re aiming for in your final product!
Maple Syrup: Maple syrup makes an excellent addition when back sweetening hard cider because its rich flavor pairs nicely with many ciders while still allowing them to retain their unique characteristics such as tartness or dryness levels.
Start by adding 2 tablespoons per gallon then adjust according to taste preferences – just remember that maple syrup contains more calories than other types of sugars so take this into consideration when deciding how much additional sugar needs to be added!
Brown Sugar: Brown sugar is another great option when trying to achieve a slightly richer profile in your finished product due its molasses content which adds complexity without overwhelming the palate like honey might do if overused!
Start with 2 tablespoons per gallon then adjust according to preference – just remember that brown sugar contains more calories than white granulated sugar so take this into consideration when deciding how much additional sugar needs to be added!
When trying to achieve higher levels of sweetness without drastically affecting the overall character or aroma profiles, juice concentrate (such as frozen orange juice) can be a great option. Start by adding 3 ounces per 5 gallons and then adjust according to taste preferences.
However, it is important to remember that concentrated juices contain more calories than plain fruit juices, so take this into consideration when deciding how much additional sugar needs to be added.
Main Takeaway: Back sweetening is a popular technique used by home brewers to make sweeter hard cider. Here are some options for back sweetening: – Apple Juice (12 cup per gallon) – Lactose (14 teaspoon per gallon) – Honey (1 tablespoon per gallon) – Maple Syrup (2 tablespoons per gallon) – Brown Sugar (2 tablespoons per gallon) – Juice Concentrate (3 ounces per 5 gallons). When back sweetening, it’s important to consider the calorie content of each option and adjust accordingly.
Artificial sweeteners for backsweetening
When it comes to back sweetening your hard cider, there are a few options for artificial sweeteners that you can use. Xylitol is one of the most popular choices because it has a similar sweetness level as sugar but without any calories.
It also doesn’t ferment like other sugars so it won’t affect the alcohol content of your cider. Erythritol is another option that has no calories and won’t ferment either, but its sweetness level isn’t quite as high as xylitol’s.

Splenda and stevia are two more non-fermentable sweeteners that can be used in hard cider brewing.
Both have very low calorie levels and don’t contribute to fermentation, however they do have different taste profiles than regular sugar and xylitol or erythritol that are closer to the taste of table sugar, so you may need to experiment with them before finding the right balance for your cider recipe.
All four of these artificial sweeteners can help make sweeter ciders without affecting their alcohol content too much, so feel free to try them out if you’re looking for an alternative way to back-sweeten your brews!
Backsweetening with artificial sweeteners is a great way to add sweetness and complexity to your hard cider without adding too much sugar, allowing you to create the perfect balance of flavor.
Can you back sweeten cider after carbonation?
Back sweetening cider after carbonation is possible, but it requires a few extra steps. The first step is to use storage containers that are easy to open and reseal so the carbonation does not escape. If you plan on back sweetening your cider after it has been carbonated, make sure you use airtight bottles or kegs with lids that can be opened and closed without losing too much of the CO2.
Once you have secured your container, you will need to determine how much sugar or artificial sweetener needs to be added in order for the desired sweetness level to be achieved.
You may want to start by adding small amounts of sugar or artificial sweetener at a time and taste until the desired sweetness level is reached. It’s important not to add too much at once as this could lead to an overly-sweetened beverage that may taste unpleasant.
It’s also important not forget about cold crashing when back sweetening cider after it has been carbonated; this process helps clear up any remaining sediment from fermentation and makes for a clearer product overall.
Cold crashing involves cooling down the liquid quickly in order for yeast cells and other particles suspended in solution settle out faster than they would under normal conditions; this helps create a clearer final product with fewer off flavors caused by yeast autolysis (the breakdown of dead yeast cells).
Finally, if you are using artificial sweeteners such as stevia or monk fruit extract, keep in mind that these do not contain calories like traditional sugars do. Therefore, they cannot provide any additional body or mouthfeel which some people enjoy from their ciders.
However, they can still provide a pleasant flavor profile without all of the calories associated with traditional sugars making them ideal for those looking for lower calorie options when back sweetening their ciders post-carbonation.
Yes, you can back sweeten cider after carbonation. However, it is important to note that the process of adding sugar or other sweeteners to your cider must be done carefully and with caution in order to avoid over-carbonating the beverage. Next, we will discuss what type of sweetener works best for back-sweetening hard cider.
Main Takeaway: Back sweetening cider after carbonation is possible, but requires a few extra steps to ensure the desired sweetness level is achieved. These include using airtight containers and cold crashing for clarity, as well as adding small amounts of sugar or artificial sweetener such as stevia or monk fruit extract at a time until the desired sweetness level is reached. Artificial sweeteners can provide flavor without calories while still providing body and mouthfeel like traditional sugars do.
Sweeten just before drinking – why not?
This one is fairly obvious, but still not appreciated by many.
The thing is, if you want a sweet cider without any risk of bottles exploding or adding chemicals, why not just add the sugar directly to the glass right before drinking the cider?
It might sound blasphemous, but it makes sense in many ways. First, there might be many people drinking the same cider, with different preferences.

By adding sugar post-second-fermentation, you can adjust the sweetness exactly to everyone’s needs.
Maybe I like my cider bitter and tannic, and you like it less bitter or bitter-sweet – just add half a teaspoon to a large glass of cider and you will get rid of some bitterness!
Another good thing is that you can maximally ruin one glass at a time, and a whole bottle will give you several attempts to experiment with your preferred sweetness.
Brewing Process for Sweet Apple Cider – An Example!
Brewing sweet apple cider can be a tricky process, but with the right ingredients and techniques you can create a delicious beverage.
The first step is to choose the right yeast for your desired sweetness level.
For sweeter ciders, opt for low attenuating yeasts such as Nottingham or Safale US-05. These will leave more residual sugars in the finished product than higher attenuating yeasts like champagne or dry ale yeast (Safale S-04).
You’ll also need to adjust your fermentation temperature accordingly. Lower temperatures will slow down fermentation and help preserve some of those residual sugars that would otherwise be consumed by the yeast during primary fermentation.
Aim for around 65°F (18°C) if possible, although it’s not essential – just keep an eye on how quickly fermentation progresses so you don’t end up with too much alcohol content in your final cider!
If you want even more sweetness, consider adding additional sugar after primary fermentation has completed. This could be anything from honey or brown sugar to maple syrup or molasses – experiment until you find something that works best for your taste buds!
Just make sure to add it slowly over time rather than all at once; this will allow the yeast enough time to consume each addition before moving onto the next one.
Finally, don’t forget about carbonation!
Sweet ciders are often served sparkling so it’s important to take steps towards achieving this effect either through bottle conditioning (adding priming sugar directly into bottles prior to capping) or keggingforce carbonating using CO2 tanks or simply a SodaStream machine!
Both methods work well but require different equipment setups depending on which route you decide to go down – do some research beforehand so that everything goes smoothly when bottling day arrives!
Final Steps
Once you have achieved the desired level of sweetness in your hard cider, it is time to take the final steps. These include bottling and storage.
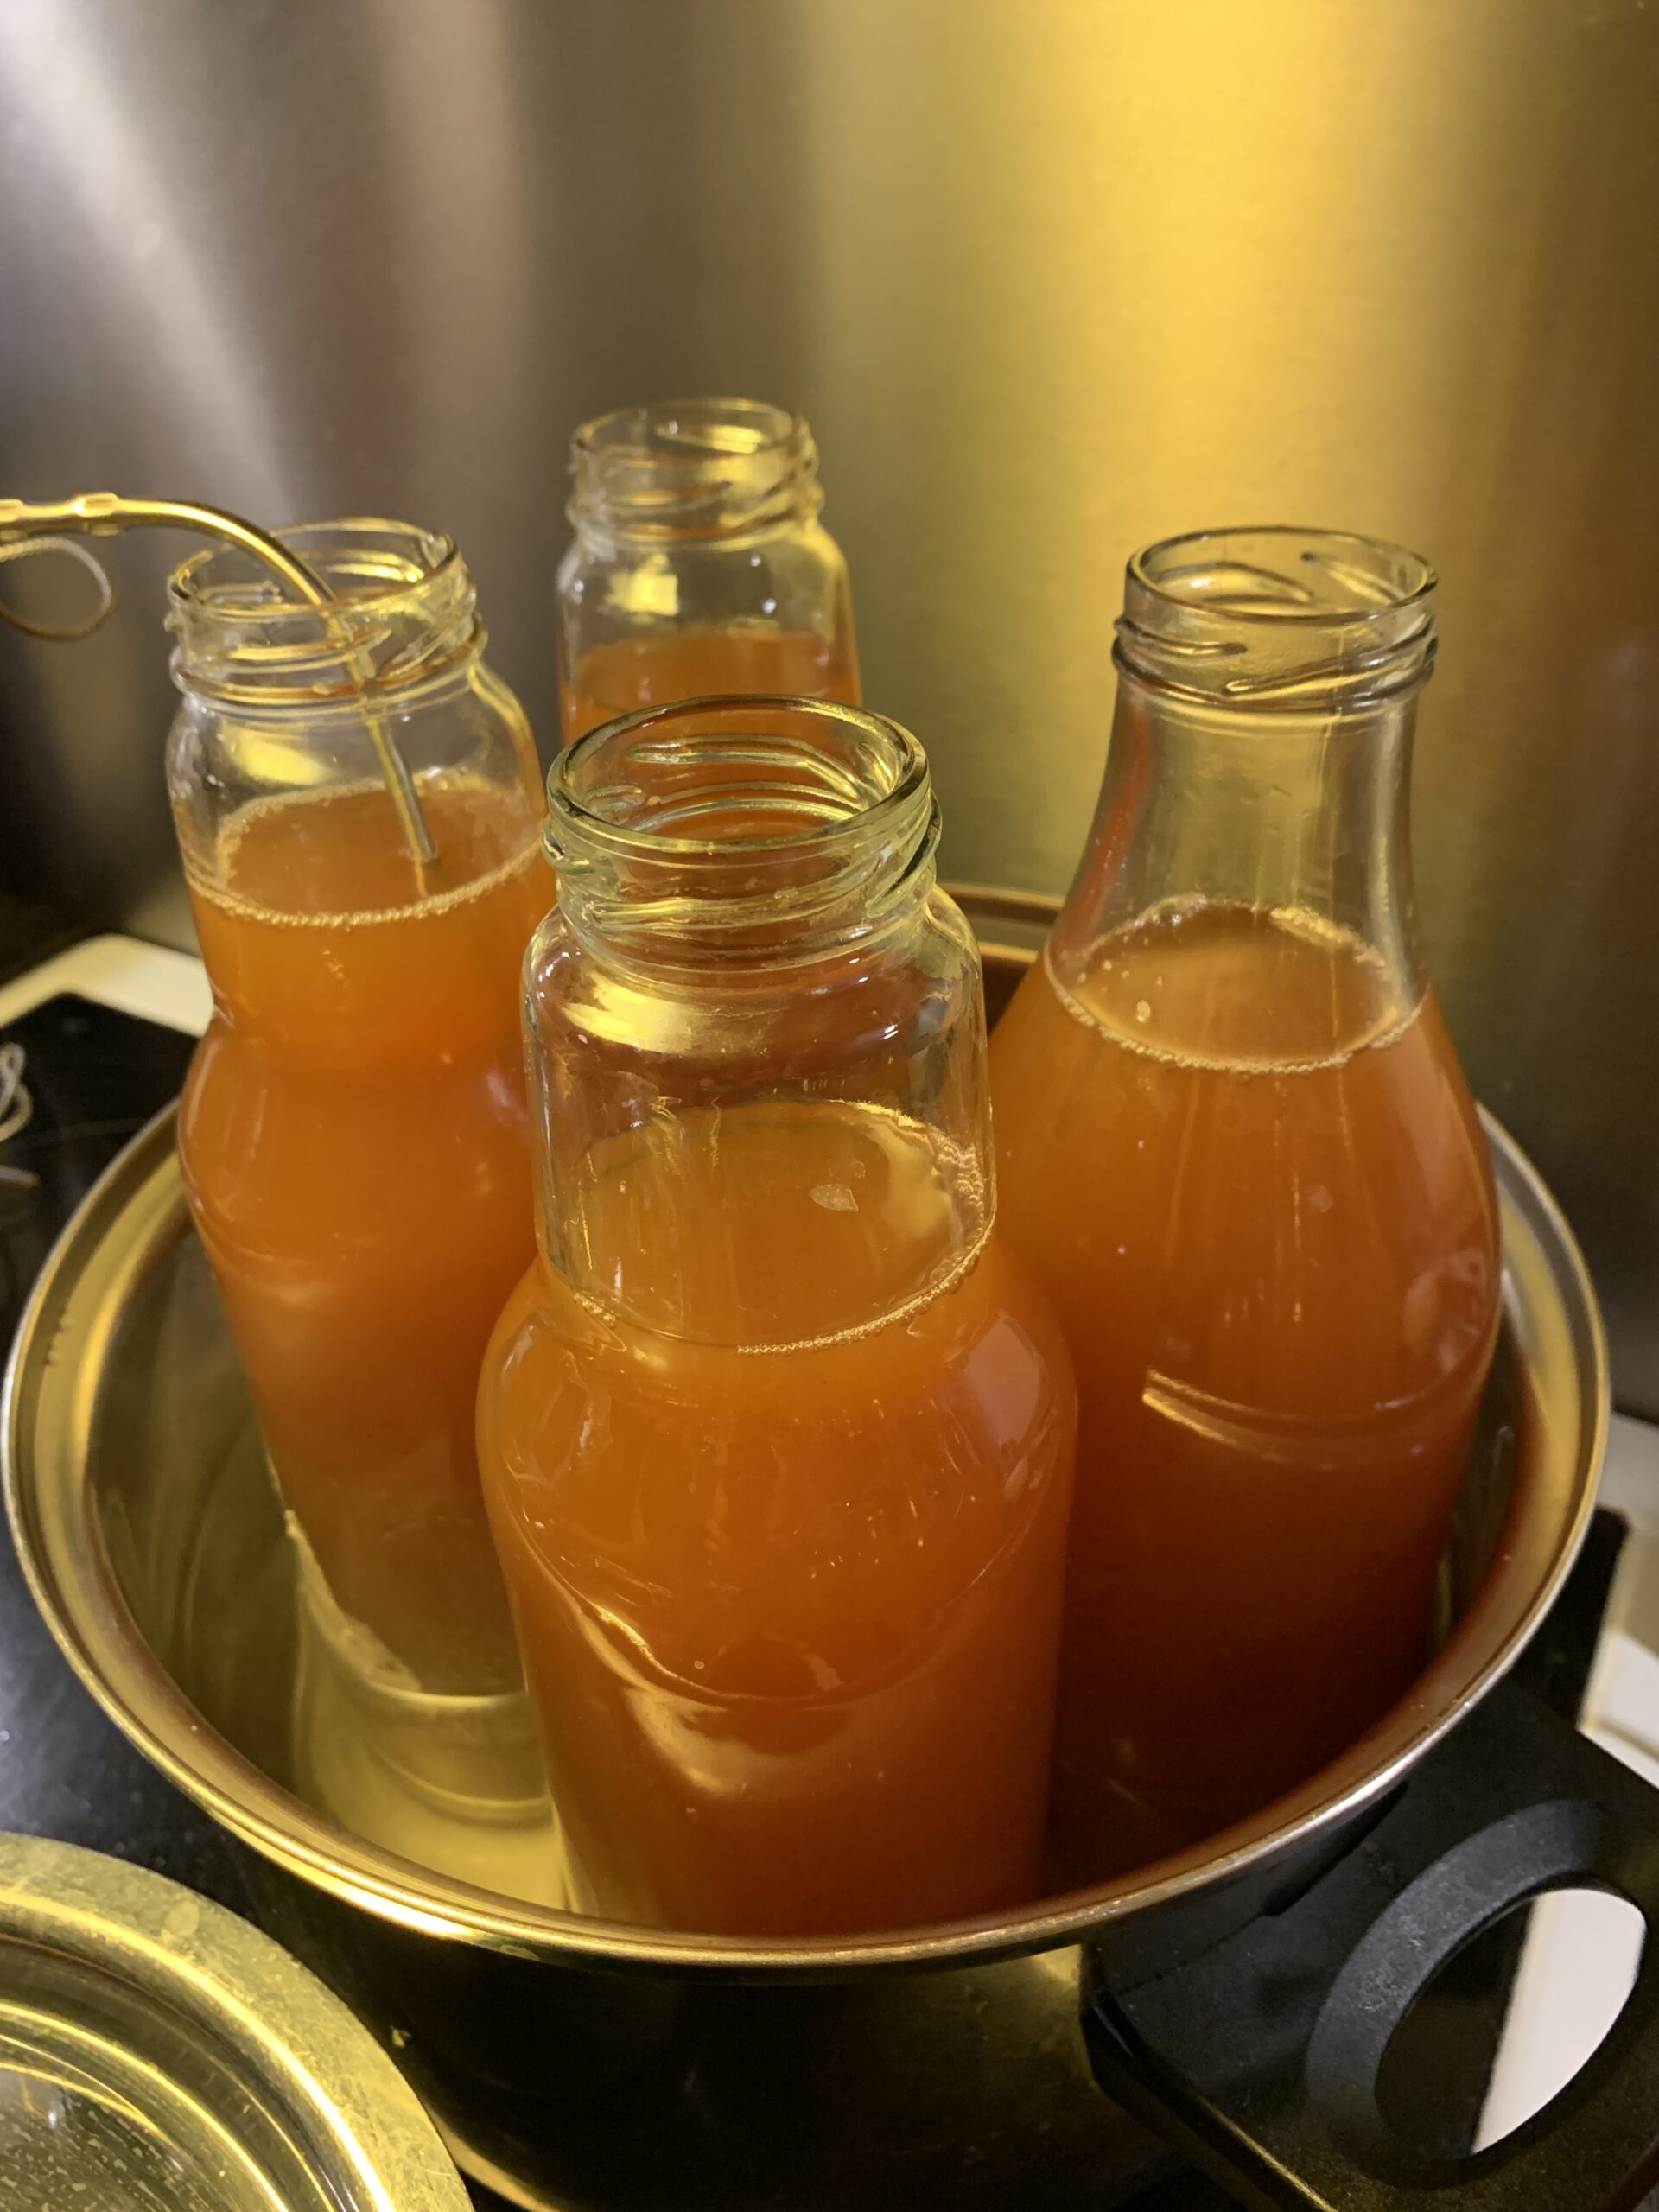
Bottling: Bottling your hard cider is a relatively simple process that requires some basic equipment such as bottles, caps or corks, a capper or corker, and priming sugar if carbonation is desired. First, sanitize all of your equipment with a food-grade sanitizer like Star San. Once everything has been cleaned and rinsed off, fill each bottle up to within an inch from the top using either a funnel or auto-siphon. If you are looking for carbonation in your finished product then add 1/4 teaspoon of priming sugar per 12 ounce bottle before capping them off with either caps or corks depending on what type of closure you prefer.
Storage: After bottling it’s important to store your hard cider properly so that it can age correctly and develop its full flavor potential without spoiling due to improper storage conditions. The ideal temperature range for storing cider is between 45°F (7°C) – 55°F (13°C).
Storing at temperatures higher than this can cause accelerated aging which will lead to undesirable flavors developing over time as well as potentially causing spoilage organisms like bacteria and wild yeast strains to become active again leading to further fermentation inside the bottle which could cause overcarbonation resulting in exploding bottles!
It’s also best practice not expose stored cider directly sunlight since UV light can degrade both flavor compounds as well as color compounds present in most ciders resulting in flat tasting and dull colored products after long term exposure.
When storing large batches of bottled cider, it is important to keep them upright instead of laying down horizontally. This will help prevent any leaking issues caused by pressure build up inside individual bottles due to continued fermentation even after being capped off during bottling day.
Once you have completed all the necessary steps to make your sweet hard cider, it’s time to let it sit and ferment. Now that you’ve made your sweet hard cider, let’s move on to bottling and carbonating for a perfect finish!
Main Takeaway: It is important to properly bottle and store hard cider in order to achieve the desired level of sweetness. Bottling requires basic equipment such as bottles, caps or corks, a capper or corker, and priming sugar if carbonation is desired. When storing large batches of bottled cider it should be done upright at temperatures between 45°F (7°C) – 55°F (13°C) away from direct sunlight. This will ensure that your hard cider has full flavor potential without spoilage due to improper storage conditions.
Conclusion
In conclusion, making sweet hard cider is a process that requires some patience and understanding of the fermentation process.
By tweaking the fermentation process with cold crashing, campden, sorbate and filtration you can stop fermentation and then back sweeten your cider with different types of sugars or artificial sweeteners.
It’s important to remember when to back sweeten as it can be done before or after carbonation. Finally, follow all instructions carefully for best results in order to make sweet hard cider!