

Brewing your own hard cider at home is a fun and rewarding experience. It allows you to be creative, explore different flavors, save money on store-bought varieties, and gain an appreciation for the craft of brewing your own alcoholic beverage.
Whether it’s something you’re just starting out with or have been doing for years – this guide will give you all the basics to get started making great tasting cider from the comfort of your own home!
We’ll cover topics such as tips for getting started in homebrewing cider, equipment needed, how to crush and press apples yourself (for those who want complete control over their recipes), yeast selection advice so that fermentation goes smoothly every time, what contributes to different tastes in ciders plus much more!
Table of Contents:
- The basics of cider brewing
- The benefits of brewing your own cider
- Tips for getting started with cider brewing
- Cider Brewing Equipment
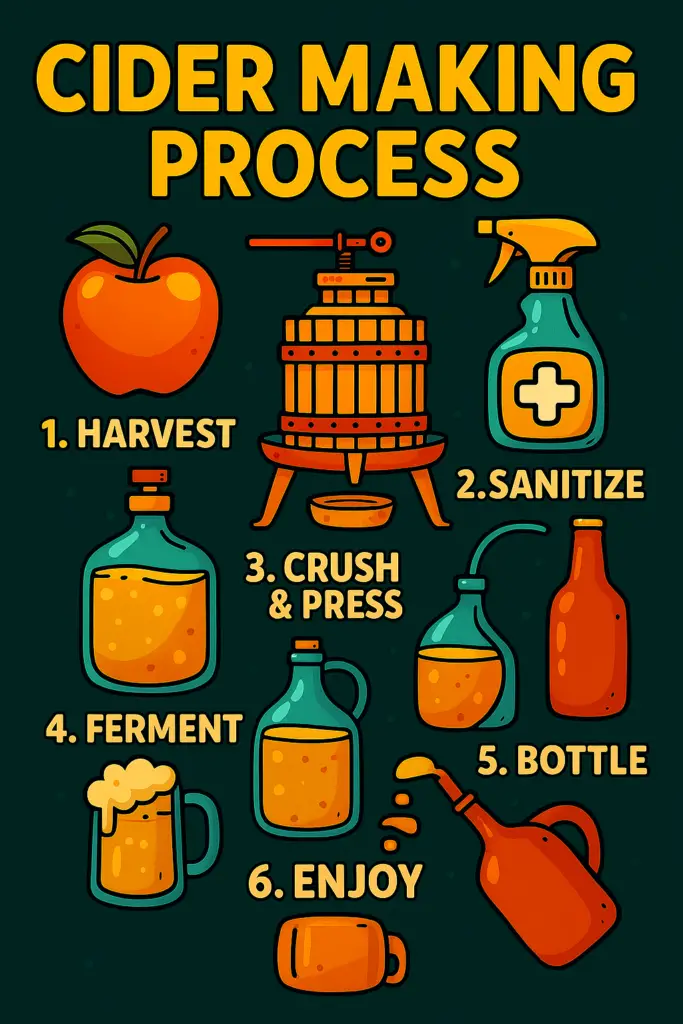
- The Cider Brewing Process – how to do it at home!
- How to crush and press your own apples for cider
- Yeast selection for cider
- What contributes the different tastes in hard cider?
- Troubleshooting common issues in cider brewing
- Advanced techniques for experienced brewers
- FAQs in Relation to Home Brewing Cider
- Conclusion
The basics of cider brewing
Cider brewing is popular among homebrewers, and for good reason. It’s easy to make, relatively inexpensive as it does not require fancy boilers etc. (like beer brewing does), and the end result can be quite delicious.
All you need to get going is basically some good apple juice, a container with an airlock and a willingness to experiment and learn!
Here are some basics of cider brewing that will help you get started:
Ingredients: The main ingredients in cider brewing are apples (or apple juice), yeast, and sugar. You can also add other fruits or spices to give your cider unique flavors.
Equipment: To brew your own hard cider at home, you’ll need a few pieces of equipment including a fermenter (a large container with an airlock lid), bottles or kegs for storing the finished product, and any additional tools such as hydrometers or thermometers that may be necessary depending on the recipe you choose.
Process: Cider brewing involves several steps which include sanitizing all equipment before use; crushing/pressing apples into juice; adding yeast (and sometimes) extra sugar to begin fermentation; monitoring temperature during fermentation; transferring the fermented liquid into bottles/kegs; carbonating if desired; then finally aging it until it’s ready to drink!
Tips for getting started with cider brewing
Brewing your own hard cider at home is an enjoyable experience that yields delicious results when done correctly. Here are some tips that will help ensure success from your very first batch onwards!
Research Recipes: Before beginning any project involving food or beverage production, research recipes thoroughly beforehand so you know what ingredients and processes are involved ahead of time – this includes researching both traditional French cider recipes as well as more modern ones using new techniques like commercial yeasts or barrel aging etc.. Doing so will allow you to experiment more easily and develop your own taste for the hobby!
Taste Test Regularly: Tasting samples taken periodically throughout entire process helps track progress made by yeast cells converting sugars into alcohols/carbon dioxide gas bubbles etc., plus gives insight regarding how much sweetness still remains left over after conversion finishes up completely – tasting sample also allows brewer adjust sweetness level accordingly by adding additional sweetener prior bottling phase takes place if necessary.
Testing the sugar content and the pH of your cider during fermentation is not only fun but can also help resolve problems before they get the the overtake.
Sanitize Equipment Thoroughly: Sanitation is key when making beer or wine – but especially important when making something like hard apple cider because there’s always potential for spoilage due to its high acidity levels. Make sure all equipment used throughout the process has been properly sanitized before each step begins – this includes anything coming into contact with either raw materials (apples) or finished product (bottles).
Monitor Temperature During Fermentation: As mentioned above, temperature plays an important role in successful fermentation – too hot temperatures can cause off-flavors while too cold temperatures won’t allow enough activity from yeast cells needed for conversion of sugars into alcohols/carbon dioxide gas bubbles etc.. Use thermometers placed inside fermenters regularly throughout fermentation process in order monitor temperature accurately – aim keep between 65°F–75°F range during primary fermentation period then lower slightly after secondary stage begins if desired flavor profile requires it .
Once bottled, store containers away in a dark and cool area away from direct sunlight since light exposure causes oxidation spoilage to occur quickly even though the bottle is sealed tightly shut. Additionally, avoid placing containers near heat sources such as heating vents or radiators since warm temperatures accelerate the rate at which oxidation occurs even further.
Cider brewing is a fun and rewarding hobby, and with the right knowledge and tools you can create delicious hard ciders at home. Now let’s explore the next step of cider brewing: choosing ingredients.
Main Takeaway: Brewing your own hard cider at home is an enjoyable experience that can yield delicious results when done correctly. The key elements to ensure success include researching recipes beforehand, sanitizing equipment thoroughly, monitoring temperature during fermentation, and tasting samples regularly. Additionally, be sure to store the finished product in a cool and dark area away from direct sunlight and heat sources.
How to crush and press your own apples for cider
Crushing and pressing your own apples is a great way to make cider at home. It can be done with minimal equipment, but it does require some effort. Here’s what you need to know about crushing and pressing your own apples for cider:
Equipment Needed
The most important piece of equipment you will need is an apple grinder or crusher. This machine will grind the apples into a pulp that can then be pressed in order to extract the juice.

You may also want to invest in a press if you plan on making larger batches of cider regularly. Other items that may come in handy include buckets, strainers, funnels, jugs and bottles for storing the finished product.
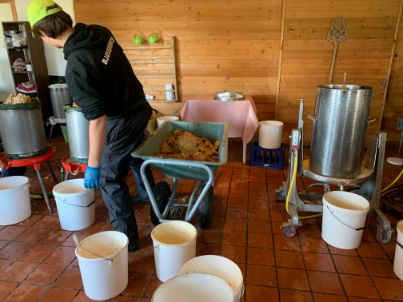
Grinding Apples
Once you have all of your equipment ready, it’s time to start grinding! Start by washing the apples into small pieces so they fit easily into the grinder or crusher.
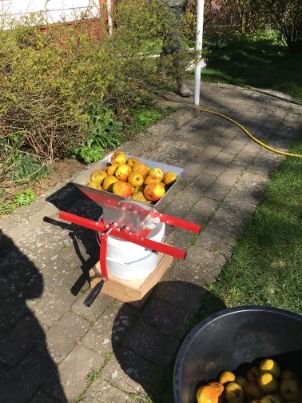
Make sure there are not too many stems or leaves mixed in with them as these could contaminate the juice later on during fermentation.
Manual Apple Crusher
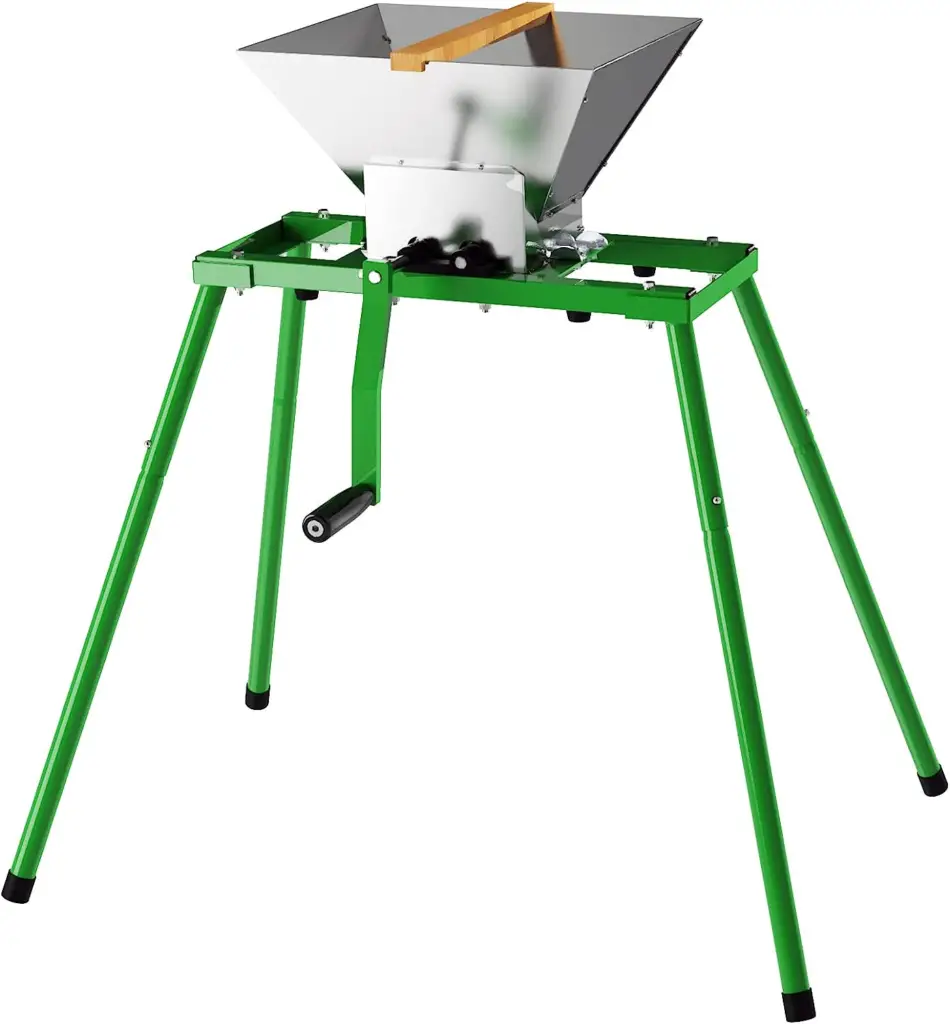
Solid Starter Option
Can be used manually or with an electric drill. Comes with a stand and pretty much ready to use!
- Great value for money
- Can grind up to 45 kg of fruit in an hour.
- Great for apples and pears
- Easy to clean stainless steel
- Ergonomic working height
Once everything is cut up, place it inside the grinder or crusher and turn it on until all of the fruit has been broken down into a thick paste-like consistency.
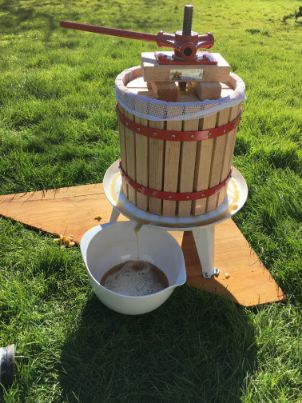
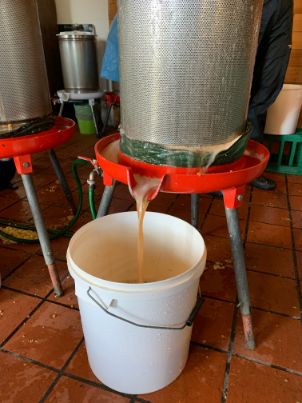
Pressing Apples
Now that your apples are ground up, they need to be pressed in order to extract their juices which will eventually become hard cider after fermentation takes place.
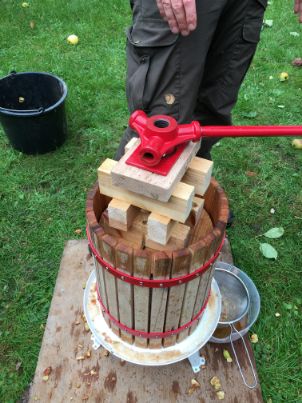
Place a strainer over one bucket before pouring your ground-up apple mixture inside; this will help remove any large chunks from getting through when pressing begins (these chunks can clog up presses).
Heavy-duty Hand Press
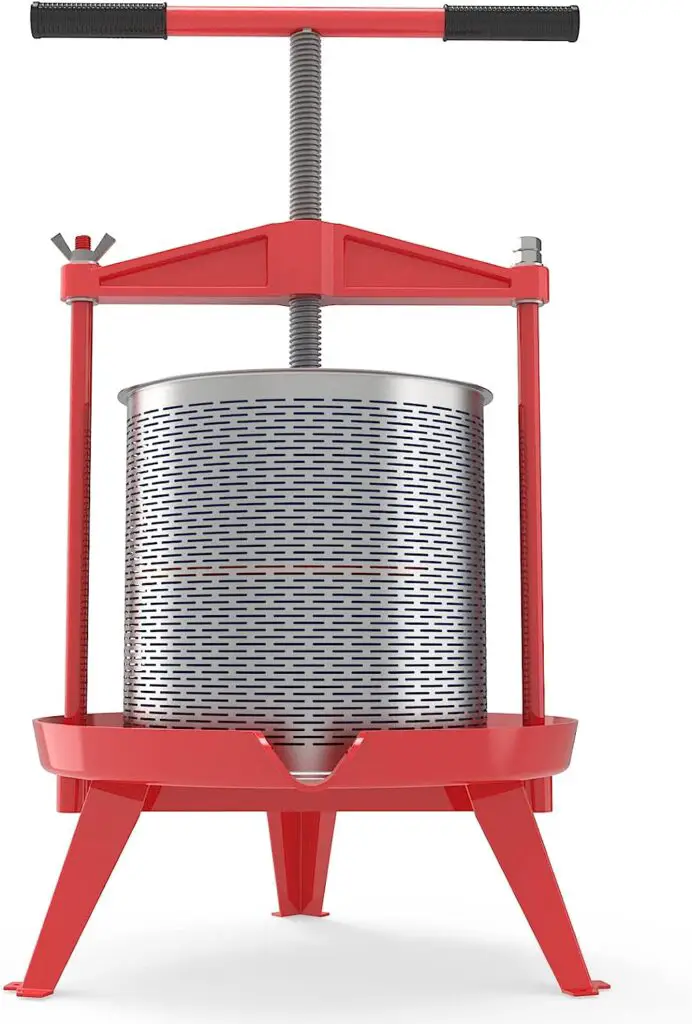
The Best Option for Beginners
I recommend this metal version over the wooden one as it is way easier to clean and much easier to operate.
- 14L (3.7 Gallon) capacity
- Stainless steel lasts forever
- Much easier to clean compared to wooden ones
- Cross-beam for extra force
- Comes in a bundle with grinder etc.
Then use either an electric press or manual press depending on what type of equipment you have available – both work equally well as long as enough pressure is applied evenly across all sides of each batch being pressed at once!
Storing Cider Juice
Once all of your batches have been successfully pressed out, their juices should now be stored in airtight containers such as jugs or bottles until fermentation takes place (which we will cover next).
Be sure not to fill them too full since carbon dioxide produced during fermentation could cause them to explode if left unchecked.
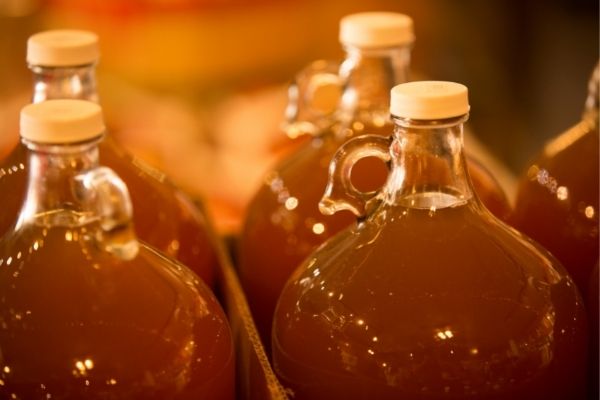
Also remember that freshly extracted juice contains natural sugars which means bacteria can grow quickly if exposed to too much oxygen; therefore, keep lids tightly sealed whenever possible and consider adding sulfites early on!
Crushing and pressing your own apples is a great way to make the perfect cider for any occasion. Next, we’ll look at how to ferment and age your cider for the best results.
Main Takeaway: Crushing and pressing your own apples for cider is a great way to make hard cider at home with minimal equipment. You will need an apple grinder or crusher, buckets, strainers, funnels, jugs and bottles for storing the finished product.
The benefits of brewing your own cider
Brewing your own cider has many benefits, and it can be a fun and rewarding experience. For starters, brewing your own cider is much more cost-effective than buying pre-made hard ciders from the store.
You can save money by purchasing bulk apples or other fruits to make your cider with instead of buying individual bottles.
Additionally, you have full control over the flavor of your cider when you brew it yourself. You can experiment with different types of apples or add spices or herbs for unique flavors that are not available in store-bought ciders.
Another benefit of making your own hard cider is that it’s thought to be healthier than commercial brands because there are no preservatives added to homemade versions.
This means you don’t have to worry about consuming any artificial ingredients while enjoying a cold glass of homebrewed cider! Plus, being able to say that you brewed an alcoholic beverage at home is something special – even if only for bragging rights!
Finally, brewing your own hard cider gives you the opportunity to learn more about fermentation processes and hone in on techniques like yeast selection and temperature control which will help improve the quality of each batch you make.
As long as safety precautions are taken during production, such as sanitizing all equipment, learning how to brew beer or wine at home can be both educational and enjoyable.
Brewing your own cider can be a rewarding experience that allows you to enjoy the unique flavor of freshly-made hard cider while saving money in the long run. Next, we’ll look at how to get started with brewing your own cider.
Tips for getting started with cider brewing
To get started, it’s important to understand the basics of cider making. You’ll need to make sure that your apple juice is properly fermented before adding any other ingredients or flavors.
This process can be done with either natural yeast or store-bought yeast, depending on what you prefer. Once fermentation has taken place, you can then start experimenting with different flavorings such as spices, fruits, herbs and more!
When it comes to equipment for brewing cider at home, there are some key pieces that will make the process easier (and more enjoyable). A good quality fermenter is essential – this will allow you to keep track of how much sugar has been converted into alcohol during fermentation.
Other items like an airlock (to prevent oxygen from entering the fermenter), thermometer (for monitoring temperature) and hydrometer (for measuring specific gravity) are also helpful tools for successful cider brewing.
Finally, find a recipe that appeals to you and give it a try. Start simple so you can get used to the process before moving onto more complex concoctions.
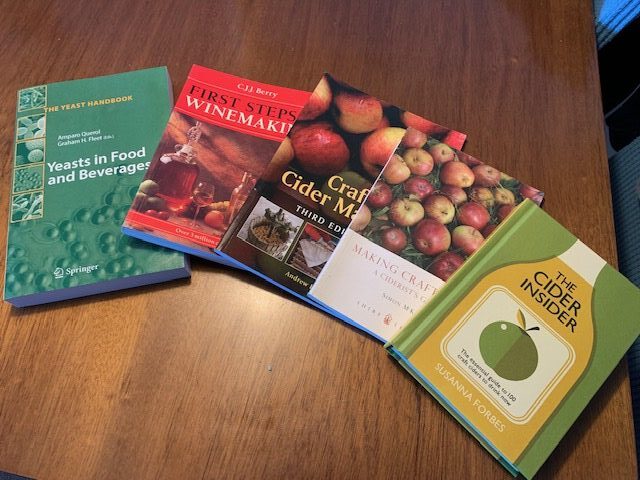
Look for recipes online or in books dedicated specifically to homebrewing hard ciders; these often include detailed instructions as well as tips from experienced brewers who have gone through similar processes themselves.
Or, you can just continue reading this blog as I really try to summarize everything I learn here!
With good reads, practice and patience, soon enough you will be able to brew delicious ciders right in your own kitchen
Home Brewing Cider can be a fun and rewarding experience, but it is important to do your research beforehand in order to ensure you have the right ingredients and equipment. Next, we’ll discuss some tips for creating the perfect batch of cider.
Cider Brewing Equipment
Cider brewing requires some specialized equipment to ensure a successful batch. The most important piece of equipment is the fermentation vessel, which can be either a carboy or a plastic bucket.
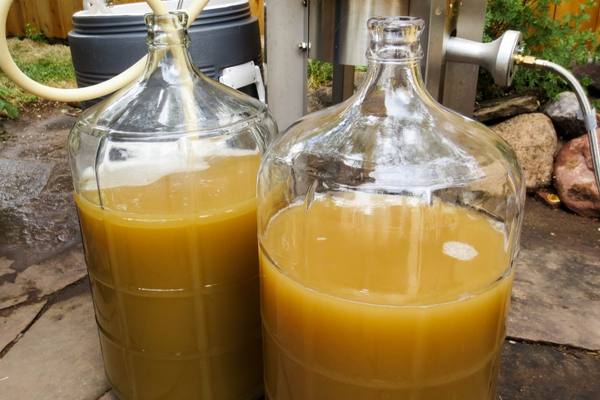
Carboys are typically made from glass and have an opening at the top for adding ingredients and taking samples during fermentation. Plastic buckets are less expensive but require more frequent cleaning due to their porous nature.
Both types of vessels should be thoroughly cleaned before use with hot water and sanitizing solution such as Star San or Iodophor.
Racking tubes are used to transfer cider from one container to another without introducing oxygen into the mix, which can cause off-flavors in your finished product.
Racking tubes come in various sizes and shapes, so it’s important to choose one that fits your fermenter correctly. Additionally, racking tubes should also be cleaned prior to use with hot water and sanitizer solution like Star San or Iodophor.
Sulfites are often added during the cider making process as they help protect against oxidation while allowing yeast activity to continue unhindered by wild yeasts present in apples naturally occurring on the skin of apples or introduced through contact with other fruits or surfaces throughout processing time frame.
Sulfite additions should always follow manufacturer’s instructions when using sulfites for cider production purposes only!
Yeast nutrients provide essential minerals needed for healthy yeast growth during fermentation; these include nitrogen compounds such as diammonium phosphate (DAP) along with trace elements like zinc sulfate among others depending on type chosen . Yeast nutrient additions should also follow manufacturer’s instructions when using them for cider production purposes only!
Specific gravity (SG) measurements allow you determine how much sugar has been converted into alcohol by measuring density changes between pre-fermentation sample versus post-fermentation sample readings taken over time frame.
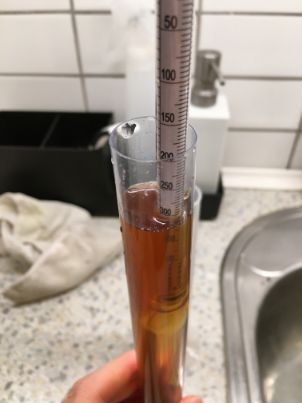
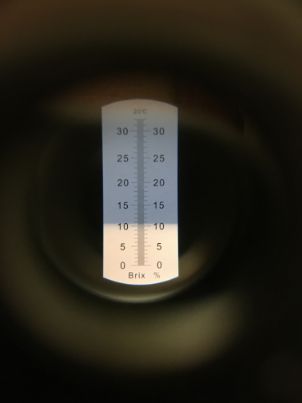
SG measurements can be done using hydrometers, refractometers, digital scales etc., all of which need calibration prior usage according accuracy standards required by industry professionals worldwide!
pH meters measure acidity levels within liquid mediums including ciders ; this helps brewers adjust acidity levels if necessary based upon desired taste profiles wanted end result products produced once fermented fully completed!
pH meters come in many different varieties ranging from handheld models up until lab grade units capable providing highly accurate readings quickly efficiently!
Airlocks allow carbon dioxide created during fermentation to escape, while preventing any outside contaminants from entering containers where ciders stored for aging processes.
They come in a variety of styles and designs; however, simple two piece airlocks work just fine for home brewers who wish to make hard ciders of their own homes safely and securely.
Having the right cider brewing equipment is essential to making a delicious and enjoyable hard cider. Next, we’ll discuss the ingredients needed for successful home brewing of cider.
Main Takeaway: Home cider brewing requires specialized equipment such as fermentation vessels, racking tubes, sulfites, yeast nutrients, specific gravity measurements tools, pH meters and airlocks. Cleaning all of these items prior to use with hot water and sanitizer solution is essential for a successful batch.
Ingredients for Home Brewing Hard Cider
Fruit Juice or Concentrate: The most important ingredient for making hard cider is the fresh apple juice or concentrate.
For a beginner, it’s easiest to start with store-bought apple juice or cider as this will give you a good base flavor and consistency. It will also allow you to try out cider making without buying any grinding or cider pressing equipment.
If you want to get more creative, try using other types of fruit juices such as pear, cranberry, peach, etc.
You can also use frozen concentrate if you prefer.
Just make sure that the juice does not contain any preservatives as these can interfere with fermentation.
Yeast
Yeast is what turns your sweet apple juice into alcoholic cider! Different types of yeast are available depending on the type of cider you want to make – dry ciders require different yeasts than sweeter ones do.

It’s important to choose the right strain for your desired outcome and follow instructions carefully when adding it in order to ensure successful fermentation.


Other Additives
Sweeteners and Flavorings: Depending on the desired sweetness or dryness of the cider, additional ingredients may be added during fermentation.
Home brewers often use honey or sugar to achieve their desired taste profiles while commercial producers tend to use artificial sweeteners such as Splenda or other non-fermentable sweeteners as these do not restart the fermentation.
It is, however, not easy to make a sweet cider as the yeast will always strive to ingest all the sugers and convert them into alcohol!
Herbs and spices can also be used for extra flavor complexity; cinnamon sticks are a popular choice but one can experiment with other flavors that appeal to them.

With the right methods, you can easily make a sweeter cider, which I have detailed in my article about making sweet hard ciders here.
The Cider Brewing Process – how to do it at home!
Cider brewing is a fun and rewarding hobby that can be done at home. The process of making cider involves several stages, including primary fermentation where most yeast growth happens and temperature control is important, and other factors that affect the taste of your final product.
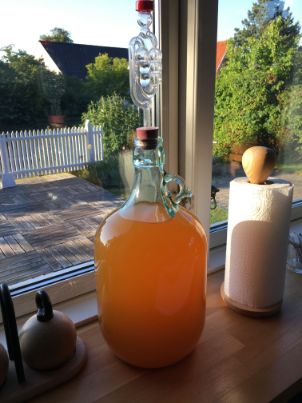
1. Primary Fermentation: This is the first step in cider brewing. During this stage, your yeast grows fast and lots of bubbles are going to show (and sound!) in your air lock. This phase will typically last up to only a few days depending on the temperature of your fermentation.
Different types of yeasts produce different flavors at different temperatures in your cider so it’s important to choose the yeast and conditions that suits your tastes best.
Read more about cider brewing temperature here and about yeast choice here.
Once you have added the sugar and selected a type of yeast, you will need to seal off the container with an airlock or lid and let it sit for about two weeks until all signs of fermentation have stopped before moving on to secondary fermentation (if desired).
2. Yeast Life Cycle: Yeast plays an important role in cider brewing as it helps convert sugars into alcohol during primary fermentation.

As part of its life cycle, yeast can benefit from some oxygen early on but, then less oxygen should be allowed as time goes by as oxygen at the end of the fermentation is generally a bad thing!

It’s important not to disturb the container during this period as too much movement could cause problems with flavor development later on down the line due to oxidation from exposure to air bubbles created by stirring or shaking too vigorously while fermenting.
Temperature Control
Temperature plays a key role in successful cider brewing since it affects how quickly or slowly certain processes occur such as carbonation and clarification which are both essential parts of producing good quality ciders with clear flavors without any off-flavors caused by bacteria growth due high temperatures allowing them thrive unchecked if they are present in small amounts already within ingredients used like fruit juices etc..
Keeping temperatures between 65-75°F (18-24°C) throughout most stages should ensure good and fairly fast results although some brewers may prefer cooler temperatures depending on their individual preferences for flavor profiles.
Specifically when using wild yeasts instead traditional ones cultivated commercially for sale purposes only generally speaking though regardless what kind gets used keeping things consistent matters most here overall!
There are many other factors besides temperature that can affect taste and we will dive into these in the next section! But briefly:
Most of these tastes already lie in the apples used such as acidity levels from adding tart fruits like cranberries or lemons along with sweetness levels derived from adding honey syrup.
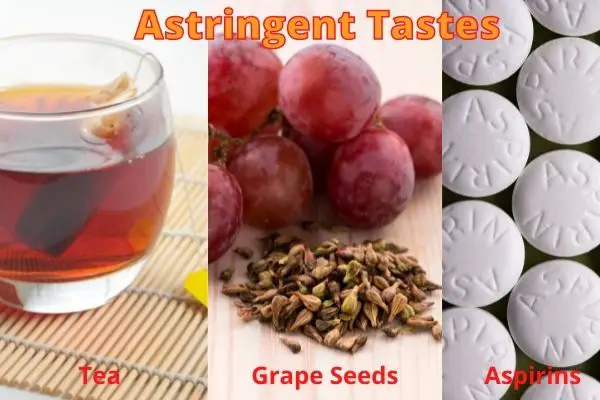
Tannin are found in the apples but can also be extracted through steeping tea bags or oak wood chips inside the fermenting cider prior to bottling, and aging timescales allow flavors to develop further over extended periods compared to shorter ones usually preferred initially when just getting started out.
Experimentation is encouraged here, as trial and error often lead to great discoveries which eventually lead to even better tasting end products enjoyed by everyone involved wholeheartedly.
Home brewing cider is an exciting and rewarding process, but it can be intimidating for beginners. With the right supplies and a bit of knowledge, you’ll be able to make delicious hard ciders in no time!
Racking in cider brewing
Racking is the process of transferring cider from one container to another, leaving behind the sediment (or lees) that accumulates during fermentation.
This step is essential in cider brewing for improving clarity, preventing off-flavors caused by prolonged contact with dead yeast cells and other particulates, and preparing the cider for secondary fermentation or aging.
Racking is typically done using a siphon or auto-siphon to minimize agitation and maintain the cider’s quality by reducing oxidation.

The timing of racking is crucial. It’s often performed after primary fermentation has slowed or completed, usually when bubbles in the airlock become less frequent. Some cider makers rack their cider multiple times, depending on the level of clarity they desire and the recipe’s requirements.
Each racking step helps remove additional sediment while giving the cider time to mature and develop a refined flavor. Care must be taken to sanitize all equipment thoroughly to avoid contamination, ensuring a clean, crisp, and well-balanced final product.
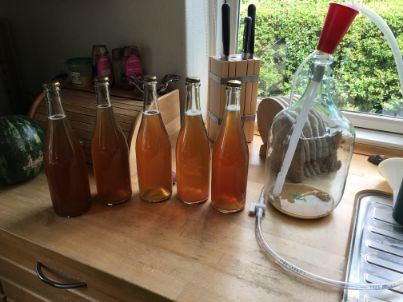
Bottling your cider
Bottling is the final step in cider brewing, where the fermented cider is transferred into bottles for carbonation and storage. Before bottling, it’s essential to ensure the cider has reached the desired clarity and flavor.

For sparkling cider, priming sugar is often added at this stage to feed the remaining yeast, creating carbon dioxide for natural carbonation. The amount of sugar must be measured carefully, as too much can cause over-carbonation and potentially lead to bottle explosions. Alternatively, non-carbonated (still) cider can be bottled directly, bypassing the priming process.
Sanitation is critical during bottling to prevent contamination and spoilage. All bottles, caps, or corks, as well as the siphoning equipment, must be sterilized. To bottle, the cider is carefully siphoned into bottles, leaving about an inch of headspace to accommodate carbonation pressure.

Once sealed, the bottles should be stored at room temperature for one to two weeks to allow carbonation to develop, then moved to a cool, dark place for aging. Aging enhances the cider’s flavor profile, giving it a smoother, more balanced taste. Properly bottled cider can be enjoyed for months or even years, depending on the recipe and storage conditions.
Main Takeaway: Cider brewing is a fun and rewarding hobby that requires attention to several key elements in order to achieve the desired results. These include primary fermentation, yeast life cycle, temperature control, acidity levels, sweetness levels, tannin extraction and aging timescales. By experimenting with these factors and adjusting them according to your preferences you can create delicious ciders with unique flavors!
What contributes the different tastes in hard cider?
When it comes to hard cider, the taste of the finished product is largely determined by the apples used in its production. Different varieties of apples will contribute different levels of acidity, bitterness, tartness, sweetness and astringency.

The balance between these elements will determine how sweet or dry your cider ends up being.
The type of apple you choose for your cider can also affect its flavor profile beyond just sweetness and acidity.
For example, some apples are more aromatic than others and can impart a unique aroma to your cider that complements other flavors present in the beverage.
Additionally, if you decide to add other ingredients such as hops or fruits during fermentation they may further enhance certain characteristics like bitterness or carbonation level in your final product.
Finally, there are several factors that influence how much sugar is converted into alcohol during fermentation which affects both the strength and flavor of the resulting drink.
he most important aromatic compounds when it comes to cider brewing are:
- Esters (they all smell of flowers and ripe fruits)
- Phenols (some smell like vanilla, but many cheesy and musky)
- Pyrazines (the smell of grass, chocolate and vegetables)
- Terpenes (smells of pine wood, spices and lavender)
- Thiols (most smell bad like skunk or fish)
- Organinc acids (sour smells like yoghurt or sweat)
So, if any bad smells are coming from your cider, or any other brew, it is likely to be caused by the thiols (sulfur compounds), phenols or acids present in the brew.
However, as you can see in the table below, there are many different chemical families that contribute to the aroma of a brew – be it cider, wine, beer or champagne!
| Aromatic group | Good smells/tastes | Bad tastes/smells |
| Esters | flowers and ripe fruits | Artificial, too sweet |
| Phenols | Vanilla, wood, sweet, smoke | Cheese, tar, plastics |
| Pyrazines | grass, chocolate, vegetables | Mushy, green pepper, mud |
| Terpenes | pine wood, spices, lavender | Gas, turpentine |
| Thiols | Dark chocolate, burned | Skunk, onion, smoke |
| Aldehydes | Nuts, fruits, grains, grass | Musty, burned, gas |
| Ketones | Flowers, fruits, cheese | Cheese, nail polish, Acetone |
| Amines | Nope. | urine, dead animals, fish |
| Carboxylic acids | wax, nutmeg, vinegar | Rancid, sweat, sour feet |
These are not single chemicals, but families of many different versions of chemicals. For example, the esters are responsible for major smells in almost all flowers and fruits!
All of these chemical families have molecules in them with different structures that can make them smell both good and bad. And some of these smells are subjective to the individual person smelling them of course!
Multiple factors influence the formation of these compounds during fermentation!
These include temperature control during fermentation as well as yeast selection; different types of yeasts have varying levels of efficiency when it comes to converting sugars into alcohols so selecting one with a higher conversion rate could result in a stronger yet drier tasting beverage compared to using one with lower efficiency but more residual sweetness left over after fermentation has completed.
Overall, there are many variables to consider when crafting delicious hard ciders from scratch at home. From selecting specific apple varieties based on their individual flavor profiles, to controlling temperatures during fermentation and choosing appropriate yeasts for maximum sugar conversion – each step contributes something unique towards creating an enjoyable drinking experience.
The different tastes in hard cider are determined by the type of apples used, the yeast strain and fermentation process, as well as any additional ingredients or flavorings. Next, we will explore how to choose the right apples for your hard cider.
Main Takeaway: When brewing hard cider at home, it is important to consider several factors in order to achieve the desired flavor and strength. These include: selecting the right type of apples for sweetness and acidity; adding other ingredients such as hops or fruits; controlling fermentation temperature; and choosing an appropriate yeast with a high sugar conversion rate. With careful consideration of these elements, you can create a delicious beverage that suits your taste preferences.
Yeast Type and Taste in Cider
Yeast selection is a key part of cider brewing. Different types of yeast can produce different flavors and aromas in the finished product, so it’s important to choose the right one for your desired outcome.
For beginners, cider yeasts are generally recommended as they tend to be more reliable and easier to work with than wine or champagne yeasts. cider yeasts also tend to create less off-flavors than other strains, making them ideal for novice brewers who may not have as much experience dealing with flavor issues.
When selecting an ale yeast strain for cider brewing, look for ones that are labeled “high attenuation” or “high flocculation” – these will help ensure that you get a clearer final product with fewer suspended solids (which can lead to cloudy ciders).
You might also add pectic enzyme or go through the more advanced keeving process to get a crisp and clear cider at the end!
While wine or champagne yeasts are also popular choices for cider making, ale and beer yeasts can give some very interesting results!
LP830 German Lager Yeast or Fermentis Saflager S-23 Dry Lager Yeast which will give you a crisper finish but require colder fermentation temperatures (around 10°C/50°F) compared to ales which ferment at warmer temperatures (18–22°C/65–72°F).
Finally, if you want something unique then consider experimenting with wild yeasts like Brettanomyces bruxellensis or Saccharomyces cerevisiae var diastaticus which can impart interesting fruity esters into your cider but may take longer to ferment due to their slower metabolism rates.

It is worth noting that some strains of yeast will also add sulfites during fermentation. If this is not desirable, then opt for a low sulfite producing strain such as Lalvin EC1118 Prise de Mousse Wine Yeast instead. Ultimately, it comes down to personal preference so experiment until you find what works best for you
Yeast selection is an important step in cider brewing and can have a huge impact on the flavor of your cider. Next, we’ll discuss the different types of apples used for cider brewing.
Main Takeaway: When selecting a yeast strain for cider brewing, it’s important to consider your desired outcome and the characteristics of different types of yeast. For beginners, cider yeasts are generally recommended as they tend to be more reliable and easier to work with than wine or champagne yeasts.
Cleaning and Sanitizing Supplies for Home Brewing Hard Cider
Cleaning and sanitizing supplies are essential for home brewers of hard cider. Cleaning agents such as detergents or alkaline solutions should be used to remove any residue left behind after brewing has been completed.
Brushes, sponges, scrubbers, or other tools can help reach into tight spaces and crevices that need extra attention. Sanitizers should then be applied before transferring the wort into a fermenter in order to kill any remaining microorganisms that could spoil the batch during fermentation or storage stages of production.
Cleaning Agents and Solutions: Detergents are effective at removing organic matter from surfaces while also providing some disinfectant properties when used with hot water.
Alkaline cleaners provide a stronger cleaning power than detergents but may require additional rinsing afterwards due to their higher pH levels.
Both types of cleaning agents should be used according to manufacturer instructions in order to ensure safe use and effectiveness against bacteria or wild yeast strains that can ruin an entire batch of cider if not properly addressed before fermentation begins.
Brushes, Sponges, and Scrubbers: These tools are necessary for reaching into tight spaces and crevices where dirt, grime, or other residues may have accumulated over time from previous batches of cider being brewed in the same equipment.
They come in various shapes and sizes so it is important to choose one that fits your needs best depending on what type of surface you’re trying to clean (i.e., carboys vs kegs). It is also recommended that brushes made specifically for beer/cider brewing be purchased as they will last longer than regular household brushes due their materials being designed specifically for this purpose (i.e., stainless steel bristles).
Once all surfaces have been cleaned with either detergent or alkaline cleaner solution, it is important to apply a sanitizer prior to transferring the wort into a fermenter in order to prevent contamination from bacteria or wild yeast strains that could spoil the batch during fermentation stages of production.
Commonly used sanitizers include: chlorine-based products such as Star San, which provides quick acting protection without leaving behind any residual flavors on finished product. However, there are several other options available including iodophors which offer slower acting protection but leave less residual flavor behind once fully dissolved away during rinsing process following application.
Cleaning and sanitizing supplies are essential for successful home brewing of hard cider. The next heading will cover the equipment you need to get started.
Main Takeaway: Cleaning and sanitizing supplies are essential for home brewers of hard cider. Cleaning agents such as detergents or alkaline solutions should be used to remove any residue, while brushes, sponges, scrubbers and other tools can help reach into tight spaces. Sanitizers should then be applied before transferring the wort into a fermenter in order to kill any remaining microorganisms that could spoil the batch during fermentation or storage stages of production.
Troubleshooting common issues in cider brewing
Troubleshooting common issues in cider brewing can be a daunting task for any home brewer. Fortunately, there are some easy steps you can take to get your cider back on track.
Fermentation Issues: Fermentation is the process of converting sugar into alcohol and carbon dioxide, and it’s an essential part of making hard cider. If your fermentation isn’t going as planned, it could be due to several factors such as too much or too little yeast, incorrect temperature control or inadequate aeration.

To fix these problems, make sure you’re using the right amount of yeast for the batch size and that you’re keeping temperatures consistent throughout fermentation (ideally between 65-75°F). Additionally, make sure you’re aerating your wort before pitching the yeast by stirring vigorously with a sanitized spoon or shaking up the fermenter every few days.
Bottling Problems: Bottling is one of the most important parts of making hard cider since it allows carbonation to occur naturally within each bottle. If done incorrectly however, bottling can lead to overcarbonated bottles which may explode if left unchecked!
To avoid this issue when bottling your cider at home, always use fresh priming sugar dissolved in boiled water and ensure that all bottles are filled completely without leaving any air pockets at the top. Additionally double check that all caps have been tightened securely before storing away in a cool dark place for conditioning/carbonation purposes.
Gushing Cider: Gushing occurs when excess amounts of CO2 escape from opened bottles causing them to foam uncontrollably upon opening – not ideal!
This usually happens when either too much priming sugar was used during bottling or if temperatures were allowed to fluctuate significantly after bottling had occurred (such as leaving outside during winter months).
To prevent gushing from occurring again in future batches try reducing priming sugar levels slightly and store finished ciders indoors where temperatures remain more consistent year round!
I have made a priming sugar calculator for cider making that will give you the safe amount of sugar to add to avoid gushing as well as under carbonation!
Flat ciders occur when not enough priming sugar has been added prior to bottling, resulting in no natural carbonation taking place inside each bottle once sealed off.
This is not ideal. The solution is simple; add more priming sugar next time around ensuring that each bottle gets an adequate amount prior to capping off securely so they will condition properly over time without losing out on flavor or fizziness altogether.
By troubleshooting common issues in cider brewing, you can ensure that your hard cider is of the highest quality and taste. Next, let’s look at how to prevent problems when brewing cider.
Main Takeaway: Home brewing cider can be tricky, but with the right steps it doesn’t have to be. Here are some key takeaways:
• Use the correct amount of yeast for your batch size and keep temperatures consistent during fermentation (65-75°F).
• Always use fresh priming sugar dissolved in boiled water when bottling and make sure all bottles are filled completely without air pockets.
• Reduce priming sugar levels slightly to prevent gushing from occurring and store finished ciders indoors where temperatures remain more consistent year round.
• Add an adequate amount of priming sugar prior to capping off securely so that each bottle conditions properly over time without losing out on flavor or fizziness.
Advanced techniques for experienced brewers
Optimizing to avoid Common Issues:
Experienced brewers will likely encounter some common issues during the cider brewing process. These can include problems with fermentation, off-flavors, and oxidation.
It’s important to understand what could be causing these issues in order to properly troubleshoot them. To start, make sure that all of your equipment is clean and sanitized before use. This will help prevent any contamination from spoiling your brew.
Additionally, check for signs of infection such as a sour smell or slimy film on the surface of the cider – this may indicate bacteria has contaminated it and you should discard it immediately. Lastly, pay attention to temperature control throughout the entire process; too high or low temperatures can cause unwanted flavors in your final product.
Optimizing Flavor & Aroma:
When it comes to flavor and aroma optimization in hard cider brewing, there are several things you can do as an experienced brewer to get better results every time!
First off, make sure you’re using fresh apples for pressing into juice – old apples won’t give you good results! Secondly, consider adding spices or herbs like cinnamon sticks or ginger root during fermentation for extra complexity and depth of flavor in your finished product.
Finally, experiment with different yeast strains when fermenting; each strain produces its own unique aromas and flavors so find one that works best for you!
Improving Mouthfeel:
Pay close attention to carbonation levels when creating great tasting ciders at home; too much will result in a harsh mouthfeel, while not enough will leave your drink flat-tasting. You can also add adjuncts such as honey or fruit juices which act as natural sweeteners but also contribute body and texture to the overall mouthfeel of the beverage.
Cold Crashing
Cold crashing is a technique used in homebrewing to clarify and stabilize beverages like hard cider. It involves rapidly cooling the cider to near-freezing temperatures, typically around 1–3°C (34–37°F), to encourage suspended particles, yeast, and other sediment to settle at the bottom of the fermenter.
This process helps achieve a clearer cider without the need for chemical clarifiers, preserving its natural flavor profile. Cold crashing is typically performed after fermentation is complete and before bottling, ensuring that the cider’s taste is unaffected while improving its appearance and mouthfeel.

To cold crash hard cider, transfer the fermenter to a refrigerator or cold storage area, maintaining the target temperature for at least 24–48 hours. Once the cider has clarified, siphon it carefully into bottles or a secondary fermenter to avoid disturbing the sediment.
Cold crashing can also help slow yeast activity, reducing the risk of over-carbonation during bottle conditioning. However, it doesn’t fully halt fermentation, so additional precautions like pasteurization or careful monitoring of sugar levels may be necessary for sweeter ciders. The result is a polished, crisp cider that looks as good as it tastes.
Aging
Finally, try aging your ciders longer than usual; this helps mellow out any sharpness resulting from higher alcohol content while adding more complex notes due to oxidation over time.

Advanced techniques for experienced brewers can help take your cider brewing to the next level, unlocking a whole new world of flavors and aromas. Now let’s explore how to get started with home brewing cider.
Main Takeaway: A key takeaway from the above is that experienced brewers can optimize flavor and aroma, troubleshoot common issues, and improve mouthfeel when home brewing cider. To do this:
• Make sure all equipment is clean and sanitized before use • Add spices or herbs during fermentation for extra complexity
• Experiment with different yeast strains to find one that works best for you • Pay attention to carbonation levels in your finished product
• Add adjuncts like honey or fruit juices to add body and texture
• Age ciders longer than usual to mellow out sharpness.
FAQs
Can anyone make hard cider at home?
Yes, making hard cider at home is a relatively simple process. First, you need to gather the necessary ingredients and equipment.
This includes fresh apple juice or cider, yeast, an airlock, fermentation vessel (carboy or bucket), siphon hose and bottling supplies. Next, sanitize all of your equipment with a no-rinse sanitizer like Star San.
Then mix together the apple juice/cider and yeast in the fermentation vessel and attach the airlock for carbon dioxide release during fermentation. Allow it to ferment for two weeks or more (depending on the temperature!) before transferring it into bottles using a siphon hose; this will help prevent oxidation of your cider as well as reduce sediment in each bottle.
Finally cap off each bottle with a beer bottle capper and allow them to condition for another two weeks before enjoying!
What kit do you need to make cider?
To make hard cider, you will need a few essential items. First, you’ll need a fermentation vessel such as a carboy or food-grade plastic bucket to hold the liquid while it ferments. You’ll also need an airlock and stopper to fit your fermentation vessel so that carbon dioxide can escape without letting oxygen in.

A kit is a great start!
Additionally, you’ll need some sanitizing solution like Star San or Iodophor to clean all of your equipment before use. Finally, you’ll need apple juice or fresh apples for making the cider itself and yeast for fermenting it into alcohol. With these items in hand, you’re ready to start brewing!
Can you make cider with a beer kit?
Yes, you can make cider with a beer kit. Beer kits contain all the necessary ingredients and equipment needed to brew your own beer at home.
The same process can be used to make hard cider instead of beer. All that is required is substituting apple juice or concentrate for the malt extract in the recipe and adding additional yeast specifically designed for fermenting cider.
You may also need to adjust other ingredients such as hops depending on the desired flavor profile of your finished product. With some minor modifications, a beer kit can easily be transformed into a hard cider brewing kit!
Is brewing cider the same as brewing beer?
No, brewing cider is not the same as brewing beer. Beer is made with grains such as barley and wheat, while cider is made from fermented apples or other fruits.
The process of making beer involves boiling the grain to extract sugars, while cider requires pressing fruit to extract juice which will then be fermented.
Additionally, different yeasts are used for each type of beverage; ale yeast for beer and champagne yeast for hard ciders. Lastly, the flavor profiles between these two beverages vary greatly due to their ingredients and processes involved in production.
You can read more about the fundamental differences between cider and beer in this blog post!
Conclusion
In conclusion, home brewing cider is a great way to enjoy the taste of fresh-pressed apples and craft your own unique flavors.
With the right equipment, knowledge, and practice you can make delicious hard ciders that will impress even the most experienced brewers.
Whether you are just starting out or looking for more advanced techniques to refine your skillset, this guide has given you all the information needed to become an expert in home brewing cider.
Are you looking to take your home brewing skills to the next level?
ExpertBrewing is here to help! Our comprehensive cider brewing guide will teach you all the tips and tricks for making delicious, craft-style hard ciders.


