Bottle carbonating cider is a rewarding and enjoyable experience for homebrewers. It allows you to add natural carbonation to your cider, making it fizzy and more refreshing.
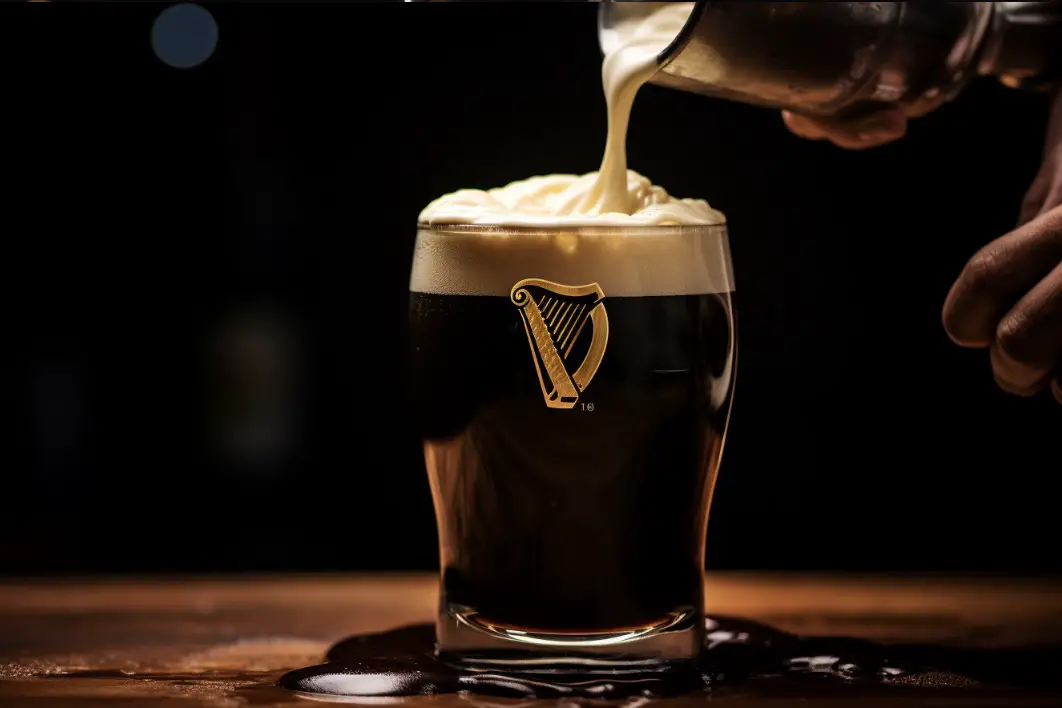
The process of bottle carbonating cider involves fermenting the cider a second time, but in a sealed bottle, which traps the carbon dioxide produced by the yeast, giving your cider a bubbly texture.
How do you bottle cider after fermentation?
To bottle cider after fermentation, you will need to follow a few steps:
1. Clean and sanitize your bottles: Thoroughly clean and sanitize your bottles, caps, and any other equipment you will be using to ensure a sterile environment.
2. Prepare your cider: If your cider has been aging in a fermentation vessel, transfer it to a clean and sanitized container. Avoid disturbing the sediment at the bottom, as it may affect the clarity of your cider.
3. Add priming sugar: If you want carbonated cider, you can add a small amount of priming sugar to the cider before bottling. This will create carbonation during the bottle conditioning process. Follow a reliable recipe or guideline for the appropriate amount of sugar to use.
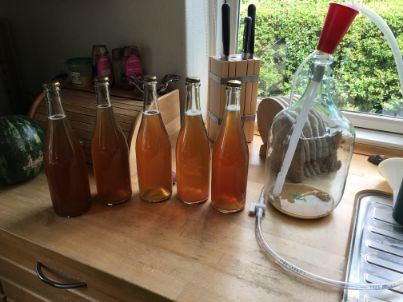
4. Fill the bottles: Use a siphoning tube or a bottling wand to fill each bottle, leaving a small headspace at the top. Ensure a tight seal by using caps or corks specifically designed for cider bottles.
5. Store for bottle conditioning: If you want carbonation, store the filled bottles in a warm place (around 65-75°F or 18-24°C) for a few weeks to allow for secondary fermentation. This process will carbonate the cider. Keep in mind that this step requires careful monitoring to prevent overcarbonation, which can lead to bottle explosions.
6. Age and chill: After bottle conditioning, you can age your cider in a cool place for a few weeks or longer to enhance its flavors. When ready to consume, chill the bottles before opening to enjoy a refreshing cider.
Remember to follow proper sanitation practices throughout the process to prevent contamination and ensure the best quality cider.
Why Bottle Carbonate Cider?
The Benefits of Bottle Carbonation
Bottle carbonating cider has several benefits compared to other methods of carbonation such as forced carbonation.
For one, bottle carbonation is a more natural process. By allowing the cider to ferment in the bottle, it undergoes a natural, slow carbonation process.

This can result in a more complex flavor profile and a smoother mouthfeel compared to forced carbonation. Additionally, bottle carbonating cider is more cost-effective, as it does not require any additional equipment like CO2 tanks and regulators.
The Basic Process of Bottle Carbonating Cider
Step-by-Step Guide to Bottle Carbonation
1. Primary Fermentation: The first step in bottle carbonating cider is the primary fermentation. This is when the initial conversion of sugar to alcohol and carbon dioxide occurs. The cider should be fermented in a fermentation vessel, such as a carboy or a bucket, until it reaches the desired level of dryness.
2. Racking and Aging: After the primary fermentation is complete, the cider should be racked (transferred) to a secondary fermentation vessel. This helps to separate the cider from the sediment and dead yeast cells. The cider can be aged in this vessel for a few weeks or even months to allow the flavors to develop and mature.
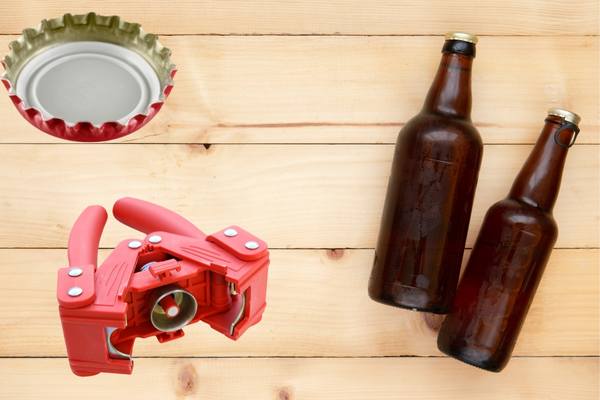
3. Preparing for Bottle Carbonation: Once the cider has matured, it’s time to prepare for bottle carbonation. First, select the appropriate bottles, such as swing-top bottles or standard beer bottles with caps. Make sure the bottles are cleaned and sanitized.
4. Priming: Priming is the process of adding sugar to the cider before bottling. This provides the yeast with a new source of food, which will create the carbon dioxide needed for carbonation. Priming sugar can be added directly to the cider or mixed with a small amount of water and then added.
5. Bottling: Carefully transfer the cider into the bottles, leaving about an inch of headspace at the top. Seal the bottles with caps or swing-tops.
6. Bottle carbonation: The bottles should be stored in a dark, cool place for the secondary fermentation to occur. This typically takes 1-3 weeks, depending on the temperature and the type of yeast used.
7. Refrigeration: Once the desired level of carbonation is achieved, transfer the bottles to the fridge to stop the fermentation and enjoy your carbonated cider.
Choosing the Right Bottles
The Importance of High-Quality Bottles
When bottle carbonating cider, it’s essential to choose high-quality bottles that can withstand the pressure created by the carbon dioxide.
Swing-top bottles, also known as Grolsch-style bottles, are a popular choice because they have a built-in seal and can be easily opened and closed.

Standard beer bottles with caps can also be used, but you will need a capping device to seal them.
Calculating the Right Amount of Priming Sugar
The Role of Priming Sugar in Bottle Carbonation
The amount of priming sugar added to the cider before bottling will affect the level of carbonation in the final product. Too little sugar will result in a flat cider, while too much sugar can cause the bottles to explode.
I have already written extensively about how much priming sugar to use for different volumes of cider on this site.
In addition I have made a calculator for you to calculate the amount needed for your exact cider project!
Most recipes call for about 0.5-1 ounce of priming sugar per gallon of cider, but this can vary depending on the type of sugar used and the desired level of carbonation.
It’s important to measure the priming sugar accurately and distribute it evenly among the bottles to ensure consistent carbonation.
Monitoring Carbonation Progress
How to Know When Your Cider is Carbonated
One way to monitor the carbonation progress of your cider is by using a plastic soda bottle as a test bottle.
When you’re bottling your cider, fill a plastic soda bottle as an “indicator bottle” and squeeze out the excess air before sealing it.
As the cider carbonates, the plastic bottle will become firm and pressurized.
When the test bottle feels as firm as a new, unopened soda bottle, your cider is likely carbonated and ready to be refrigerated.
Troubleshooting Carbonation Issues
Common Carbonation Problems and Solutions
Sometimes, despite our best efforts, our bottle-carbonated cider may not turn out as expected. Here are some common issues and their solutions:
1. Under-carbonation: If your cider is too flat, it may be due to not enough priming sugar, a lack of viable yeast, or not enough time for carbonation. You can try adding more priming sugar and waiting a bit longer.
2. Over-carbonation: If your cider is too fizzy or the bottles are exploding, it may be due to too much priming sugar or an incomplete primary fermentation. Be sure to measure your priming sugar accurately and ensure primary fermentation is complete before bottling.
3. Off-flavors: If your cider has off-flavors, it may be the result of a bacterial infection or oxidation. Always sanitize your bottles and equipment and avoid exposing your cider to oxygen during the bottling process.
Conclusion
Bottle carbonating cider is a rewarding and enjoyable process for homebrewers. By following the steps outlined in this guide, you can create a delicious, naturally carbonated cider. To summarize, here are 10 key facts about bottle carbonating cider:
1. Bottle carbonation is a natural, cost-effective method of carbonating cider.
2. The process involves a secondary fermentation in the bottle.
3. Bottle carbonating cider can result in a more complex flavor and smoother mouthfeel.
4. High-quality bottles, such as swing-top or standard beer bottles, are essential for successful carbonation.
5. Priming sugar provides the yeast with a new food source, creating the carbon dioxide needed for carbonation.
6. The amount of priming sugar used will affect the level of carbonation in the finished cider.
7. Monitoring carbonation progress can be done using a plastic soda bottle as a test bottle.
8. Troubleshooting carbonation issues may involve adjusting the amount of priming sugar, ensuring primary fermentation is complete, and sanitizing equipment.
9. Bottle carbonation typically takes 1-3 weeks to complete.
10. Always store bottle-carbonated cider in a cool, dark place to prevent over-fermentation and maintain quality.
FAQs
How much sugar per bottle to carbonate cider?
The amount of sugar needed to carbonate cider can vary depending on personal preference and the desired level of carbonation. However, a general guideline is to use about 1-2 teaspoons of sugar per 16-ounce bottle of cider. It’s important to note that adding too much sugar can result in excessive carbonation or even bottle explosions, so it’s advisable to start with a smaller amount and adjust according to taste.
How do you carbonate cider in a bottle?
To carbonate cider in a bottle, you can follow these steps:
1. Start with a fully fermented cider that has been clarified and is ready for carbonation.
2. Add priming sugar to the cider. Priming sugar is a type of sugar that will ferment in the bottle, producing carbon dioxide and carbonating the cider. The amount of sugar to add depends on the desired level of carbonation and the volume of cider.
3. Use a bottling bucket or a siphon to transfer the cider into clean, sanitized bottles, leaving some headspace at the top.
4. Seal the bottles with caps or crown corks that are specifically designed for carbonation. Make sure they are tightly secured to prevent any gas from escaping.
5. Store the bottles at a temperature of around 70-75°F (21-24°C) for the carbonation process to occur. This typically takes about 1-2 weeks, but can vary depending on factors such as sugar content, yeast activity, and temperature.
6. After the carbonation period, refrigerate the bottles to slow down the fermentation process and stabilize the carbonation.
It’s important to note that carbonating cider in bottles can be risky if not done properly. Excessive pressure or improper handling may lead to bottle explosions. It’s recommended to use appropriate equipment, follow safety guidelines, and consider seeking advice from experienced homebrewers or cidermakers.
How long does it take for cider to be ready?
The time it takes for cider to be ready can vary depending on the method used and personal preference. Generally, it takes around 1 to 3 weeks for the fermentation process to complete. After that, the cider may benefit from additional aging for a few more weeks to several months to develop more complex flavors. Ultimately, the readiness of cider is subjective, and it’s best to taste it periodically to determine when it has reached the desired taste and carbonation level.
How much sugar do you add to fermenting cider?
The amount of sugar added to fermenting cider depends on the desired level of sweetness and alcohol content. Typically, for a dry cider, no additional sugar is added as the natural sugars from the apples are enough to ferment into alcohol. However, if a sweeter cider is desired, sugar can be added to taste, usually around 1/2 to 1 cup per gallon of cider. It’s important to note that adding too much sugar can result in excessive alcohol content or fermentation issues, so it’s recommended to follow a specific recipe or consult a cider-making guide for precise measurements.
How do you know when cider is ready to bottle?
Cider is typically ready to bottle when it has finished fermenting and the desired level of carbonation has been achieved. You can determine this by monitoring the specific gravity using a hydrometer or by observing a stable airlock activity. Additionally, the cider should have a clear appearance, with no visible signs of fermentation, such as bubbling or cloudiness. Tasting the cider is also important to ensure it has reached the desired flavor profile.