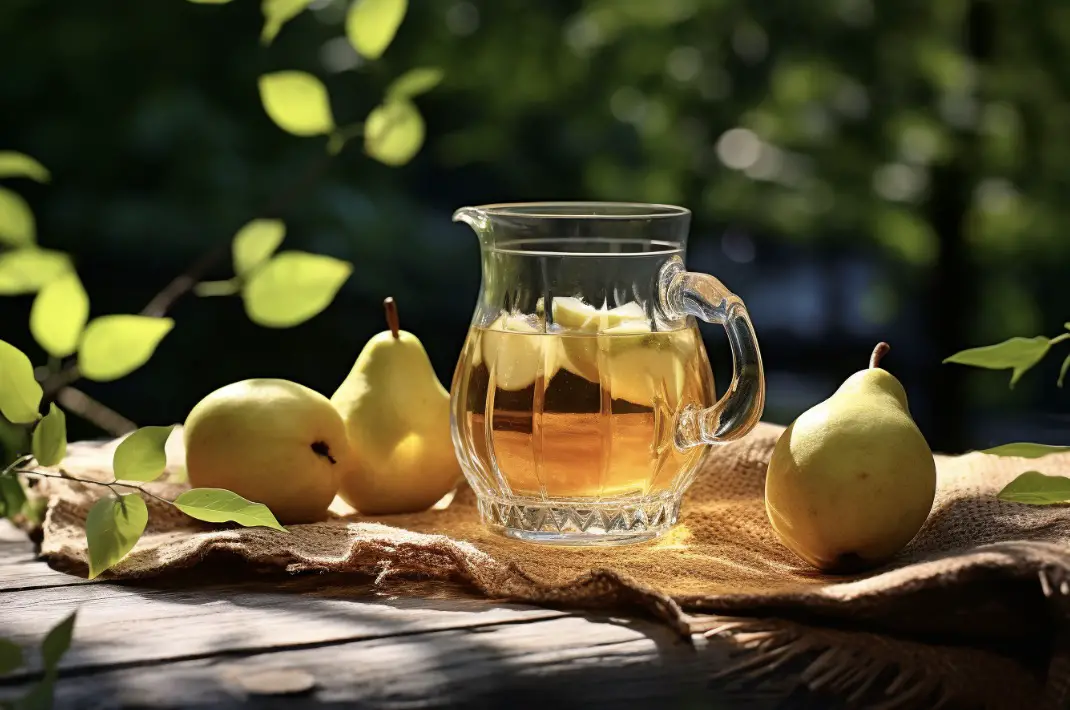
As a seasoned homebrewer, one of my favorite things to do is experiment with different fruits and flavors to create unique, delicious wines. And when it comes to fruit wines, pear is at the top of my list.
Not only does pear wine have a unique taste that sets it apart from its grape-based counterparts, but it’s also relatively simple to make at home.
So, for those of you who are looking to venture into the world of fruit wines or simply want to try something new, I’ve compiled a list of the best 5-gallon pear wine recipes to get you started.
The best 5-gallon pear wine recipes include a simple pear wine, spiced pear wine, pear and apple wine, pear and ginger wine, and pear and elderflower wine.
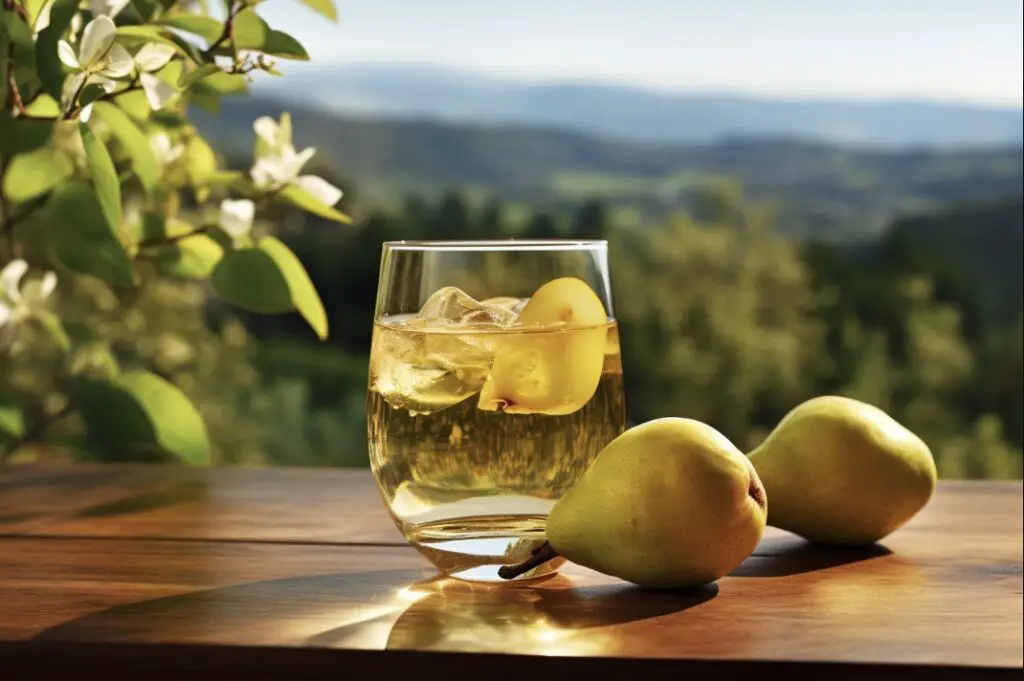
Pear wine is also known as pear cider, even when it is still (without bubbles!), but true pear cider or “Perry” is made with a specific type of pears.
1. Simple 5 Gallon Pear Wine Recipe
The first recipe on our list is a no-frills, straightforward pear wine that allows the natural flavor of the fruit to shine through.
With just a few ingredients, you’ll be able to create a delicious wine that showcases the sweet, juicy taste of pears.
Ingredients
- 15-20 lbs. of ripe pears
- 1-5 lbs. of sugar (depending on the fruit sweetness and desired ABV)
- 5 gallons of water
- 1 packet of wine yeast
- 1 tsp. yeast nutrient
- 1 tsp. pectic enzyme
- 1 Campden tablet, crushed
Instructions
1. Wash and core the pears, then cut them into small pieces. You can leave the skin on, as it adds a bit of tannin to the wine.
2. In a large pot, bring the water to a boil and dissolve the sugar in it. Allow it to cool to room temperature.
3. Grind and press the pears using an apple grinder and an apple cider press or a kitchen juicer. Sprinkle pectic enzyme on the crushed pears to improve extraction yield.
(3.1) Alternatively add the chopped pears, sugar water, yeast nutrient and pectic enzyme directly to the fermenter.
4. Add yeast to the juice in a sanitized fermentation vessel.
5. Sprinkle the cider yeast on top and cover the fermentation vessel with an airlock.
6. Allow the wine to ferment for 2-3 weeks, or until fermentation has stopped.
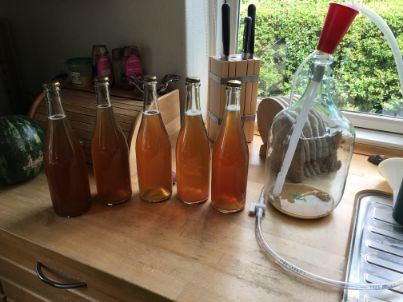
7. Rack the wine into a secondary fermentation vessel, leaving the sediment behind.
8. Let the wine age for at least three months before bottling.
If the pH of the cider is relatively high (> 4) consider adding a crushed Campden tablet or two and stir well!
2. Spiced Pear Wine
For those who enjoy a bit of warmth and spice in their wines, this spiced pear wine recipe is a must-try. The addition of cinnamon and cloves adds a depth of flavor that perfectly complements the sweetness of the pears.
Ingredients
- 15-20 lbs. of ripe pears
- 11 lbs. of sugar
- 5 gallons of water
- 1 packet of wine yeast
- 1 tsp. yeast nutrient
- 1 tsp. pectic enzyme
- 1 Campden tablet, crushed
- 2 cinnamon sticks
- 6 whole cloves
Instructions
1. Follow the instructions for the simple pear wine, but add the cinnamon sticks and cloves to the fermentation vessel along with the other ingredients.
2. After fermenting for 2-3 weeks, remove the spices and rack the wine into a secondary fermentation vessel.
3. Age the wine for at least three months before bottling.
3. Pear and Apple Wine
If you’re a fan of both pear and apple flavors, why not combine them in a single wine? This pear and apple wine recipe brings together the best of both worlds for a fruity, refreshing beverage.
Ingredients
- 10 lbs. of ripe pears
- 10 lbs. of ripe apples
- 11 lbs. of sugar
- 5 gallons of water
- 1 packet of wine yeast
- 1 tsp. yeast nutrient
- 1 tsp. pectic enzyme
- 1 Campden tablet, crushed
Instructions
1. Wash, core, and chop both the pears and apples into small pieces.
2. Follow the instructions for the simple pear wine, adding both the chopped pears and apples to the fermentation vessel.
4. Pear and Ginger Wine
For a wine with a bit of a kick, try this pear and ginger recipe. The addition of fresh ginger adds a zesty, spicy note to the wine that contrasts beautifully with the sweetness of the pears.
Ingredients
- 15-20 lbs. of ripe pears
- 11 lbs. of sugar
- 5 gallons of water
- 1 packet of wine yeast
- 1 tsp. yeast nutrient
- 1 tsp. pectic enzyme
- 1 Campden tablet, crushed
- 3-4 oz. of fresh ginger, peeled and grated
Instructions
1. Follow the instructions for the simple pear wine, but add the grated ginger to the fermentation vessel along with the other ingredients.
2. After fermenting for 2-3 weeks, strain out the ginger and rack the wine into a secondary fermentation vessel.
3. Age the wine for at least three months before bottling.
5. Pear and Elderflower Wine
Last but not least, this pear and elderflower wine recipe adds a delicate floral note to the mix. The fragrant elderflowers complement the pear flavor, creating a light and refreshing wine perfect for sipping on a warm day.
Ingredients
- 15-20 lbs. of ripe pears
- 11 lbs. of sugar
- 5 gallons of water
- 1 packet of wine yeast
- 1 tsp. yeast nutrient
- 1 tsp. pectic enzyme
- 1 Campden tablet, crushed
- 4-5 cups of elderflowers (fresh or dried)
Instructions
1. Follow the instructions for the simple pear wine, but add the elderflowers to the fermentation vessel along with the other ingredients.
2. After fermenting for 2-3 weeks, strain out the elderflowers and rack the wine into a secondary fermentation vessel.
3. Age the wine for at least three months before bottling.
General tips for perfect pear cider
Finally, to ensure your success with your pear cider (and learn from my mistakes…) here are some general tips for great pear cider brewing, covering various aspects from measuring gravity measurements and pH to fermentation, bottling, and storage:
- Measuring sugar content (SG/Brix): I prefer to use a refractometer to measure Brix, which is a measurement of sugar content in your cider. Use a hydrometer to measure the brix level before fermentation and after fermentation to calculate the alcohol content. This will help you determine the dryness or sweetness of your cider.
- pH Level: Monitoring the pH level is important for cider fermentation. The ideal pH range for cider is typically between 3.2 and 3.8. Use a pH meter or test strips to check the acidity and adjust if necessary by adding malic acid or tartaric acid.
- Fermentation Temperature: Maintain a consistent fermentation temperature to achieve desired results. Cider generally ferments well between 55°F (13°C) and 75°F (24°C), depending on the yeast strain. Cooler temperatures produce a slower fermentation, while warmer temperatures can lead to off-flavors.
- Campden Use: Campden tablets (potassium or sodium metabisulfite) are often used to sanitize and stabilize cider. Add 1 crushed tablet per gallon of cider 24 hours before adding yeast to kill wild yeast, bacteria, and other unwanted organisms.
- Racking: Racking refers to transferring the cider from one container to another, leaving behind sediment. After primary fermentation, use a siphon or racking cane to transfer the cider to a secondary fermenter, leaving the sediment (lees) behind. This helps clarify the cider.
- Bottling: Before bottling, ensure fermentation is complete by confirming a stable specific gravity reading. Add priming sugar (typically 3/4 to 1 ounce per gallon) to carbonate the cider in the bottle. Use a siphon or bottling wand to fill sanitized bottles, leaving some headspace for carbonation.
- Storage and Aging: After bottling, store your cider in a cool, dark place such as a cellar or refrigerator. Cider benefits from aging, and flavors can develop and mellow over time. Aim for a minimum aging period of 2-4 weeks, but it can improve further with several months or even a year of aging.
Remember, these tips are general guidelines, and cider brewing can have variations based on personal preferences and risk appetite!
1. Sugar measurements
Measuring the sugar content is an essential step in cider brewing, as it allows you to gauge the sugar content of your cider.
The sugar content is crucial because it determines the potential alcohol level and the sweetness or dryness of the final product.
Here are some additional details on measuring sugar content:
- Hydrometer: A hydrometer is a device used to measure the specific gravity of a liquid, which indicates the density of the liquid relative to water. In cider brewing, it helps determine the sugar content. The specific gravity reading before fermentation is called the starting gravity, while the reading after fermentation is the final gravity.
- Starting Gravity: Before you begin fermentation, take a sample of your cider and place it in a tall, narrow container, such as a graduated cylinder. Immerse the hydrometer in the liquid, and spin it gently to dislodge any air bubbles. The hydrometer will float in the liquid, and the scale on the hydrometer will give you a reading.
- Brix Conversion: The specific gravity reading from the hydrometer can be converted to Brix using a conversion chart or calculator. Brix is a measurement of sugar content expressed as a percentage by weight. For example, a specific gravity reading of 1.050 is roughly equivalent to 12.5° Brix.
- Final Gravity: After fermentation is complete, take another hydrometer reading to determine the final gravity. The final gravity will be lower than the starting gravity because the yeast has consumed the sugar and converted it into alcohol.
- Alcohol Calculation: By comparing the starting gravity and the final gravity, you can estimate the alcohol content of your cider. The difference between the two readings represents the sugar that has been fermented.
Typically, each point of specific gravity is roughly equivalent to 0.13% alcohol by volume (ABV). So, if your starting gravity was 1.050 and your final gravity is 1.000, the alcohol content would be approximately 6.5% ABV.
Measuring Brix is a useful tool throughout the cider brewing process. It helps you track fermentation progress, determine the sweetness or dryness of your cider, and estimate the alcohol content. By monitoring Brix readings, you can make adjustments to achieve the desired flavor profile and ensure the quality of your cider.
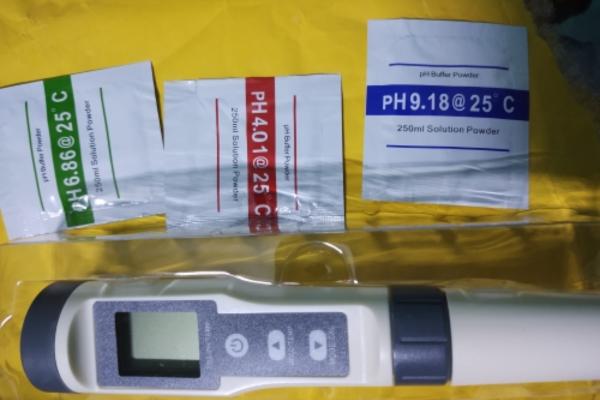
2. Measuring the pH Level
Maintaining the proper pH level is crucial for cider fermentation as it impacts the overall flavor, fermentation process, and microbial stability. pH measures the acidity or alkalinity of a solution, and for cider, the ideal pH range typically falls between 3.2 and 3.8.
Why is pH important?
The pH level affects the activity of yeast and other microorganisms during fermentation. If the pH is too low (acidic), yeast activity may be inhibited, resulting in a sluggish fermentation or the production of off-flavors. On the other hand, if the pH is too high (alkaline), it can promote the growth of unwanted bacteria and spoilage organisms.
How to measure pH:
To measure the pH of your cider, you can use a pH meter or pH test strips. pH meters provide more accurate results but require calibration and regular maintenance. pH test strips are a more economical option and give a good indication of the pH level.
Adjusting pH:
If your cider’s pH falls outside the ideal range, adjustments may be necessary. Most commonly, malic acid or tartaric acid is added to adjust the acidity. These acids can be found in powdered form and should be added gradually while testing the pH until the desired range is achieved.
It’s important to note that adjusting pH should be done with caution. Small increments of acid should be added at a time, and the pH level should be retested after each addition to avoid over-acidification.
Testing during fermentation:
During fermentation, the pH level of cider can change due to the production of acids by the yeast. It’s recommended to monitor the pH at different stages of fermentation, especially if you notice any unusual flavors or sluggish fermentation. Adjustments can be made if necessary to ensure a healthy fermentation process.

By keeping an eye on the pH level and making adjustments when needed, you can help create an environment that is favorable for yeast activity, minimize the risk of spoilage, and ultimately produce a well-balanced and flavorful cider.
3. Fermentation Temperature
Maintaining the proper fermentation temperature is crucial for achieving the desired flavors and characteristics in your cider.
Here are some further details to consider:
- Yeast Selection: Different yeast strains have different temperature preferences and produce distinct flavor profiles. Choose a yeast strain that suits your desired cider style and fermentation temperature range. Common cider yeast strains, such as Champagne yeast (Saccharomyces cerevisiae), prefer cooler temperatures around 55°F (13°C), while others may tolerate higher temperatures up to 75°F (24°C).
- Consistency is Key: Fluctuating fermentation temperatures can result in off-flavors and inconsistencies in your cider. Aim to maintain a stable temperature throughout the fermentation process. Sudden temperature changes can stress the yeast and lead to undesirable flavors.
- Temperature Control: Depending on the scale of your cider production, there are various methods to control fermentation temperature:
- Cooler Basements: If your brewing area is in a cool basement, it may naturally provide suitable temperatures for fermentation. Monitor the ambient temperature to ensure it remains within the desired range.
- Fermentation Chambers: For more precise temperature control, consider using a fermentation chamber. This could be a dedicated refrigerator or freezer modified with a temperature controller. Set the temperature to the desired range and monitor it regularly.
- Heat Belts or Wraps: In cooler environments, you may need to raise the fermentation temperature. Heat belts or wraps can be wrapped around the fermenter to provide gentle warmth. Use them with caution and monitor the temperature to avoid overheating.
- Temperature Controller: A temperature controller can be paired with a heating or cooling device to maintain a specific temperature range. This method allows for precise control and stability during fermentation.
Fermentation state
Temperature Considerations: Keep in mind the following temperature-related factors during fermentation:
- Early Fermentation: During the initial stages of fermentation, the cider may generate heat due to the yeast’s vigorous activity. It’s essential to monitor the temperature and adjust cooling measures accordingly.
- Late Fermentation: Towards the end of fermentation, the yeast activity slows down, which may result in a decrease in temperature. If needed, you can slightly increase the temperature to encourage the yeast to complete fermentation.
- Secondary Fermentation: If you plan on performing a secondary fermentation, such as malolactic fermentation, consult the specific yeast or bacteria strains used, as they may have different temperature requirements.
By maintaining a consistent fermentation temperature within the recommended range, you can help ensure a successful fermentation and achieve the desired flavor profile in your cider. Remember to refer to the instructions provided with your yeast strain for optimal temperature guidelines.
4. Campden Use:
Campden tablets (potassium or sodium metabisulfite) are commonly used in cider brewing to sanitize and stabilize the cider. Here’s a more detailed explanation of their use:
- Sanitization: Campden tablets are effective at killing wild yeast, bacteria, and other unwanted organisms in the cider. Before adding yeast, crush and dissolve one tablet per gallon of cider. Allow the crushed tablet to dissolve for 24 hours. This process helps create a clean and sterile environment for the fermentation process.
- Stabilization: Campden tablets are also used to stabilize the cider by preventing oxidation and inhibiting the growth of spoilage microorganisms. After fermentation is complete, you can add one crushed tablet per gallon of cider to help protect it during aging and storage.
- Sulfite Sensitivity: It’s important to note that some individuals may have sensitivities or allergies to sulfites. In such cases, it’s recommended to use alternative methods of sanitization and stabilization, such as using heat pasteurization or filtering.
- Following Instructions: When using Campden tablets, it’s crucial to follow the instructions and dosage recommendations provided with the tablets or included in the cider recipe. Overuse of sulfites can lead to off-flavors and impact the quality of the cider. Always measure and use the appropriate amount based on the volume of cider you’re working with.
- Testing for Sulfite Levels: If you’re concerned about the sulfite levels in your cider, you can use test kits or equipment designed to measure the concentration of sulfites. This can help you ensure that the sulfite levels are within acceptable limits and won’t pose any health risks.
Remember, while Campden tablets are a popular method for sanitizing and stabilizing cider, there are alternative methods available. It’s essential to choose the method that suits your preferences and needs while ensuring the safety and quality of your cider.
5. Racking
Racking is an essential step in cider brewing that involves transferring the cider from one container to another while leaving behind any sediment, known as lees. This process helps clarify the cider, improve its flavor, and ensure a clean final product. Here’s a closer look at the racking process:
- Timing: Racking is typically performed after primary fermentation. It’s important to wait until the initial vigorous fermentation has subsided, usually after about one to two weeks. At this point, most of the yeast activity has ceased, and the cider will begin to clarify.
- Prepare the equipment: Before racking, ensure that all the equipment you’ll be using is clean and sanitized. This includes the secondary fermenter, racking cane or siphon, airlock, and any other accessories. Sanitization is crucial to prevent contamination and spoilage.
- Positioning: Place the primary fermenter on a stable surface, slightly elevated if possible. This elevation helps in siphoning the cider into the secondary fermenter without disturbing the sediment at the bottom.
- Siphoning: Start by attaching a sanitized racking cane or siphon to a length of food-grade tubing. Insert the racking cane into the primary fermenter, ensuring it reaches just above the lees. Suck on the other end of the tube gently to start the siphoning process. Alternatively, you can use an auto-siphon, which eliminates the need for sucking on the tube.
- Transfer the cider: Carefully guide the cider from the primary fermenter into the secondary fermenter, making sure to keep the end of the tubing above the sediment. Try to minimize splashing and exposure to oxygen, as this can affect the cider’s flavor and introduce the risk of oxidation.
- Leave the sediment behind: As you near the bottom of the primary fermenter, monitor the cider’s clarity. When you notice the sediment approaching the racking cane, quickly lift it out of the cider, leaving the sediment behind. This process is known as “pulling the cane” and helps avoid transferring any unwanted solids.
- Airlock and storage: Once the cider is successfully transferred to the secondary fermenter, attach an airlock to the vessel to allow for the release of carbon dioxide while preventing oxygen and contaminants from entering. Place the secondary fermenter in a cool, dark location, ideally at a consistent temperature, to continue the fermentation or aging process.
By racking your cider, you promote clarity and enhance the overall quality of the final product. The process removes unwanted sediment and allows for a smoother, more enjoyable cider-drinking experience. Remember to practice proper sanitation throughout the racking process to maintain a clean and healthy cider.
6. Bottling
Bottling is the final step in the cider brewing process, where you transfer your fermented cider into individual bottles for storage and consumption.
Here are some important considerations for the bottling stage:
- Confirm Fermentation Completion: Before bottling, ensure that fermentation is complete by checking the specific gravity (SG) reading. It should remain stable over several consecutive days, indicating that all the fermentable sugars have been converted into alcohol.
- Priming Sugar: To achieve carbonation in the bottle, you’ll need to add priming sugar. This sugar will be consumed by the remaining yeast, producing carbon dioxide. The amount of priming sugar needed depends on the desired level of carbonation. A common range is 3/4 to 1 ounce (21-28 grams) of sugar per gallon (3.8 liters) of cider.
- Sanitize Bottles and Equipment: It’s crucial to sanitize all your bottling equipment, including bottles, caps, siphoning equipment, and any other tools you’ll be using. This helps prevent contamination and unwanted flavors. Use a sanitizing solution, such as a no-rinse sanitizer, and follow the manufacturer’s instructions.
- Racking and Filling: Use a siphon or a bottling wand to transfer the cider from the fermenter into the bottles. Attach the siphon or wand to the end of a food-grade tubing and carefully fill each bottle, leaving some headspace at the top to allow for carbonation. Avoid splashing to minimize the introduction of oxygen.
- Capping or Corking: Once the bottles are filled, cap them using crown caps or cork them with appropriate cider corks, depending on your preference. Ensure that the caps are sealed tightly to maintain carbonation. Consider using a capper or corker tool to ensure a proper seal.
- Labeling and Dating: It’s helpful to label your bottles with the date of bottling and any other relevant information, such as the cider’s variety or special additives. This helps you keep track of the aging process and allows you to identify specific batches easily.
- Carbonation and Conditioning: After bottling, store the cider in a cool, dark place at a consistent temperature for carbonation and conditioning. The remaining yeast will consume the priming sugar, producing carbon dioxide and creating the desired effervescence. The length of conditioning time can vary, but typically it takes 1-3 weeks for the cider to carbonate fully.
- Chill and Serve: Once carbonation is achieved, refrigerate the bottles to halt any further fermentation. Chilling the cider also helps to clarify it. When ready to enjoy, serve the cider chilled, ideally between 40°F (4°C) and 50°F (10°C), depending on personal preference.
By following these bottling guidelines, you’ll be able to store and enjoy your homemade cider with the desired level of carbonation and flavor. Remember to handle the bottles carefully to avoid disturbing the sediment and to ensure the best possible drinking experience.
7. Storage and Aging
Proper storage and aging are crucial steps in the cider brewing process to allow the flavors to develop and mature. Here are some key considerations:
- Temperature: Store your bottled cider at a consistent temperature between 35°F (2°C) and 50°F (10°C). This range helps slow down oxidation and aging processes while promoting stability. Avoid extreme temperature fluctuations, as they can negatively affect the quality of the cider.
- Light Exposure: Keep your cider away from direct light, especially UV light, as it can lead to off-flavors and spoilage. Choose a dark storage area or use opaque containers to protect the cider from light exposure.
- Bottle Position: Store your cider bottles upright to minimize the surface area exposed to oxygen. This reduces the risk of oxidation and helps maintain freshness.
- Aging Duration: Cider can benefit from aging, which allows flavors to meld and develop complexity. While it’s possible to enjoy your cider after a minimum aging period of 2-4 weeks, longer aging periods yield even better results. Consider aging your cider for several months or up to a year for more refined and mature flavors.
- Tasting and Monitoring: It’s a good practice to periodically sample your aging cider to assess its progress. This allows you to track changes in flavor profiles and determine the ideal aging duration. Some ciders may peak in flavor after a specific aging period, while others may continue to evolve.
- Batch Variation: Note that different cider batches may have varying aging requirements. Factors like the variety of apples used, yeast strains, fermentation conditions, and cider recipe variations can influence the aging process and flavor development. Experimentation and tasting will help you determine the optimal aging duration for each batch.
- Record Keeping: Maintain a record of the bottling and aging dates for each batch of cider. This information will assist you in tracking aging times and identifying patterns or preferences for future reference.
Remember that aging is subjective, and the optimal duration may vary depending on personal taste preferences. It’s recommended to try your cider at different stages of aging to find the sweet spot that suits your palate. Enjoy the journey of discovering the unique flavors that unfold over time!
Conclusion
In conclusion, the best 5-gallon pear wine recipes include:
1. Simple Pear Wine – a straightforward recipe that showcases the natural sweetness and flavor of pears.
2. Spiced Pear Wine – a warm, aromatic wine with the addition of cinnamon and cloves.
3. Pear and Apple Wine – a fruity blend of two popular fruit flavors.
4. Pear and Ginger Wine – a zesty, spicy twist on traditional pear wine.
5. Pear and Elderflower Wine – a delicate, floral wine perfect for sipping on a warm day.
By experimenting with these recipes, you’ll be able to create delicious, unique wines that showcase the versatility of pears as a winemaking ingredient. Happy brewing!
FAQs
How many pears for 5 gallons of wine?
The amount of pears needed for 5 gallons of wine depends on the recipe being used. Generally, 10-20 pounds of pears are needed to make 5 gallons of wine.
The number of pears in 20 pounds of pears can vary depending on the size and weight of the individual pears. However, on average, you can estimate that there are approximately 4 to 5 medium-sized pears in a pound. Therefore, in 20 pounds of pears, you can expect to have around 80 to 100 pears. Keep in mind that this is just an approximation and the actual number may vary.
What is the alcohol content of pear wine?
The alcohol content of pear wine can vary depending on the specific recipe and fermentation process used, but typically falls between 8-14% ABV.
How many pounds of fruit are in a gallon of wine?
There is no definitive answer to this question as the amount of fruit used in a gallon of wine can vary depending on the type of fruit, the recipe, and the winemaker’s preferences. However, a general rule of thumb is that it takes approximately 2-3 pounds of fruit to make one gallon of wine.
How long should pear wine age?
Pear wine should age for at least 6 months to a year to allow the flavors to mature and develop. However, some pear wines can be aged for several years to achieve a smoother and more complex taste. The ideal aging time depends on the specific recipe and personal preference.
How many pounds of grapes do I need for 3 gallons of wine?
You will need approximately 36-45 pounds of grapes for 3 gallons of wine.
Can you use frozen pears to make wine?
Yes, you can use frozen pears to make wine. Freezing does not significantly alter the quality or flavor of the fruit, and it can actually make it easier to extract juice during the winemaking process. Just make sure to thaw the pears completely before using them.