Mead pasteurization is a process of heating the mead to a specific temperature for a certain period of time to kill off any remaining yeast and microorganisms.
This helps to stabilize the mead, preventing further fermentation and off-flavors from developing.
The primary purpose of pasteurizing mead is to stabilize and preserve its quality.
In this blog post, we will explore the process of pasteurizing mead, discussing the benefits, the equipment needed, and the different methods of pasteurization. As an experienced brewer, I will also share my personal tips and tricks to help you achieve the best results.
How do you pasteurize mead?
To pasteurize home brew, you will need to heat it to a specific temperature for a certain amount of time to kill any unwanted microorganisms. The most common method is called “flash pasteurization.”

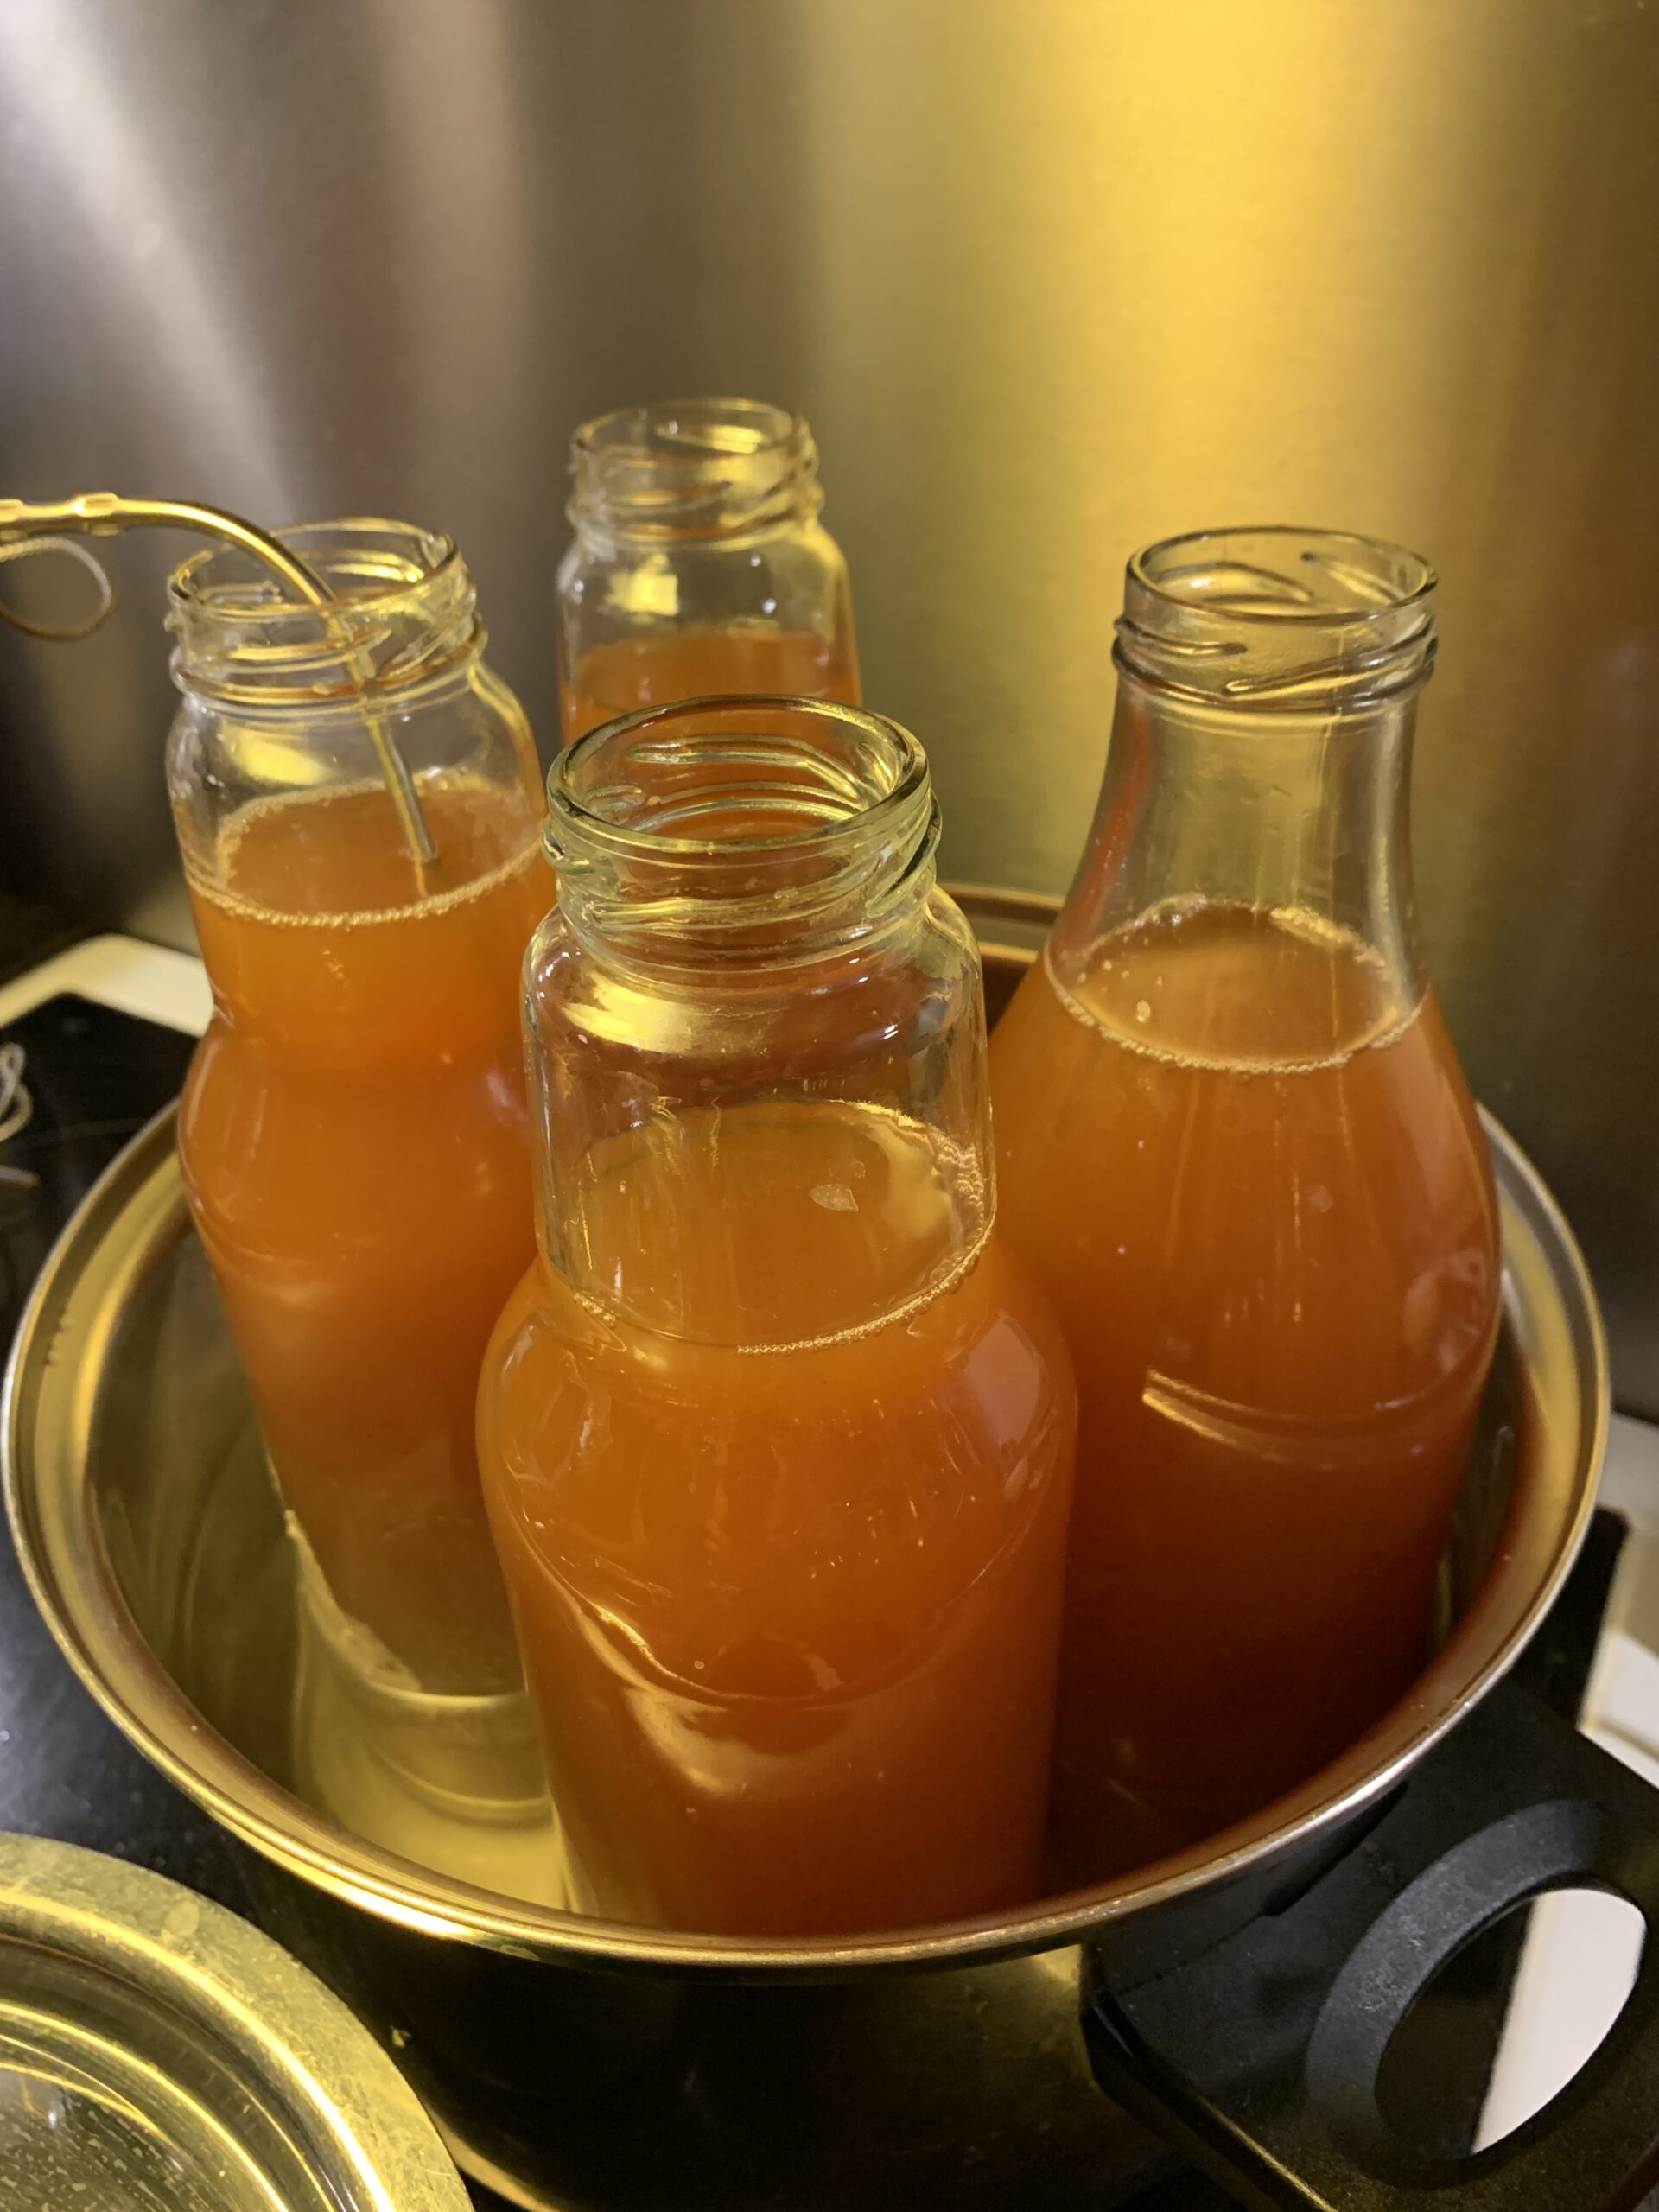
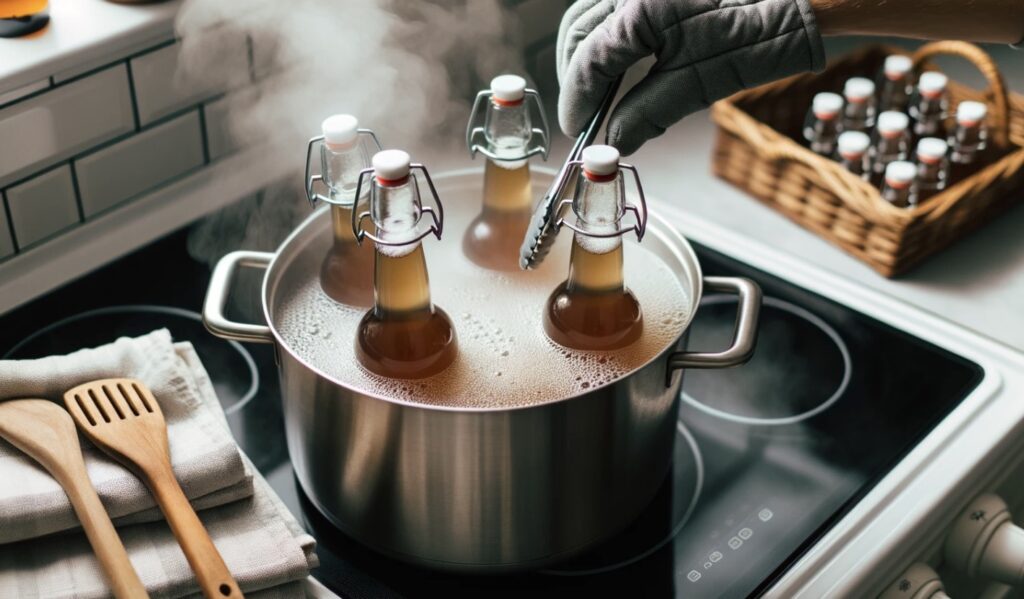
Start by transferring your home brew into heat-resistant bottles or containers, leaving some headspace for expansion.
Place the bottles in a pot of water and heat it slowly until the temperature reaches 161°F (72°C).
Maintain this temperature for at least 1 minute, ensuring all parts of the liquid reach the desired temperature. Afterward, cool the bottles rapidly in an ice bath to halt any further heating. Pasteurization helps stabilize the brew and extend its shelf life.
The Benefits of Pasteurizing Mead
Enhanced Flavor Stability
One of the main benefits of pasteurizing mead is that it helps to stabilize the flavors. This is especially important for sweeter meads, where a continued fermentation could lead to a drier taste and a higher alcohol content than desired.
Prevention of Off-Flavors
By killing off the remaining yeast and microorganisms, pasteurization prevents the production of off-flavors and aromas that can occur due to continued fermentation or bacterial spoilage.
Improved Shelf Life
Pasteurized mead has a longer shelf life than unpasteurized mead. This is because the process kills off any microorganisms that could cause spoilage, allowing the mead to be stored for longer periods without losing quality.

When to Pasteurize Mead
The timing of pasteurization is key. It’s important to pasteurize your mead after it has finished fermenting and just before you’re ready to bottle it.
If you’re adding any additional flavors, such as fruit or spices, you should do this before pasteurization.
Remember, pasteurizing too early can halt fermentation prematurely and affect the final alcohol content and taste of your brew.
Equipment Needed for Mead Pasteurization
To pasteurize your mead at home, you will need the following equipment:
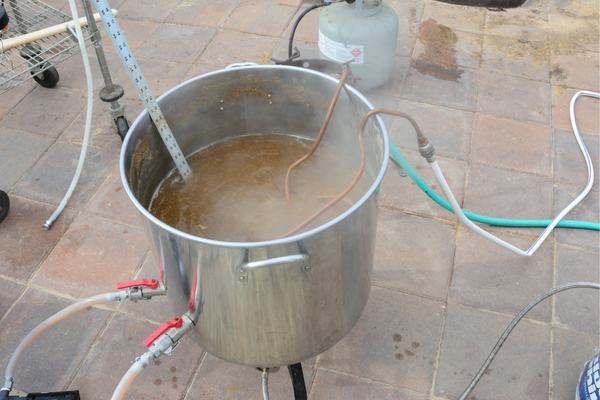
1. A large pot or kettle – This will be used to heat the mead to the required temperature.
2. A thermometer – This is essential for monitoring the temperature of the mead during pasteurization.
3. A heat source – You can use a stovetop, an electric hot plate, or a propane burner.
4. Bottles and caps – You will need sanitized bottles and caps for bottling the pasteurized mead.
5. A timer – This will help you keep track of the pasteurization time.
Different Methods of Mead Pasteurization
There are two main methods of pasteurizing mead: stovetop pasteurization and water bath pasteurization.
Each method has its advantages and disadvantages, and the best one for you will depend on your specific needs and preferences.
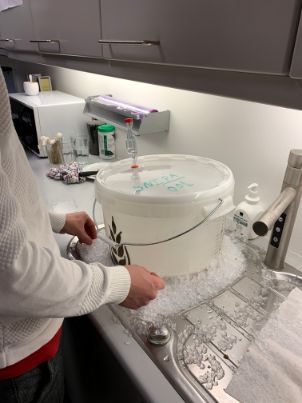
Water Bath Pasteurization
Water bath pasteurization involves placing the bottles of mead in a large pot or container filled with hot water.
I recommend this method as it is gentler on the mead, as the heat is transferred more evenly and gradually. You also don’t lose much alcohol to evaporation!
Be aware though, not to screw on the lids too tightly as the bottles may get damaged from the pressure.
Pros:
- More even heat distribution
- Less risk of scorching the mead
Cons:
- Takes longer to reach the desired temperature
- More difficult to control the temperature accurately
- Needs to be in bottles already
Step-by-Step Guide to Pasteurizing Mead
Follow these steps to pasteurize your mead at home:
1. Sanitize your equipment – Make sure all your equipment, including the bottles and caps, is clean and sanitized.
2. Choose your pasteurization method – Decide whether you want to use stovetop or water bath pasteurization.
3. Heat the mead – For stovetop pasteurization, heat the mead in a large pot or kettle, stirring constantly to prevent scorching. For water bath pasteurization, place the bottles of mead in a large container filled with hot water.
4. Monitor the temperature – Use a thermometer to keep an eye on the temperature of the mead. The recommended pasteurization temperature for mead is at least 140°F (60°C) and ideally 161°F (72°C).
5. Hold the temperature – Once the mead reaches the desired temperature, maintain this temperature for 20 minutes. This will ensure that all the yeast and microorganisms are killed.
6. Cool the mead – After pasteurizing, cool the mead down to room temperature as quickly as possible to prevent off-flavors from developing.
7. Bottle the mead – Transfer the pasteurized mead into sanitized bottles and seal with caps.
8. Store the mead – Store the bottles in a cool, dark place for at least a month before consuming to allow the flavors to mature.
Cooling (and Bottling)
After pasteurization, it’s important to cool your mead quickly to prevent any further changes in flavor. This can be done by placing your pot in an ice bath and stirring the mead gently.
Once it’s cooled to room temperature, you’re ready to bottle or store (age) your mead.
The Result: A Safe, Stable Brew
The final result of pasteurization is a safer, more stable mead that you can enjoy with confidence. You’ll have a mead that’s free from any harmful bacteria or yeast, and one that won’t continue fermenting in the bottle.
The taste of your mead should be smooth and unaltered by the pasteurization process, ready for you to enjoy or share with others.
Tips and Tricks for Successful Mead Pasteurization
– Stir constantly – This is especially important for stovetop pasteurization to prevent the mead from scorching.
– Be patient – It may take some time for the mead to reach the desired temperature, especially with water bath pasteurization. Resist the urge to crank up the heat, as this could cause the mead to overheat and produce off-flavors.
– Monitor the temperature closely – Keep an eye on the temperature throughout the pasteurization process to ensure the mead is heated evenly and consistently.
– Cool the mead quickly – Rapid cooling helps to prevent off-flavors from developing. You can use an ice bath or a cold water bath to speed up the cooling process.
Conclusion: Mead Pasteurization Facts
In conclusion, pasteurizing mead is an essential step in the brewing process that helps to enhance flavor stability, prevent off-flavors, and improve shelf life. Here are ten key facts about mead pasteurization:
1. Pasteurization stabilizes and preserves the quality of the mead.
2. Pasteurized mead has a longer shelf life than unpasteurized mead.
3. The recommended pasteurization temperature for mead is between 140°F (60°C) and 161°F (72°C).
4. The pasteurization process should be maintained for 5 to 20 minutes.
5. There are two main methods of pasteurizing mead: stovetop and water bath pasteurization.
6. Stovetop pasteurization offers greater temperature control.
7. Water bath pasteurization provides more even heat distribution.
8. Sanitize all equipment before pasteurizing mead.
9. Monitor the temperature closely during the pasteurization process.
10. Cool the mead quickly after pasteurization to prevent off-flavors.
FAQs
How do you pasteurize homebrew?
To pasteurize homebrew, you can follow these steps:
1. Fill a large pot or container with water and bring it to a boil.
2. Submerge the bottles or containers of homebrew in the boiling water, ensuring they are fully covered.
3. Keep the bottles in the boiling water for about 10 to 15 minutes. This will help kill any potential harmful microorganisms.
4. Carefully remove the bottles from the boiling water and let them cool down.
5. Once cooled, store the pasteurized homebrew in a cool, dark place to allow it to carbonate and develop flavors.
It’s important to note that pasteurization may alter the taste and quality of your homebrew, so it’s not commonly practiced by homebrewers. Most homebrewers rely on proper sanitization techniques during the brewing process to prevent contamination.
How do you sanitize honey for mead?
Sanitizing honey for mead involves two important steps: pasteurization and sulfite treatment. Pasteurization involves gently heating the honey to a temperature of around 140°F (60°C) for about 30 minutes.
This helps eliminate any potential wild yeast or bacteria present in the honey. After pasteurization, sulfite treatment is done by adding campden tablets or potassium metabisulfite to the honey.
This helps inhibit the growth of unwanted microorganisms and preserves the mead. It is important to follow proper measurements and guidelines while using sulfites to avoid overuse.
How do you pasteurize hard cider before bottling?
To pasteurize hard cider before bottling, you can follow these steps:
1. Start by heating the cider gently in a large pot or kettle. The temperature should be raised gradually to avoid scorching or boiling over.
2. Use a thermometer to monitor the temperature. Heat the cider to a minimum of 160°F (71°C) and maintain it at this temperature for at least one minute. This process helps to kill any potential harmful bacteria or yeast present in the cider.
3. Once the pasteurization time is complete, carefully cool the cider rapidly. You can use an ice bath or a heat exchanger to cool it down quickly.
4. After cooling, transfer the pasteurized cider into sanitized bottles or kegs using a siphon or a funnel.
5. Seal the bottles or kegs with sanitized caps or corks.
Remember, pasteurization is not mandatory for hard cider, and many commercial ciders are not pasteurized. It is a personal choice based on the desired level of safety and stability.
How do you clear cider before bottling?
To clear cider before bottling, there are a few common methods. One traditional approach is to allow the cider to settle naturally over time, which can take several weeks or even months. During this period, suspended particles will settle to the bottom, resulting in clearer cider.
Alternatively, you can use fining agents like gelatin, isinglass, or bentonite to speed up the clarification process. These agents help to bind and sink the particles, making it easier to separate the clear cider from the sediment. Once the cider has cleared, it can be carefully siphoned or racked into bottles, leaving behind any remaining sediment.
Does homemade apple cider need to be pasteurized?
Yes, homemade apple cider should be pasteurized to ensure its safety. Pasteurization is a process of heating the cider to kill harmful bacteria, yeasts, and molds that may be present. This helps to prevent foodborne illnesses and extends the shelf life of the cider.