Hello fellow brewers and honey wine enthusiasts! I’ve been a professional brewer and microbiologist for over two decades, and if there’s one thing I’ve become passionate about, it’s the art of making mead/honey wine.
Today, I want to share with you my personal one gallon honey mead recipe. This is a recipe I’ve perfected over the years, tweaking and adjusting until I landed on the perfect balance and flavor. The best part?
It always works.
But be sure to follow the advice in this guide carefully! And you’ll have your own honey wine (mead) in no time!
By following my step-by-step guide, noting the specific amount of ingredients, and understanding the underlying microbiology of fermentation.
So, pull up a chair, maybe grab a glass of your current favorite brew, and let’s dive deep into the world of mead-making.
Ingredients for 1 gallon of mead:
- Honey: 3 lbs. It’s the backbone of your mead, so always opt for high-quality, raw, and unfiltered honey.
- Water: About 3.5 quarts. Non-chlorinated and pure.
- Yeast: 1 packet. I recommend using Lalvin D-47 or EC-1118 for beginners.
- Nutrients: 1 tsp of yeast nutrient and 1/2 tsp of yeast energizer.
- Sanitizer: VWP, Star San, Alcohol or a similar no-rinse sanitizer.
Equipment Needed:
- 1-gallon fermentation vessel (I would recommend a glass carboy or plastic bucket)
- Airlock and rubber stopper
- Optional: Hydrometer or refractometer and test jar
- Thermometer
- Stirring spoon
- Funnel
- Racking cane and tubing
- Bottles and corks/caps
Step-by-Step Guide for 1 Gallon of Mead:
1. Sanitization:
The biggest mistake rookies make? Not sanitizing properly. Every tool and equipment piece that comes into contact with your mead needs to be sanitized.
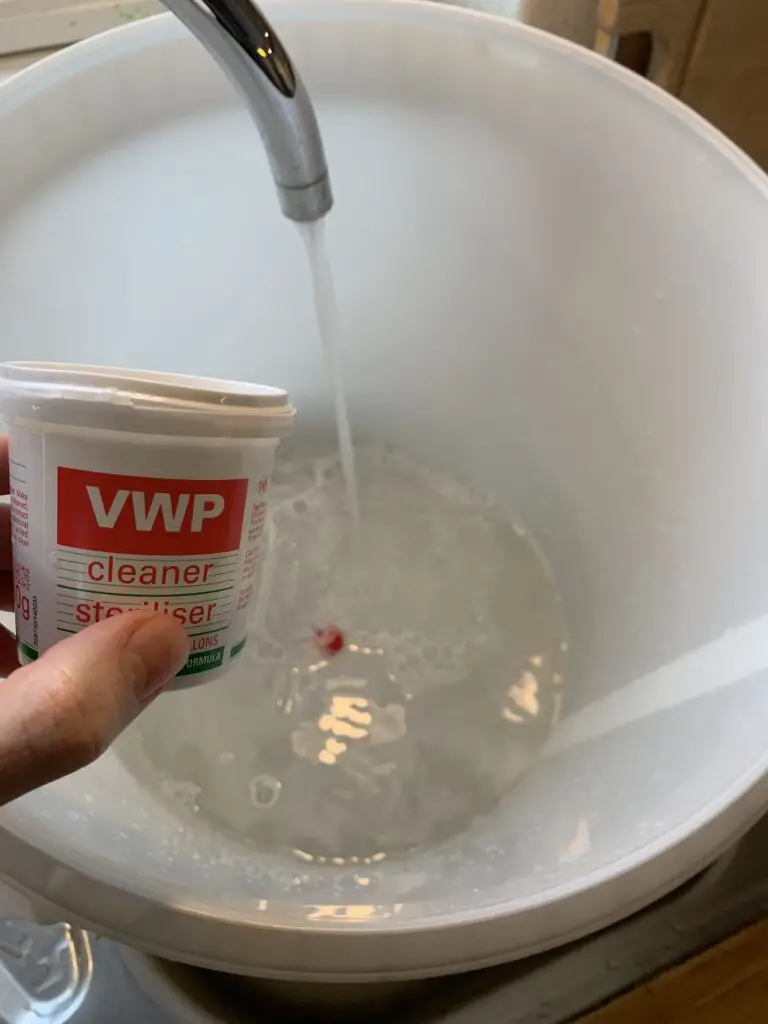
This ensures you’re not introducing harmful bacteria or wild yeasts into your brew. As a microbiologist, trust me, the world is full of microorganisms you don’t want in your mead!
You can use any type of brewing sanitizer, and you can even use ethanol or just boiling water.
Pro Tip: As a microbiologist, I’ve seen how even the tiniest contaminants can ruin a brew. I often go above and beyond, ensuring I work in a clean space, free from drafts that might blow in unwanted microorganisms.
2. Mixing Honey and Water: Crafting the Soul of Your Mead
Mead’s essence is captured in this alchemical blend of honey and water, known as the ‘must’. Honey, with its myriad floral notes, imparts the core flavor, while water dilutes and aids fermentation.
- Start with non-chlorinated water to avoid chemical flavors. If in doubt about your tap water, bottled spring water is a safe bet.
- Gently warm the water in a large pot to around 100°F. This helps honey dissolve more easily.
- Gradually stir in the honey, ensuring a homogenous mixture.
Expert Insight: The type of honey used can greatly influence your mead’s final flavor. Experimenting with different varieties like acacia, buckwheat, or chestnut can yield exciting results.
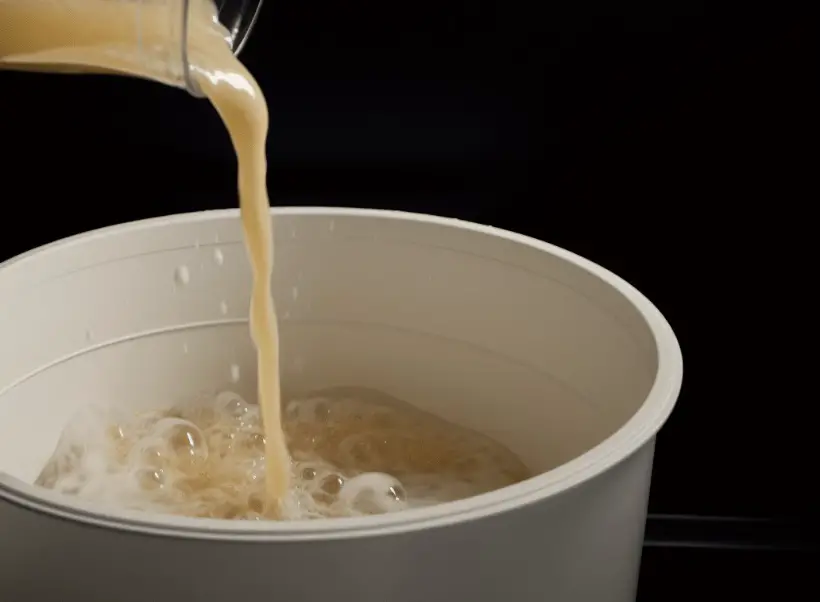
3. Cooling and Transferring to Fermentation Vessel: Setting the Stage
Before introducing yeast, the must needs to be at a comfortable temperature. Yeasts are living organisms; too hot or too cold environments can stress or even kill them, impacting fermentation.
- Allow the must to naturally cool to room temperature. If you’re short on time, an ice bath can expedite the cooling process.
- Once cooled, a sanitized funnel aids in a smooth transfer of the must into the fermentation vessel.
Expert Insight: A gradual temperature change is ideal. Sudden temperature shocks can cause honey-derived compounds to react differently, slightly altering flavors.
4. Pitching the Yeast: Enlisting Nature’s Alchemists
Yeast are responsible for the transformation of honey’s sugars into alcohol. Their health and activity directly influence the mead’s quality.
- Distribute the yeast evenly across the must’s surface.
- Let them rehydrate on the surface for about 15 minutes before stirring.
Expert Insight: Different yeasts impart varying flavor profiles. Starting with recommended strains is wise, but as you gain experience, exploring others can add complexity to your mead.
5. Adding Nutrients: Supporting Our Microscopic Allies
While honey provides food for the yeast in the form of sugars, it lacks some vital nutrients that yeast require for optimal health. Adding nutrients ensures a steady, complete fermentation.
- 24 hours post-pitching, introduce half of your nutrient and energizer mix.
- The second half should be added 48 hours from the start.
Expert Insight: Signs of nutrient deficiencies in yeast include a sluggish fermentation or the production of sulfur-like off odors. Timely nutrient addition prevents these issues.
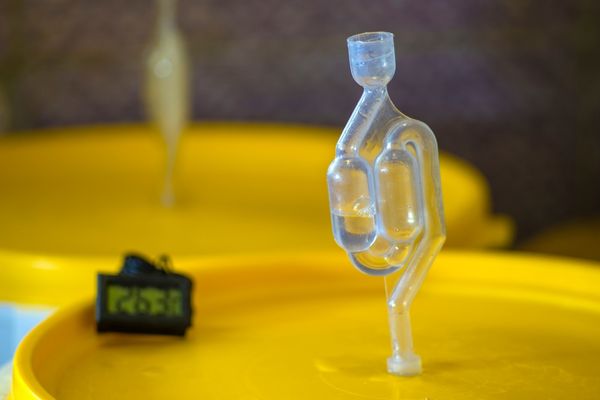
6. Airlock Setup: Guarding Against Invaders
The airlock is the mead’s protective shield, allowing gases to escape during fermentation while preventing contaminants from entering.
- Attach your rubber stopper to the fermentation vessel.
- Fill the airlock halfway with sanitized water or vodka and place it securely on the stopper.
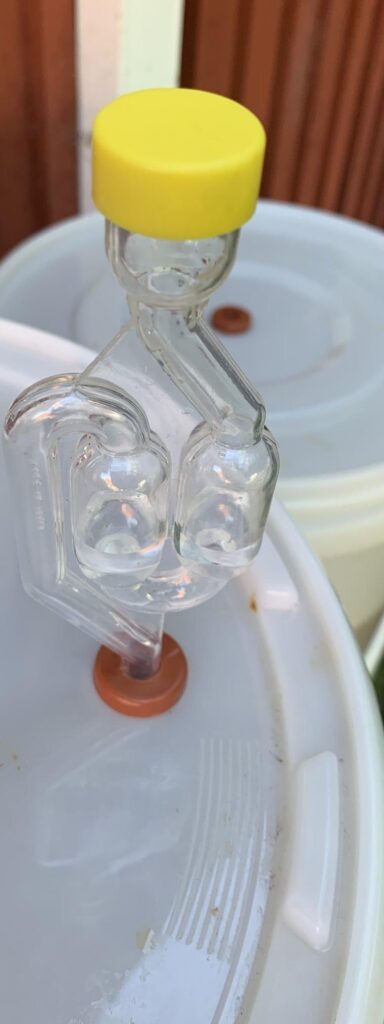
Expert Insight: Vodka in the airlock serves a dual purpose—it’s an excellent barrier against contaminants and, being alcohol, naturally prevents bacterial growth.
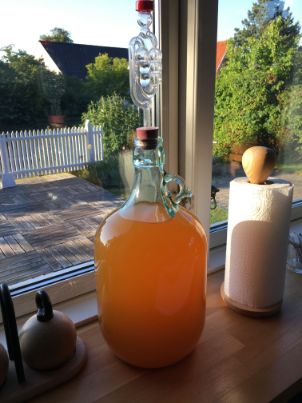
7. Fermentation: The Magical Transformation
The process where sweet must turns into a tantalizing alcoholic beverage. Observing this transformation is one of the joys of brewing.
- The vessel should reside in a dark place, shielded from sunlight which can degrade your mead.
- Monitor the airlock’s bubbling – the fermentation’s visual progress tracker. Initial rapid bubbling will slowly taper off as fermentation concludes.
Expert Insight: Documenting daily observations, like bubble frequency or any aroma changes, can offer valuable insights for future batches.
8. Racking: Pursuit of Clarity and Purity
Post-fermentation, racking ensures your mead is clear and free from any sediment or lees (dead yeast and other particulates).
- Elevate the primary fermentation vessel. Using a siphon or racking cane, gently transfer the mead to a sanitized secondary vessel.
- Ensure the sediment remains undisturbed and left behind.
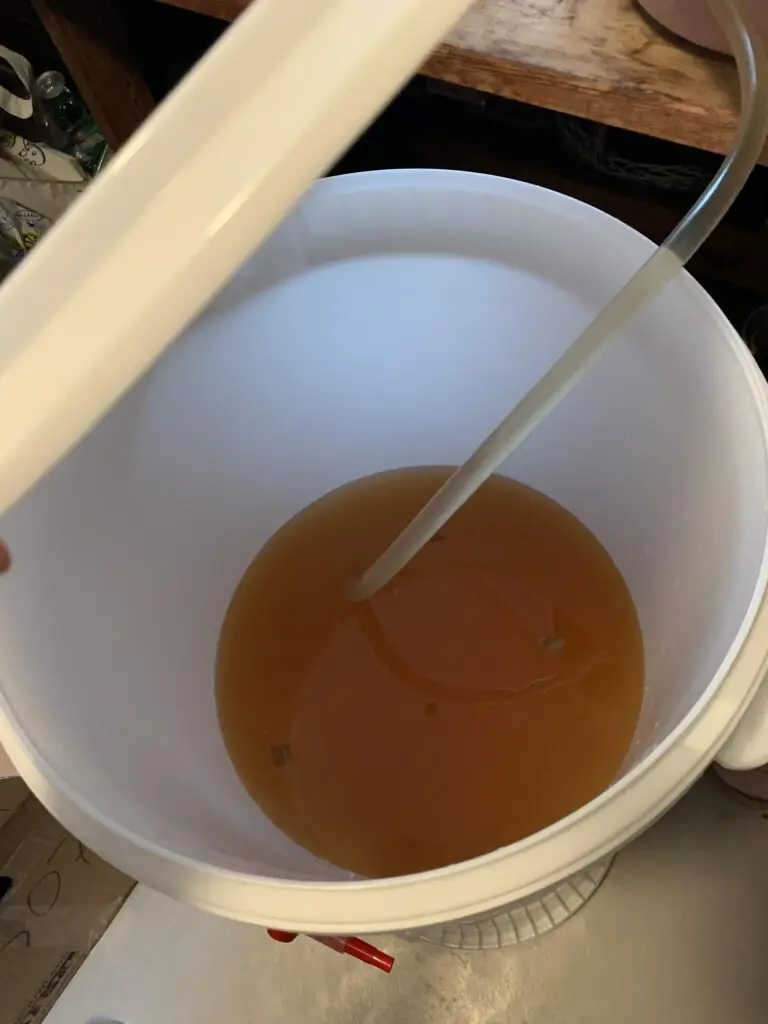
Expert Insight: Multiple racking sessions, spaced a few months apart, can lead to a brilliantly clear mead and prevent off-flavors from developing due to prolonged contact with the lees.
9. Aging: Where Patience is Rewarded
Aging allows flavors to meld, mellow, and mature, elevating the mead’s taste profile.
- Seal the secondary vessel with an airlock to guard against contaminants.
- Periodically taste your mead. Depending on the honey and yeast used, some meads mature quickly, while others benefit from extended aging.
Expert Insight: Aging isn’t just about time; it’s about evolution. Notice how flavors evolve, become smoother, and sometimes new unexpected notes emerge.
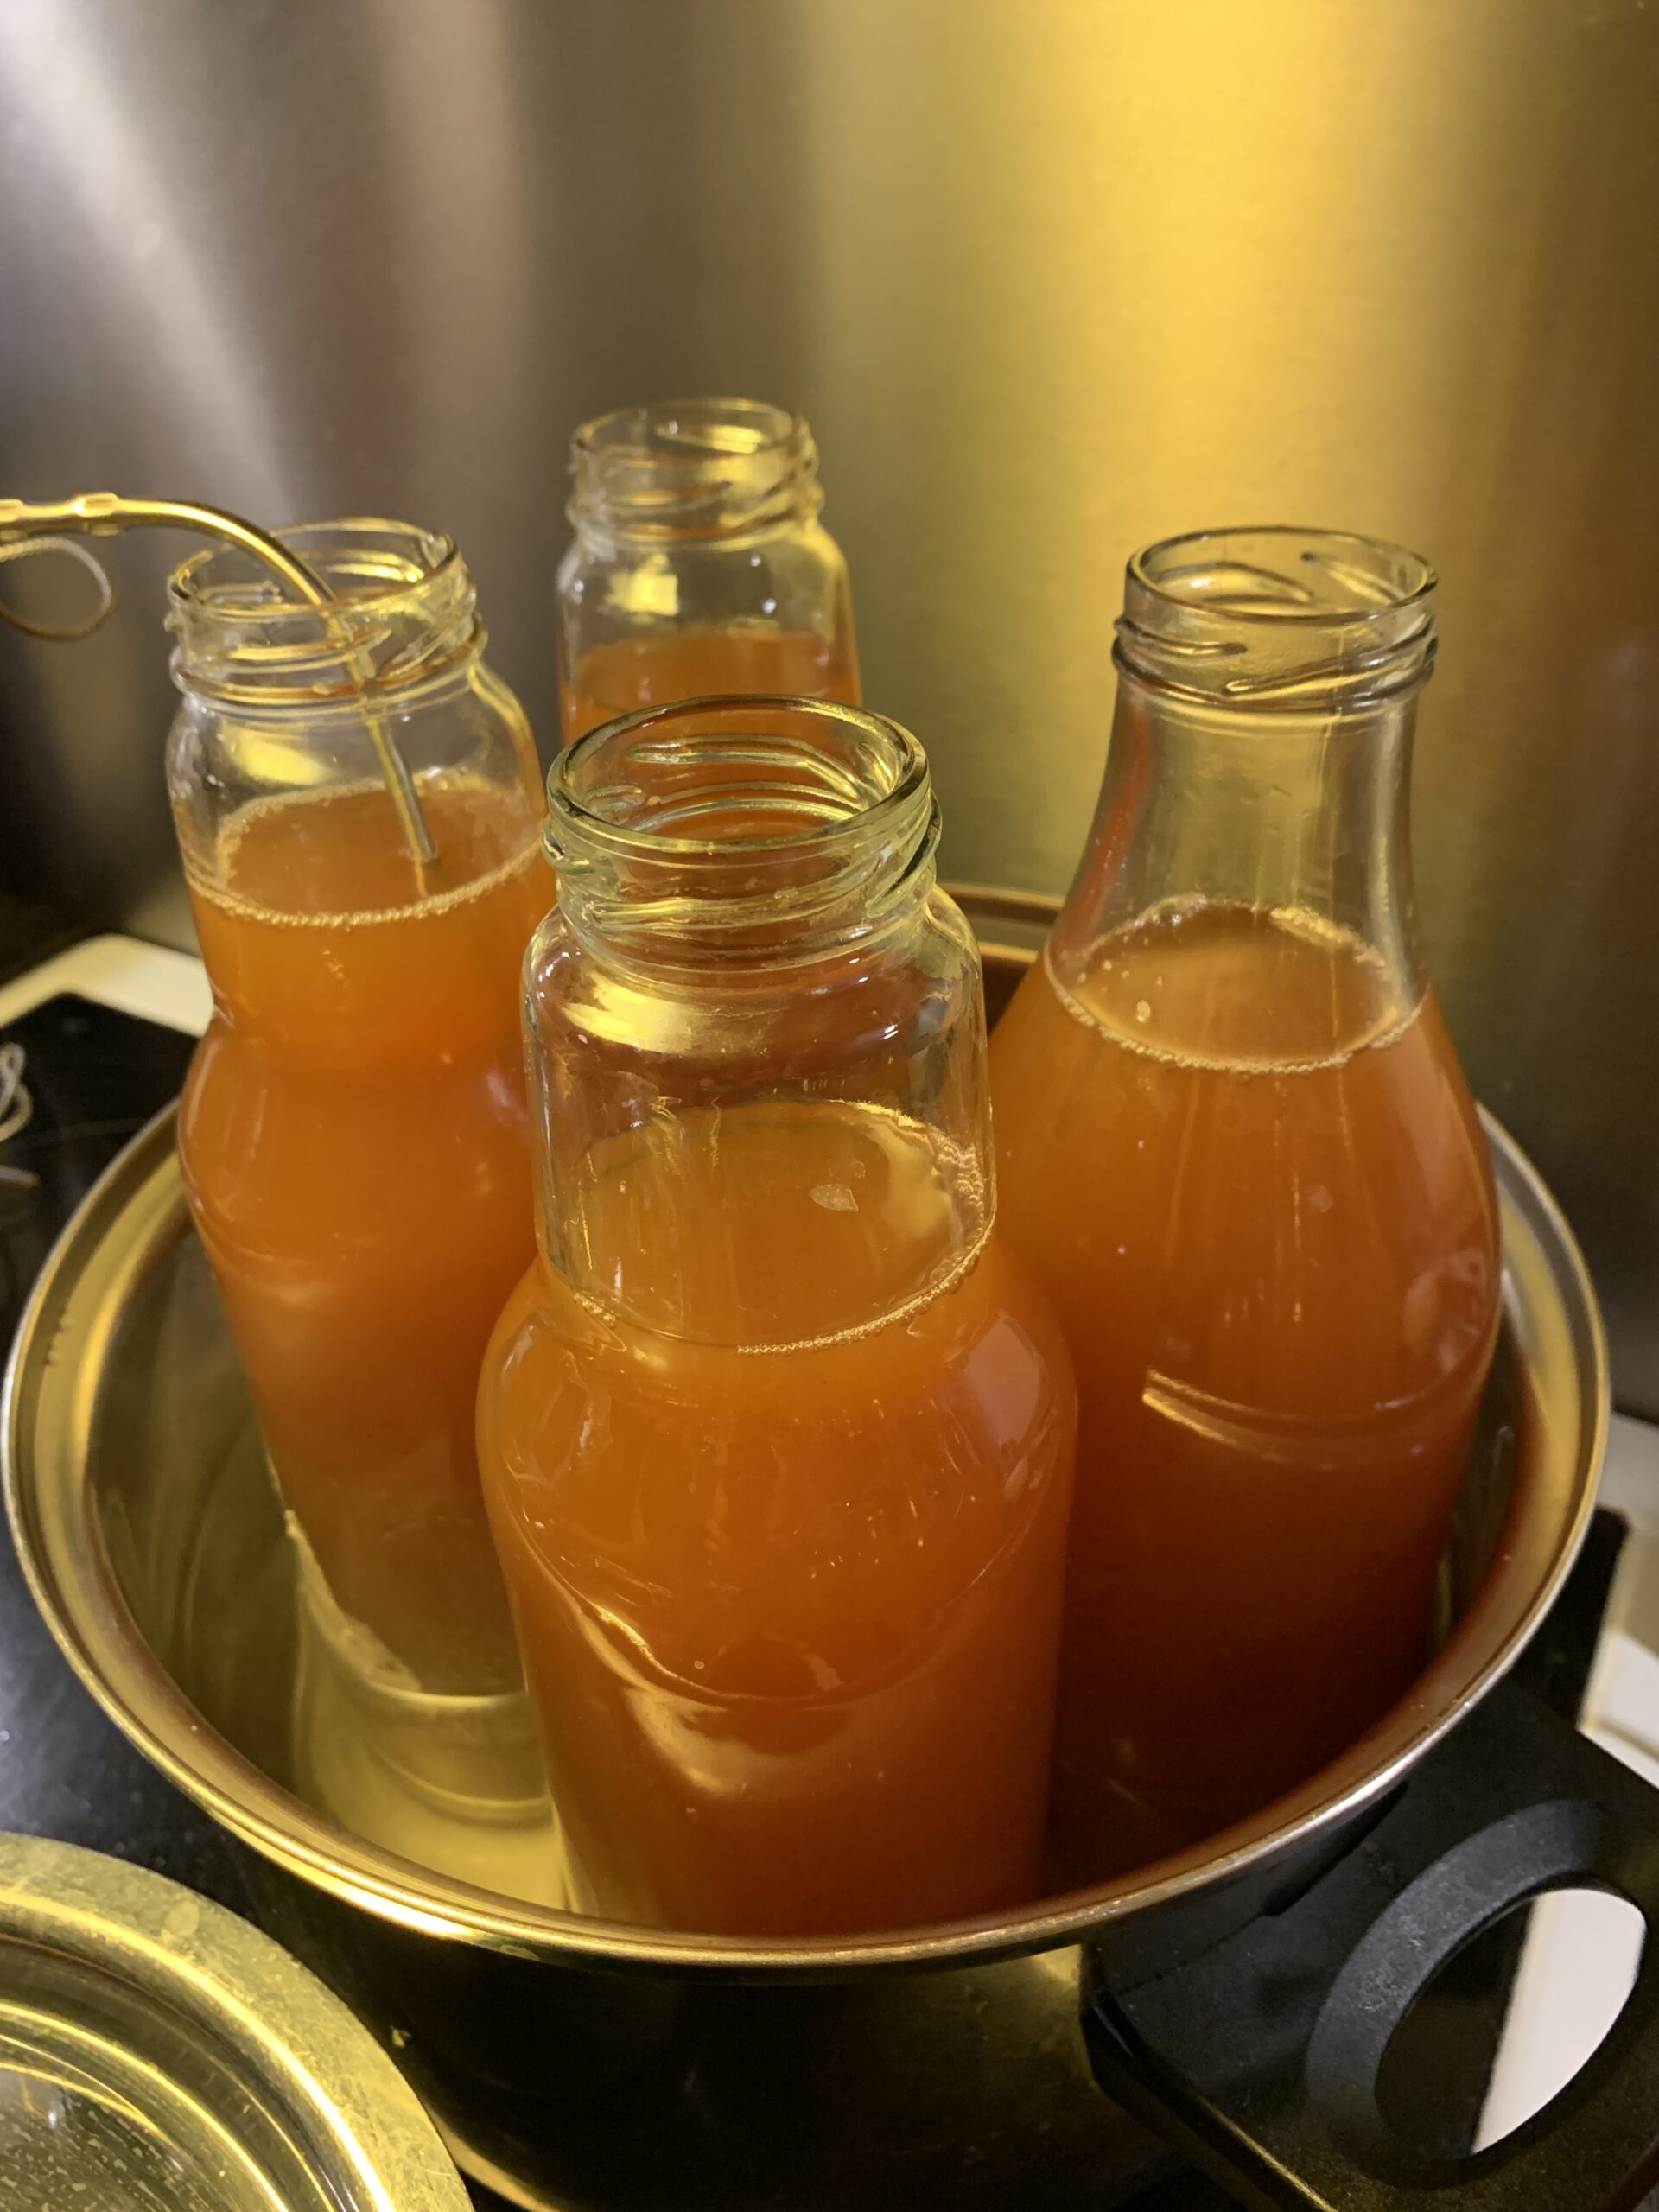
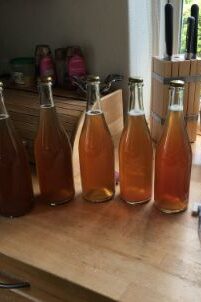
10. Bottling: Preparing for the Final Reveal
The culmination of your patience and hard work. Bottling is where your mead gets ready for presentation and consumption.
- Sanitize all bottles, corks, and any other equipment you’ll use.
- Siphon the aged mead into bottles, taking care to leave about an inch of headspace.
- Seal, label, and store them upright in a cool, dark environment.
Expert Insight: Resist the urge to consume immediately after bottling. Meads often undergo a ‘bottle shock’ where flavors can seem disjointed. Giving them a few weeks to settle post-bottling can make a world of difference.
There you have it—a detailed blueprint to crafting your own exquisite gallon of honey mead. Every batch carries its unique signature, a testament to the art and science of brewing. Happy brewing, and may every sip transport you to a realm of rich flavors and cherished memories! 🍷
Common Problems When Brewing Your First Honey Wine
Mead-making is a rewarding endeavor, but like all crafts, it comes with its own set of challenges—especially for beginners.
Throughout my years in brewing and my background in microbiology, I’ve seen (and experienced) a fair share of mead misadventures. But worry not! I’m here to guide you through some of the most common pitfalls, ensuring your mead journey is as smooth as possible.
1. Stuck Fermentation:
Problem: Your fermentation seems to have halted prematurely, with no bubbles in the airlock.
Solution: This can be due to various reasons like a lack of nutrients, temperature fluctuations, or yeast health.
Make sure to add the right amount of yeast nutrients as outlined in the main guide. If the environment is too cold, move your fermentation vessel to a warmer spot. Sometimes, repitching with a new yeast packet can also kickstart the process.
2. Off-flavors or Smells:
Problem: Your mead has a strange taste or an off-putting smell.
Solution: Off-flavors can be caused by infections, stressed yeast, or oxidation. Always ensure everything is sanitized. If your mead tastes too sour, it might be infected.
If it’s too “funky” or has a sulfuric smell, it could be due to yeast stress. Consider adding nutrients or aerating the must in the early stages to combat this. Remember, aging can also mellow out certain off-flavors, so patience might be your remedy.
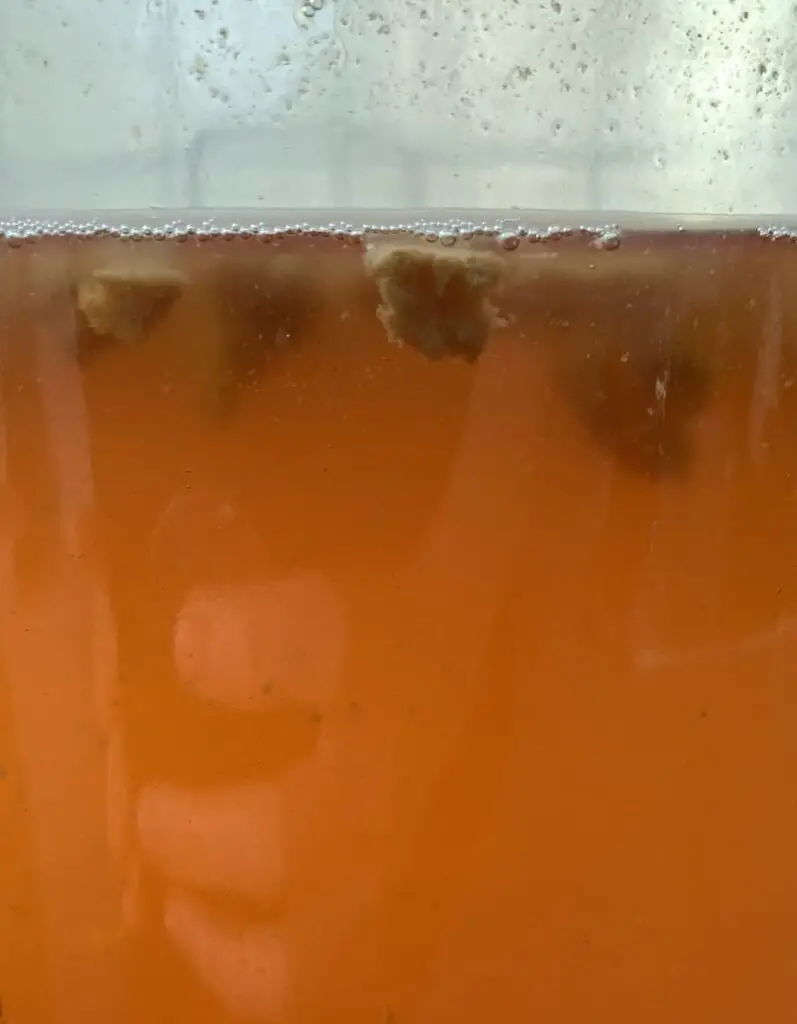
3. Cloudy Appearance:
Problem: Your mead hasn’t cleared up, even after weeks.
Solution: Cloudiness can be due to pectins (if using fruit), yeast not settling, or other suspended particles. Racking carefully and multiple times can aid in clarifying mead. If using fruits, consider adding pectic enzyme.
Time is also a natural clarifier; sometimes, waiting longer can give you crystal-clear mead.
Another great, but somewhat advanced option is to cold crash your mead by subjecting it to fridge temperature for a week or two. This will not only precipitate the yeast, but also (sometimes) stop fermentation to yield a sweeter mead.
4. Too Sweet or Too Dry:
Problem: The mead isn’t hitting your preferred sweetness level.
Solution: The sweetness of your mead is a result of the balance between the honey used and the yeast’s alcohol tolerance. If your mead is too sweet, your yeast might’ve hit its alcohol tolerance.
To remedy this, you can either blend it with a drier mead or repitch with a higher-tolerance yeast. If it’s too dry, backsweetening with honey post-fermentation is the answer. But always stabilize with potassium metabisulfite and potassium sorbate before backsweetening to prevent re-fermentation.
5. Carbonation When You Didn’t Want It:
Problem: Your mead is fizzy, and you weren’t aiming for a sparkling mead.
Solution: Unwanted carbonation usually occurs when the mead is bottled before fermentation is truly complete. This can lead to potential bottle bombs—a dangerous scenario. If your bottled mead is carbonating unintentionally, refrigerate them immediately to halt yeast activity and consume or decant them carefully.

Every brewer, no matter how seasoned, encounters challenges. It’s part of the journey. Remember, every issue has a solution, and sometimes the answer is as simple as waiting a bit longer.
As with all things mead, patience, knowledge, and a touch of intuition will guide the way. Keep these common problems and solutions in mind, and you’ll be well on your way to perfecting the art of mead-making.
Choosing the Best Honey for Your Mead
Ah, honey—the lifeblood of any mead! While our previous sections delve deep into the process, it’s worth diving into the sweet, sticky world of honey selection.
After all, the kind of honey you use can drastically influence the flavor, aroma, and overall character of your mead. Let’s embark on this golden journey, shall we?
1. Raw vs. Processed Honey:
Always aim for raw honey. This form retains its natural enzymes, flavor compounds, and aromatic properties. Processed honey, on the other hand, has often been heated and filtered, stripping away many of the characteristics that can give your mead its unique profile.
Pro Tip: The words ‘pure honey’ on a label doesn’t mean it’s raw. Always check for the term ‘raw.’
2. Floral Varieties:
Honey bees, those tireless workers, can visit a variety of plants, and the nectar they collect influences the honey’s profile. Here are some popular honey varieties:
- Clover: A classic choice. It’s light, floral, and slightly grassy. Perfect for a traditional mead.
- Orange Blossom: With a citrusy note, this honey is both fragrant and sweet.
- Wildflower: As the name suggests, it’s sourced from various flowers, giving it a complex flavor profile.
- Buckwheat: Darker and with a robust, malty flavor. It produces a rich, full-bodied mead.
Remember: The type of honey will significantly affect your mead’s flavor, so choose based on the final taste you’re aiming for.
3. Color and Flavor:
In general, lighter honeys will impart a delicate and floral mead, while darker honeys lean towards strong, molasses-like flavors. However, there’s a world of spectrum in between, and experimentation is key.
4. Regionality Matters:
The terroir, or the environment where bees forage, can influence honey’s flavor. This means that clover honey from New Zealand can taste different from one in Canada. It’s always fascinating to experiment with regional differences.
5. Testing and Sampling:
Before committing to a large batch of mead, consider making smaller batches with different honey varieties. This will give you a clear idea of which honey aligns with your palate and the flavor profile you’re aiming for.
6. Price and Quality:
Good quality honey can be pricey, but remember, it’s the primary ingredient in your mead. Investing in high-quality honey can make all the difference between a good mead and a spectacular one.
Honey isn’t just a sweetener; it’s the soul of your mead. It’s the essence that carries the whispers of blooming flowers, the hum of bees, and the warmth of sunlit days.
Choosing the right honey is both an art and a science. It’s about understanding flavors, respecting nature’s work, and being willing to experiment.
So, the next time you stand in front of shelves filled with gleaming jars of honey, take a moment, think of the mead you wish to craft, and let your intuition guide you.
Complementary 1-Gallon Mead Variations
Alright, so you’ve gotten the basics of the traditional honey mead down, and I’m thrilled! Now, how about we explore the exciting world of mead variations?
Remember, mead is like a canvas – it can be painted with countless flavors. As a brewer and microbiologist, experimentation is my daily bread. Here are some tried and tested 1-gallon recipes for different mead variations:
1. Cyser (Apple Mead):
Ingredients:
- 2 lbs. raw honey
- 1 gallon of apple cider (ensure it’s free from preservatives)
- 1 packet of yeast (Lalvin D-47 works well)
- 1 tsp yeast nutrient
- 1/2 tsp yeast energizer
Directions: Replace water with apple cider when making your must. The procedure remains the same as the honey mead. Over time, you’ll notice a delightful meld of honey and apple flavors.
Pro-tip: Using fresh apple cider during apple harvest season can elevate the flavors significantly.
2. Melomel (Fruit Mead):
Ingredients:
- 3 lbs. raw honey
- 3.5 quarts water
- 1-2 lbs. fresh fruit (berries, peaches, or any fruit of your choice)
- 1 packet yeast
- 1 tsp yeast nutrient
- 1/2 tsp yeast energizer
Directions: After dissolving honey in water, add crushed fruit to the must. Proceed with the rest of the steps as with traditional mead.
Remember: The fruit type will determine the flavor profile. Berries give rich colors, while tropical fruits can introduce vibrant aromatics.
3. Braggot (Honey and Malt Mead):
Ingredients:
- 1.5 lbs. raw honey
- 1.5 lbs. malt extract (light or amber)
- 3.5 quarts water
- 1 packet ale yeast (like Safale US-05)
- 1 tsp yeast nutrient
- 1/2 tsp yeast energizer
Directions: Dissolve both malt extract and honey in warm water. The combination of malt and honey brings about a beer-like taste to your mead.
A fun experiment: Try using different malt extracts for varied flavors.
4. Metheglin (Spiced Mead):
Ingredients:
- 3 lbs. raw honey
- 3.5 quarts water
- 1 packet yeast
- 1 tsp yeast nutrient
- 1/2 tsp yeast energizer
- A combination of spices: cinnamon sticks, cloves, ginger, allspice, etc. (based on personal preference)
Directions: Add spices to the must after the honey has dissolved. Let the spices steep as the must cools, then remove them before transferring to the fermentation vessel.
Tip: Be cautious with spices – they can be overpowering. Start with small amounts and adjust in subsequent batches.
5. Short Mead (Hydromel):
Ingredients:
- 1.5 lbs. raw honey
- 3.5 quarts water
- 1 packet ale yeast or champagne yeast
- 1 tsp yeast nutrient
- 1/2 tsp yeast energizer
Directions: The process is identical to the traditional honey mead. However, Hydromel is meant to be consumed earlier and is lighter in alcohol.
Quick note: Hydromel is perfect for those who want a refreshing, quick-drinking mead. It’s the “session beer” of the mead world.
Experimenting with mead flavors is where the real fun begins. Trust your taste buds, and don’t be afraid to venture outside the box. Even after all my years in brewing, there’s always a new flavor combination or technique waiting around the corner. Embrace the journey, and remember: the best mead recipe is the one that brings you joy.
Tips for Perfecting Your Homemade Honey Mead Recipe
1. Choosing the right honey: The type of honey you use will greatly impact the flavor of your mead. Different varieties of honey have distinct flavors and aromas, ranging from floral and fruity to earthy and robust. Experiment with different types of honey to find the flavor profile that you enjoy the most.
2. Controlling fermentation temperature: Temperature plays a crucial role in the fermentation process. Too high of a temperature can result in off-flavors and a stalled fermentation, while too low of a temperature can slow down or halt fermentation altogether. It is important to monitor and control the temperature throughout the fermentation process to ensure optimal results.
3. Adjusting sweetness and acidity: Mead can be made in a range of sweetness levels, from bone dry to very sweet. To adjust the sweetness, you can add more or less honey during the initial mixing stage. Additionally, you can adjust the acidity of your mead by adding acid blend or fruit juices during fermentation. Experiment with different levels of sweetness and acidity to find the balance that suits your taste preferences.
Conclusion:
Mead-making is an age-old craft, and like all crafts, it requires patience, knowledge, and a touch of intuition. Over the years, I’ve realized that the essence of a good mead isn’t just in the ingredients but in the love and care you pour into every step.
Here are 10 essential facts about mead-making to remember:
- 1. Sanitization is the backbone of successful brewing.
- 2. Always use high-quality, raw honey.
- 3. Don’t boil the water; keep it warm.
- 4. Nutrients are essential for healthy fermentation.
- 5. Maintain a consistent temperature during fermentation.
- 6. Racking is crucial to avoid a cloudy mead.
- 7. Aging can dramatically improve flavor.
- 8. Yeast selection can influence the character of your mead.
- 9. Patience is the brewer’s best friend.
- 10. Every batch tells a story; make it a good one.
My personal tasting experience? The sensation of tasting your own perfectly brewed mead is unparalleled. It’s a mix of pride, accomplishment, and sheer joy. There’s a depth, a warmth, and a complexity that’s hard to describe but impossible to forget. So here’s to your brewing journey—may it be filled with many such memorable sips! Cheers! 🍷
FAQ Section:
1. What type of honey should I use for brewing mead?
While I recommend high-quality, raw, and unfiltered honey, the specific type of honey can influence your mead’s flavor profile. Clover honey is quite neutral and a good starting point for beginners. However, experimenting with buckwheat, orange blossom, or even wildflower honey can bring unique notes and complexity to your mead.
2. How long does mead last once bottled?
If stored properly, mead can last for several years in the bottle. Like wine, some meads can even improve with age. Ensure that your bottles are sealed tightly and stored in a cool, dark place. Once opened, consume it within a week for the best taste.
3. Can I add fruits and spices to this recipe?
Absolutely! Adding fruits like berries, apples, or peaches during the secondary fermentation can impart delightful flavors to your mead. Spices like vanilla, cinnamon, and cloves can also be added for a more complex profile. Just be cautious with quantities to avoid overpowering the honey’s natural sweetness.
4. What if I notice an unpleasant smell during fermentation?
Occasionally, the fermentation process can produce some sulfur-like smells. This is typically due to yeast stress. If you notice this, it may be helpful to add a little more yeast nutrient or ensure the fermentation temperature is within the ideal range. Most minor off-smells will dissipate during aging.
5. Do I need to degas my mead during fermentation?
Degassing is the process of stirring your mead during fermentation to release CO2. While not strictly necessary, degassing can help prevent overly carbonated mead and reduce the risk of off-flavors. Just ensure you’re gentle to avoid oxidizing your mead.